In this guide, you have a step-by-step walkthrough you can take when installing an eSIM on your IOS device.
Installing an eSIM using a QR Code.
Before attempting to install the eSIM, there are three main things you will need:
- A strong internet connection - Ideally, you will need to be connected to Wi-fi or have a good 4G signal.
- An eSIM compatible device - If you are unsure, here's a list of compatible devices: List of compatible devices
- The device isn't locked to one Mobile Network - If you are unsure whether or not your device is locked to a certain network, have a look at our article on how to check if your device is "locked/unlocked" Locked/unlocked devices
Do not forget to turn on "Data Roaming" once the installation is complete.
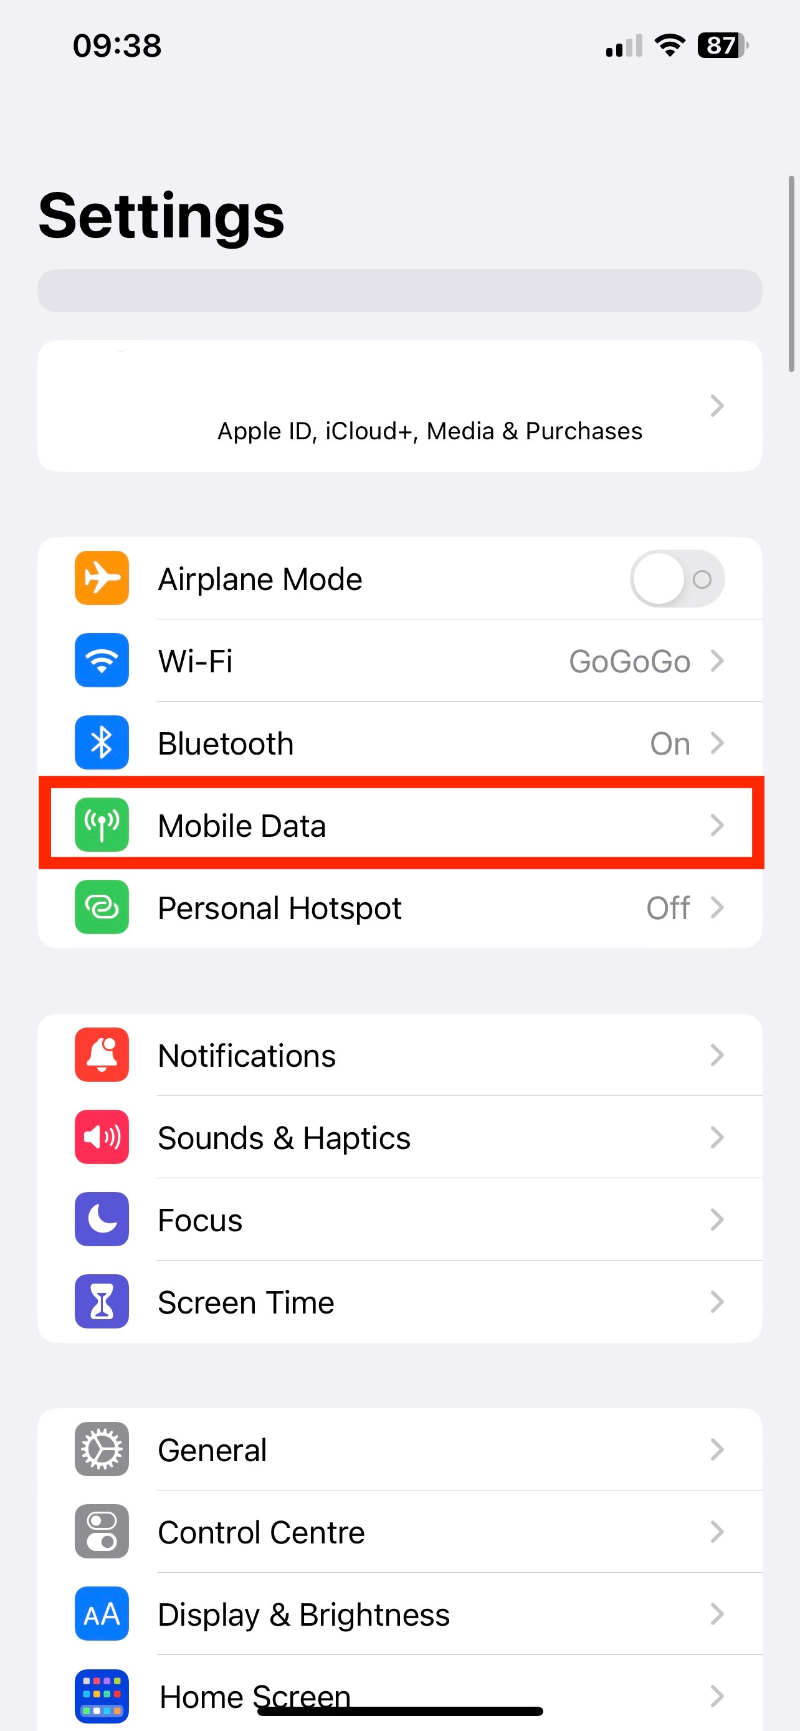
1. Go into your "Settings" and click on "Mobile Data / Cellular".
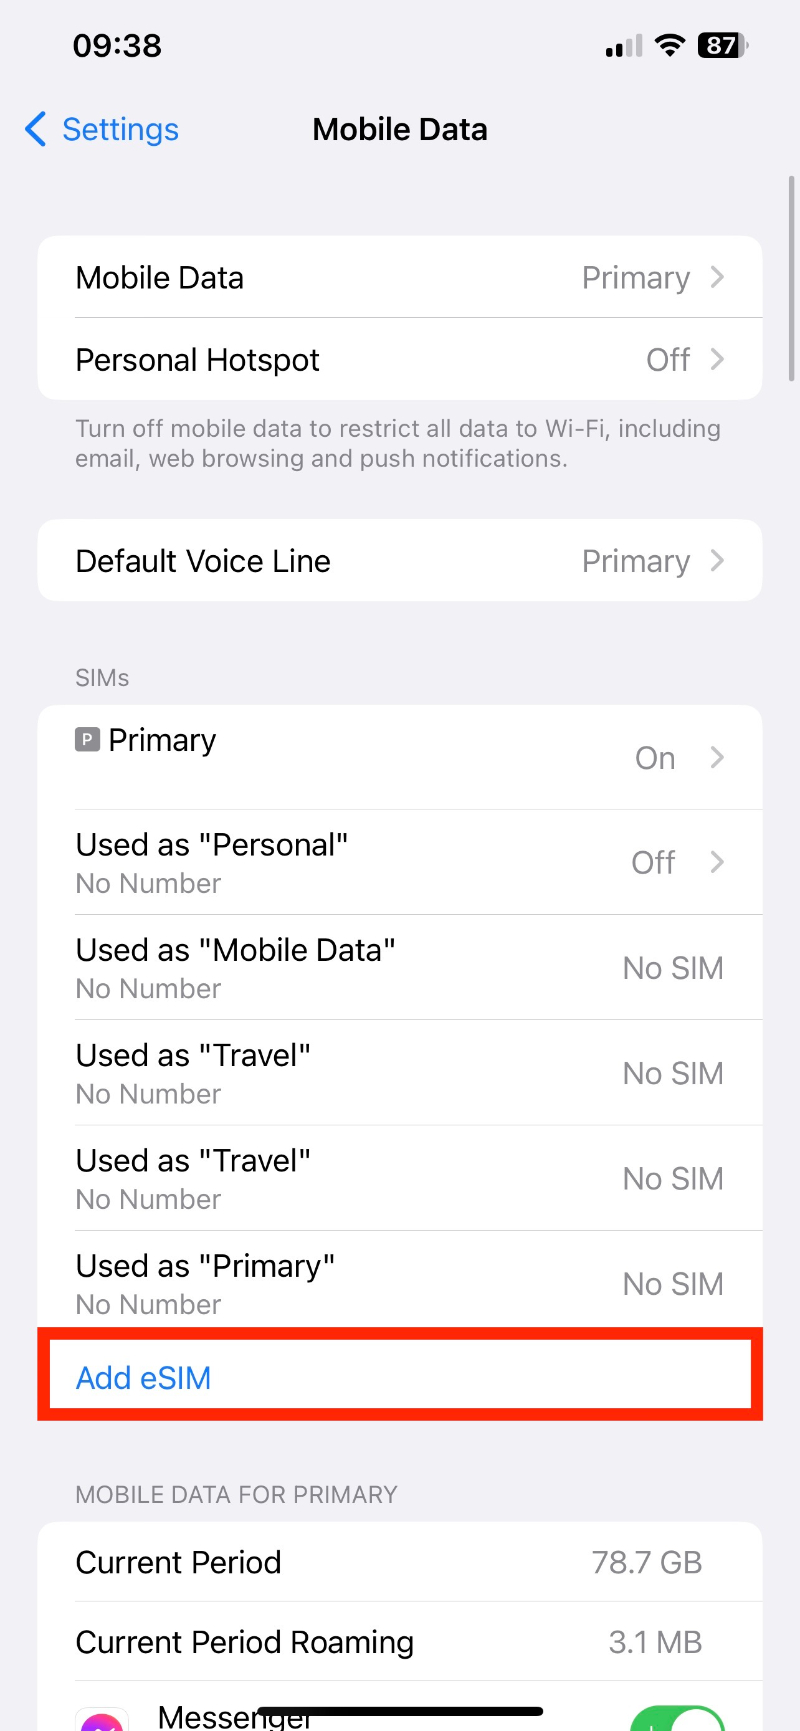
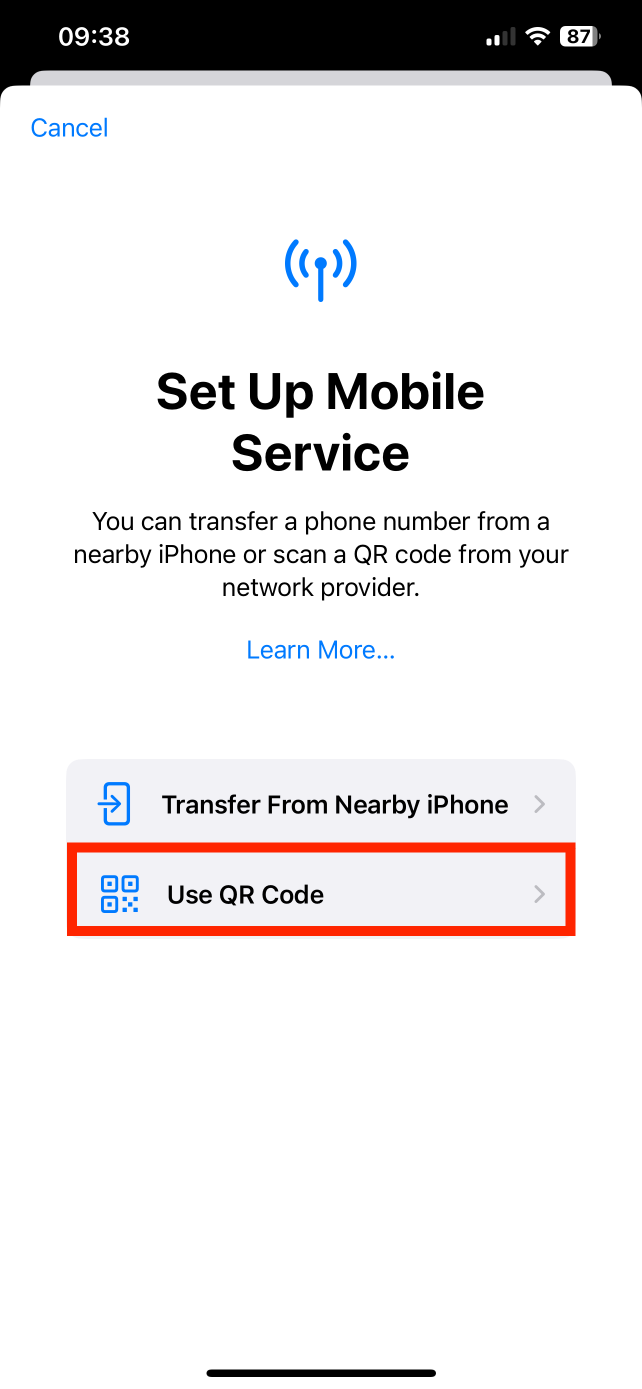
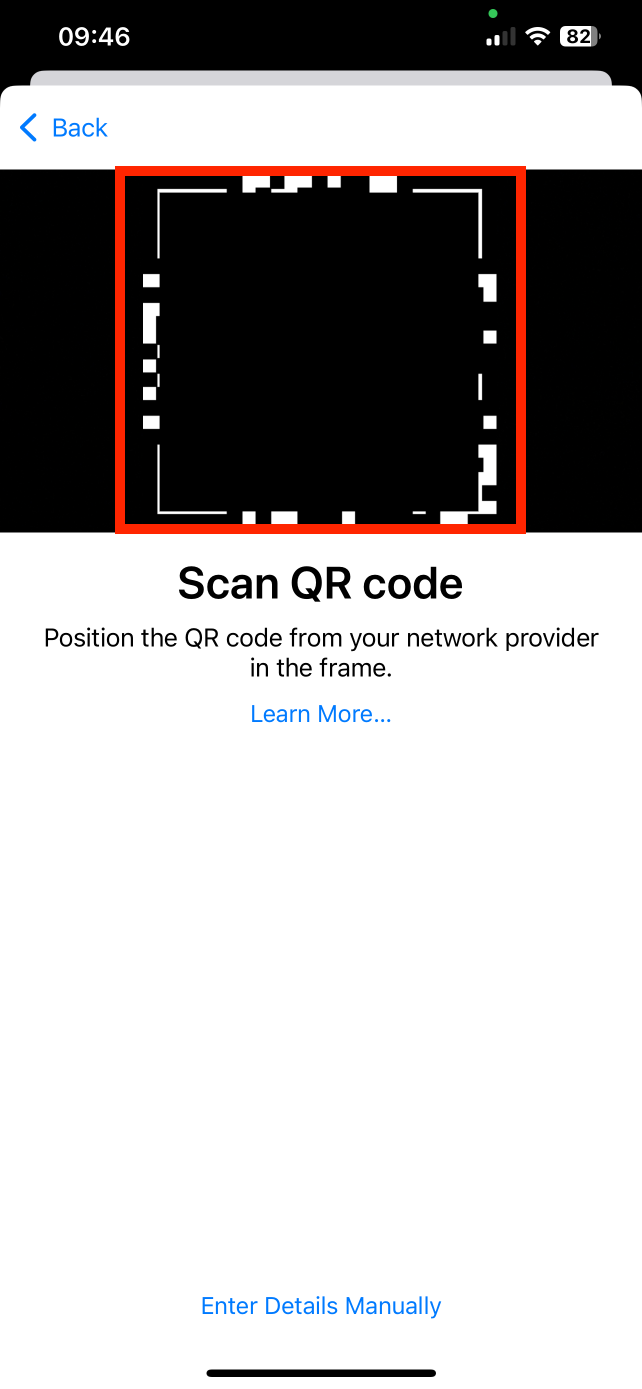
2. Tap "Add eSIM" > "Use QR Code" > Scan QR code provided.
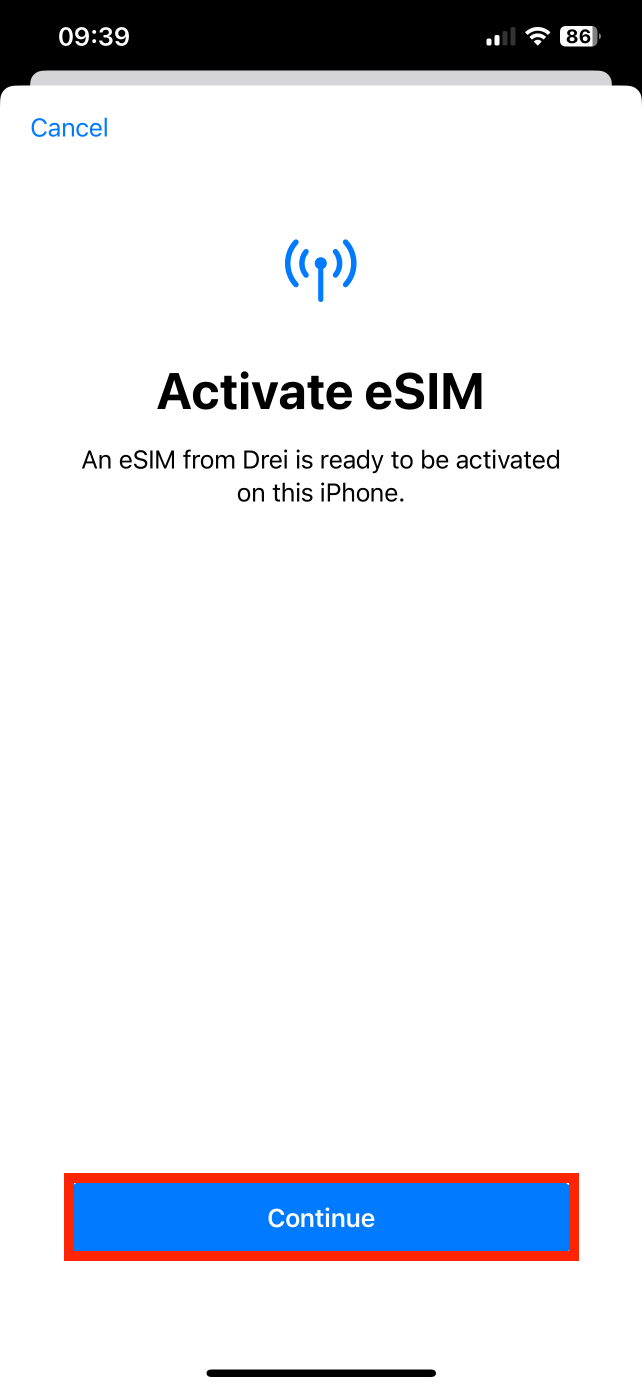
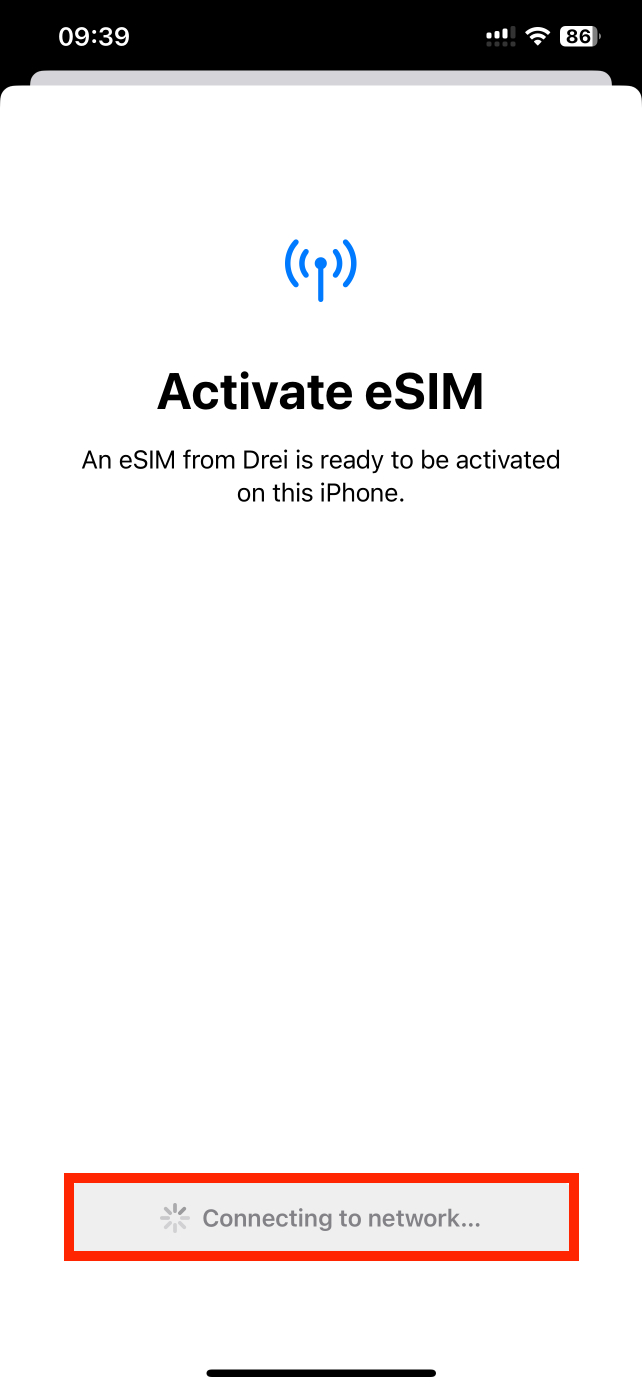
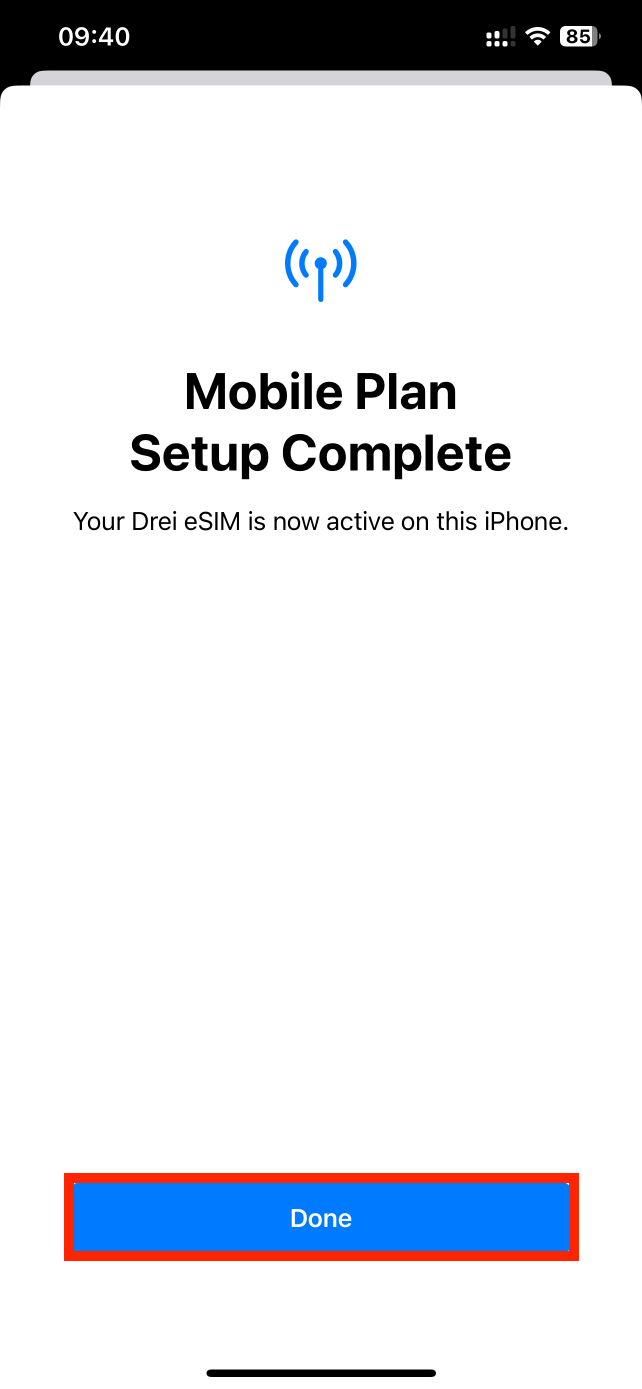
3. Click "Continue" > Allow up to 10 minutes for the eSIM to activate > Tap "Done".
Note: please do NOT close this, or the installation will stop.
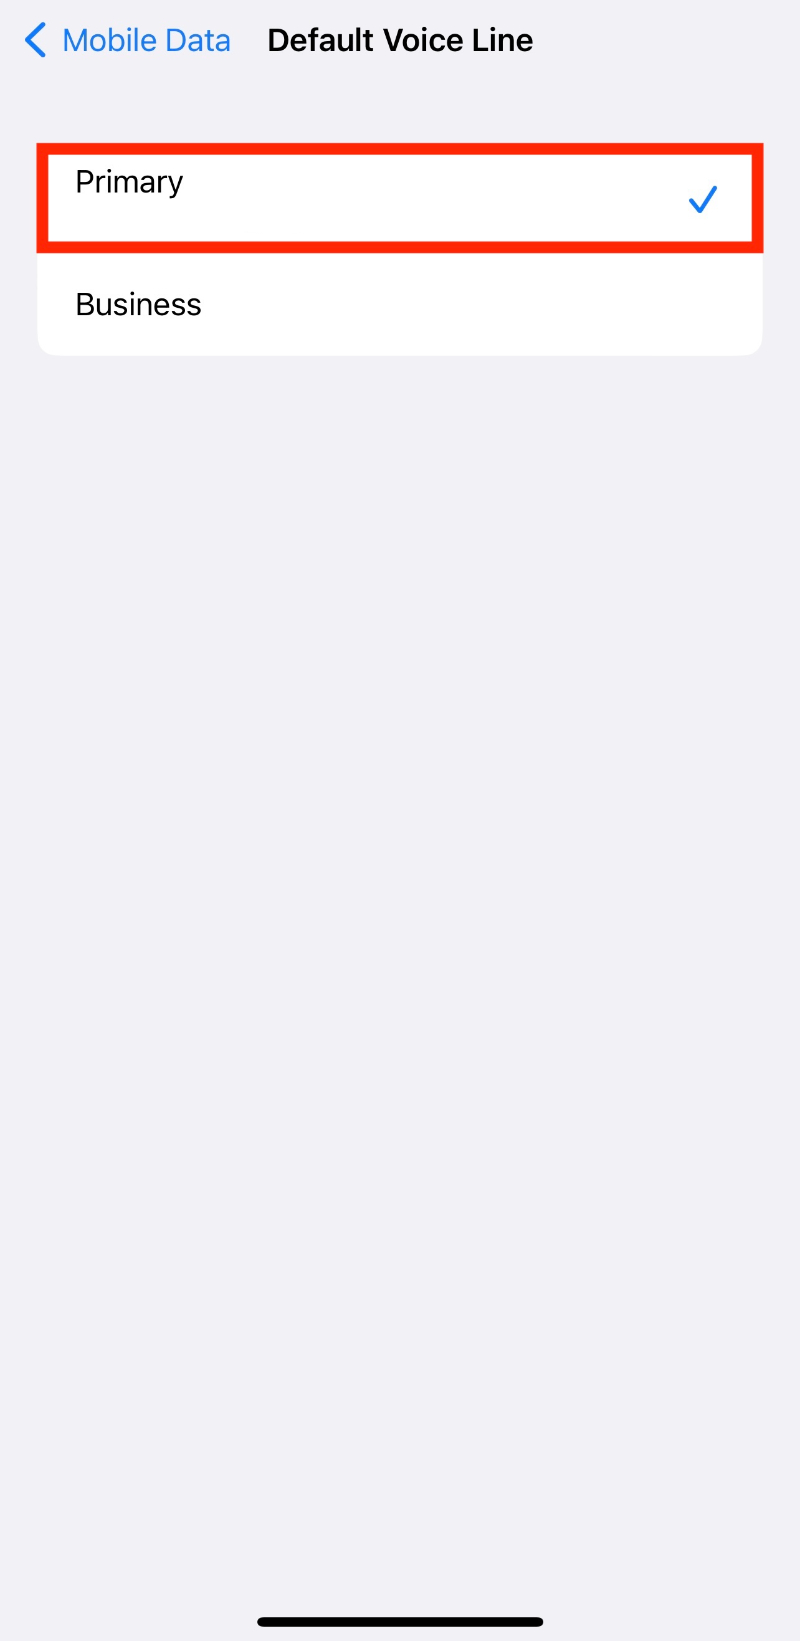
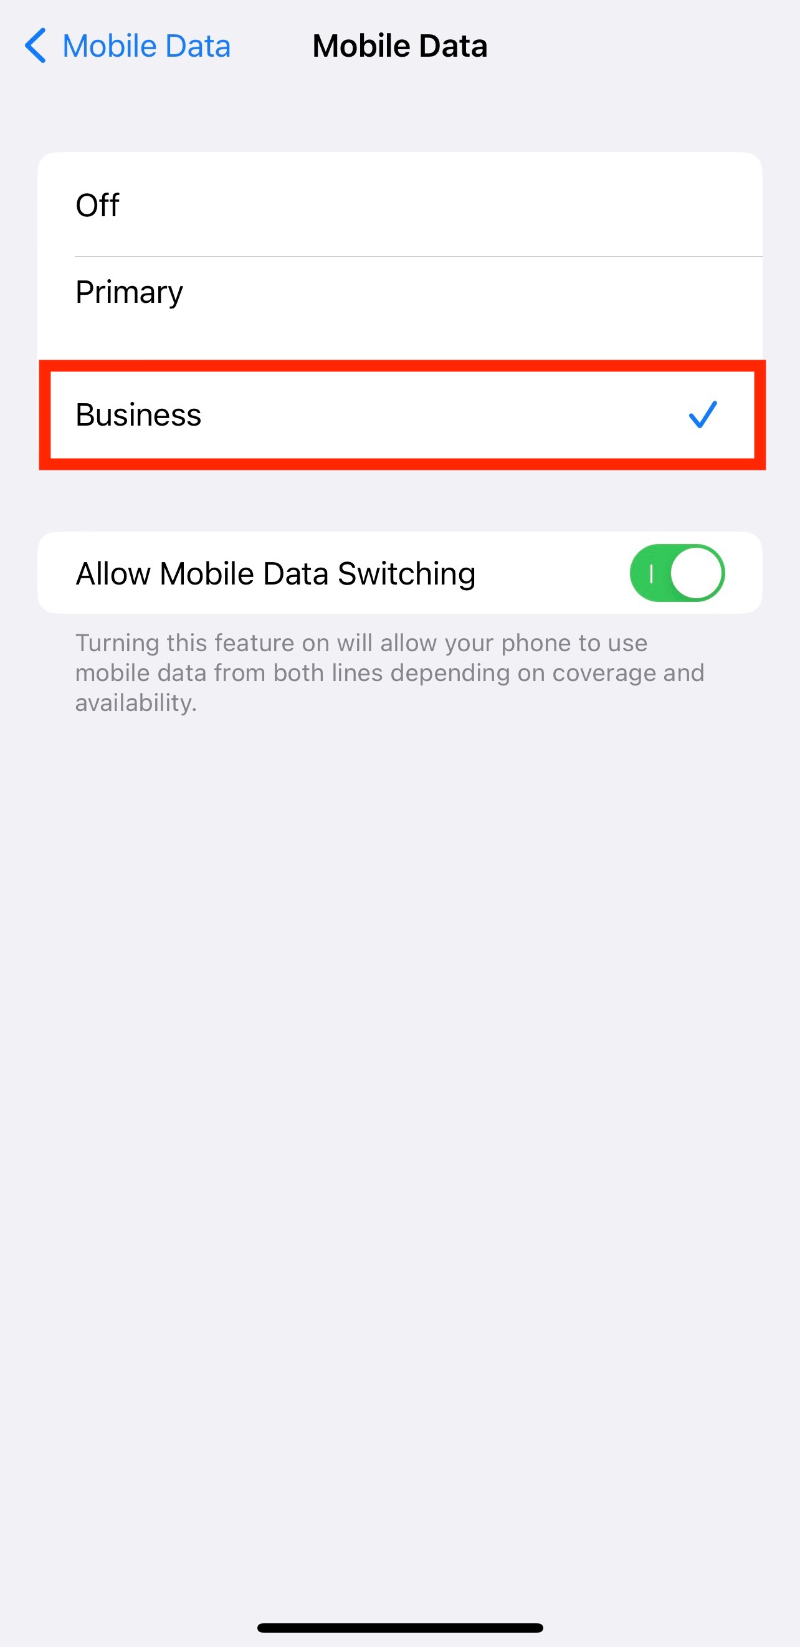
4. Configure the following settings as suggested below:
- Set Default Line to "Primary" > Tap Continue
- Set Mobile Data to your previously chosen eSIM, in this example "Business"
5. The eSIM is now installed and set up.
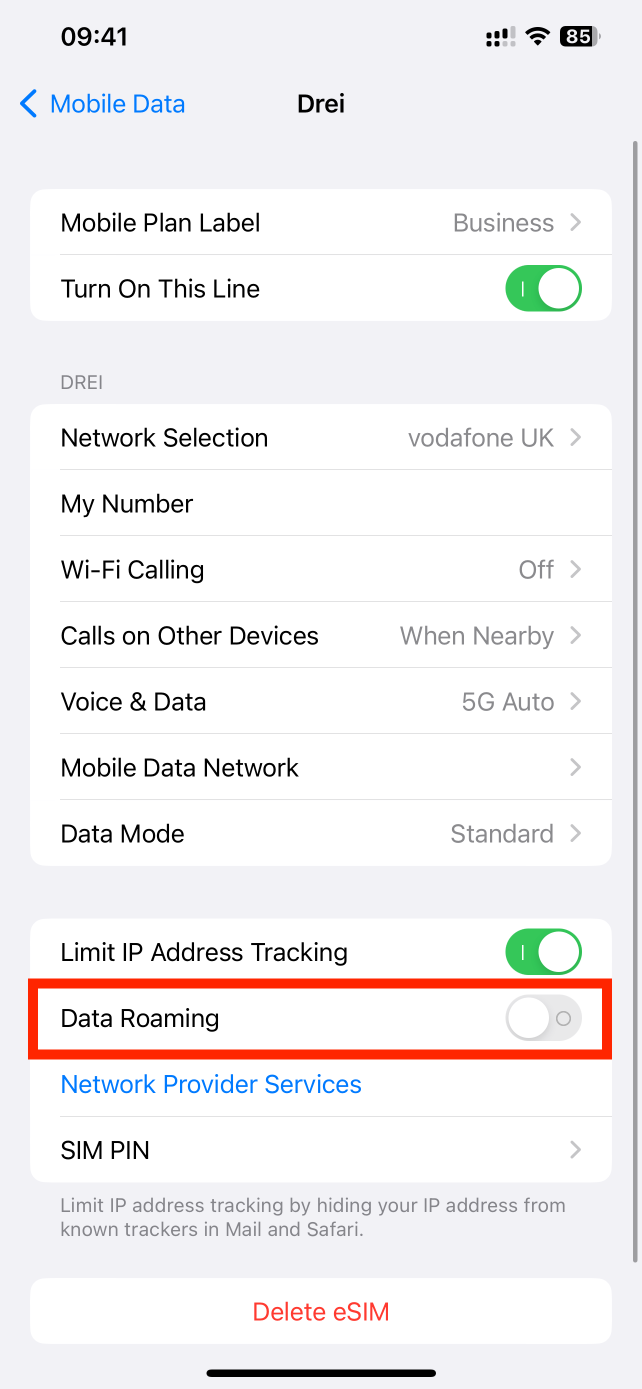
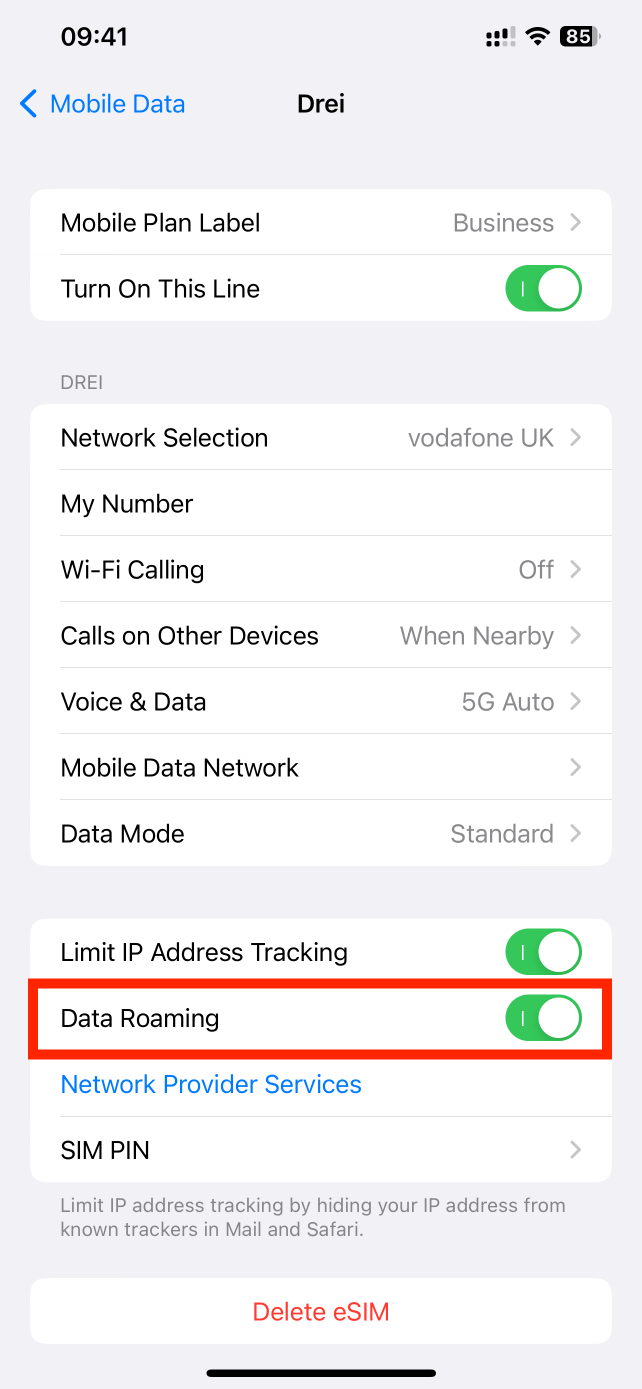
Reminder: Data Roaming MUST be "ON" in order for the eSIM to work.
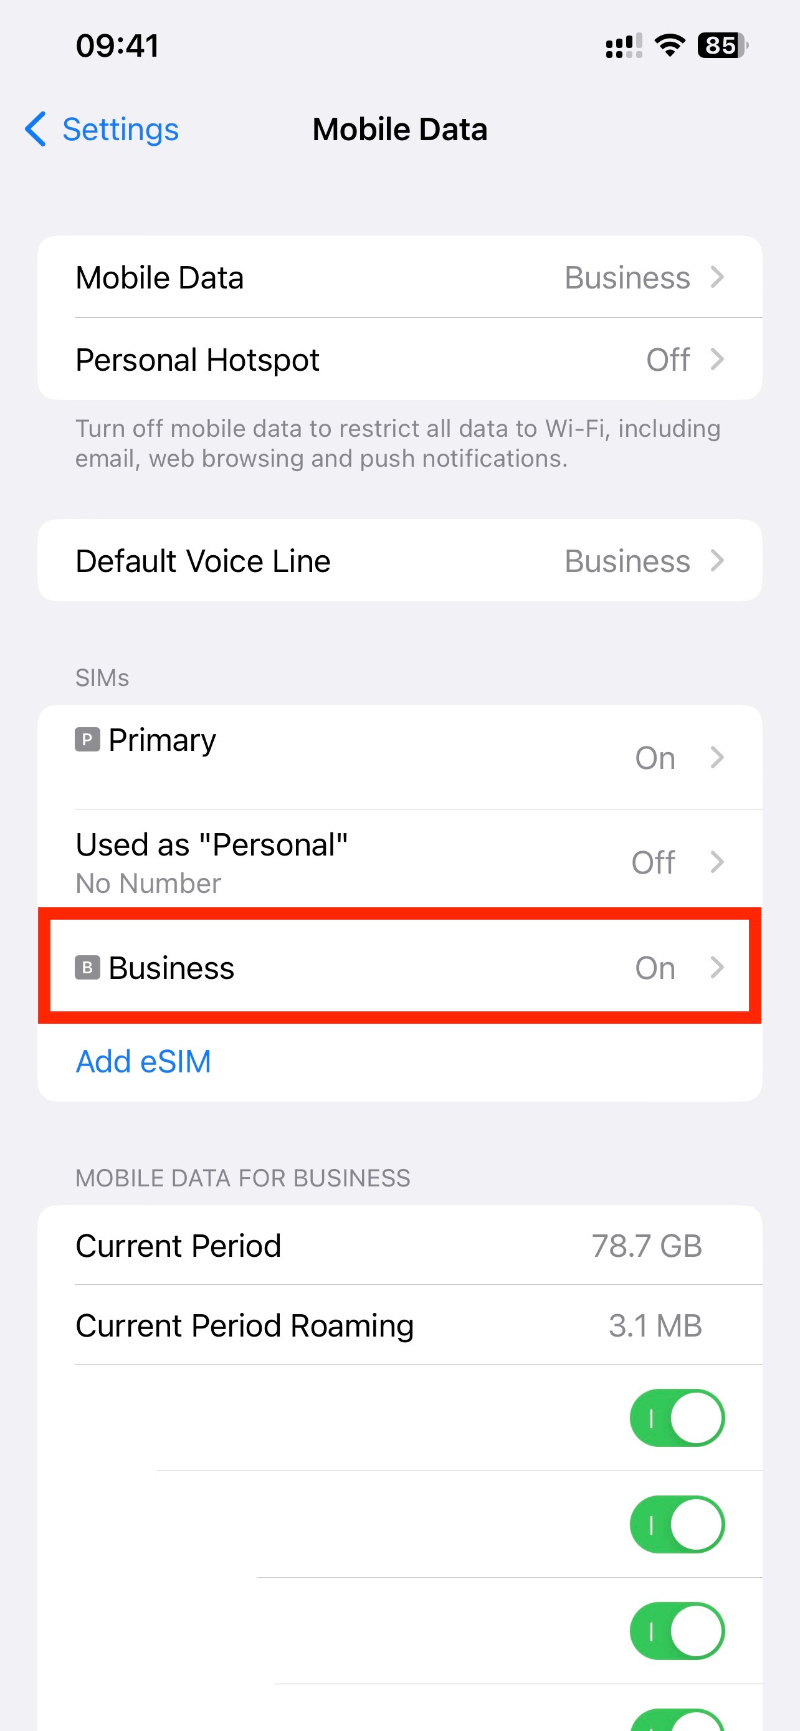
6. Go back into "Settings" > Tap "Mobile Data / Cellular" > Click on the eSIM you want to check Data Roaming for > toggle the switch to "ON".
If you experience any issues when trying to install your eSIM, have a look at our article here:
Freedom Roaming support.
Freedom Roaming support
In this guide, you have a step-by-step walkthrough you can take when installing an eSIM on your Samsung Device.
Installing an eSIM using a QR Code.
Before attempting to install the eSIM, there are three main things you will need:
- A strong internet connection - Ideally, you will need to be connected to Wi-fi or have a good 4G signal.
- An eSIM compatible device - If you are unsure, here's a list of compatible devices: List of compatible devices
- The device isn't locked to one Mobile Network - If you are unsure whether or not your device is locked to a certain network, have a look at our article on how to check if your device is "locked/unlocked" Locked/unlocked devices
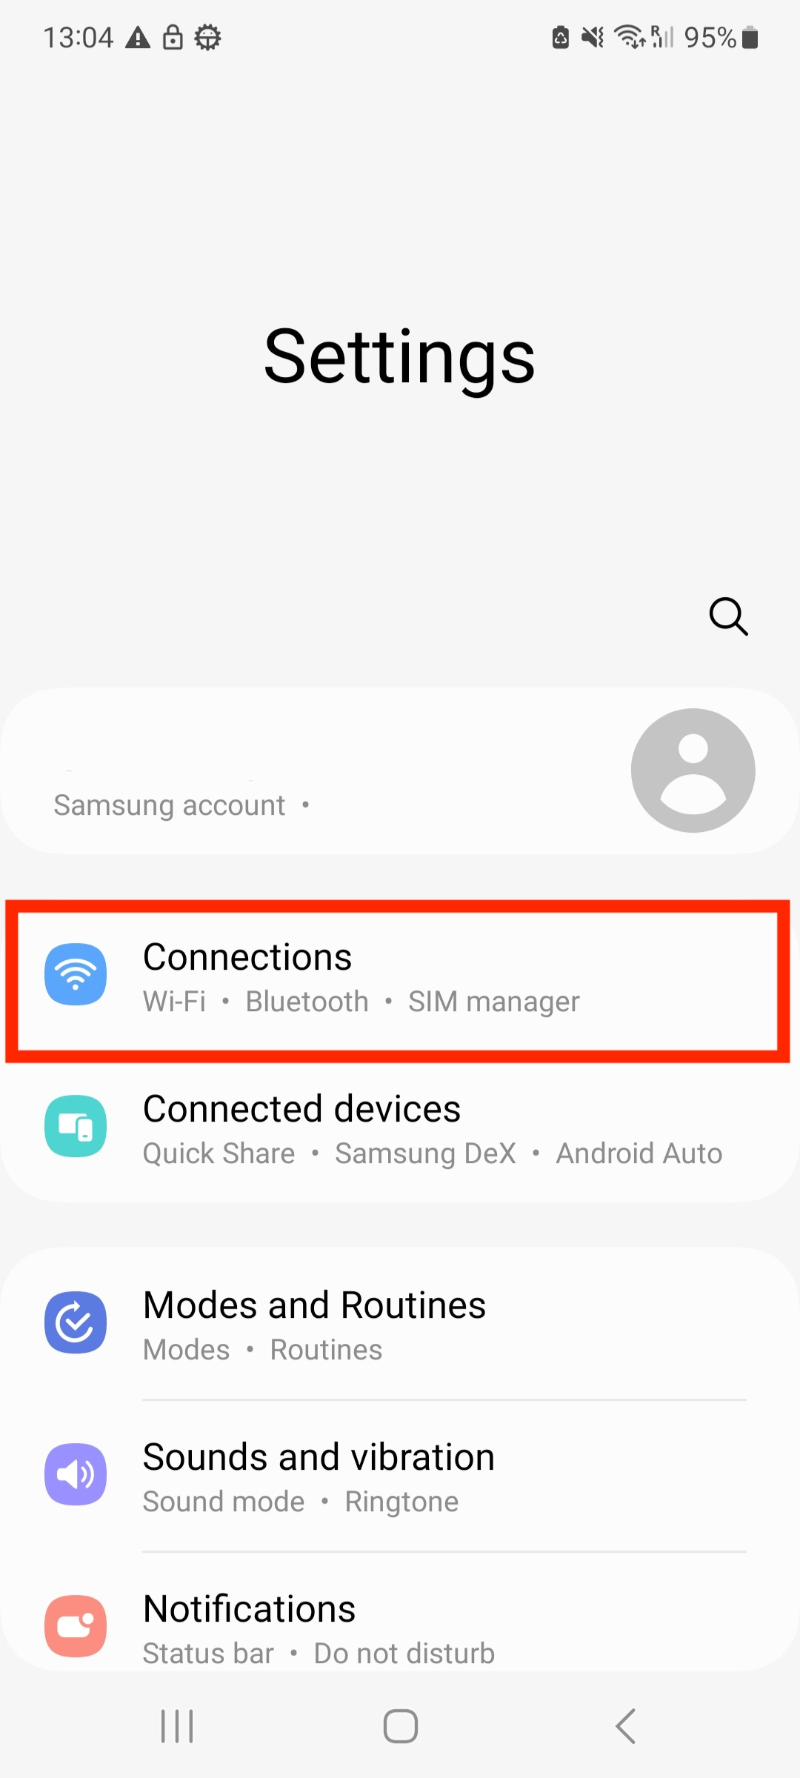
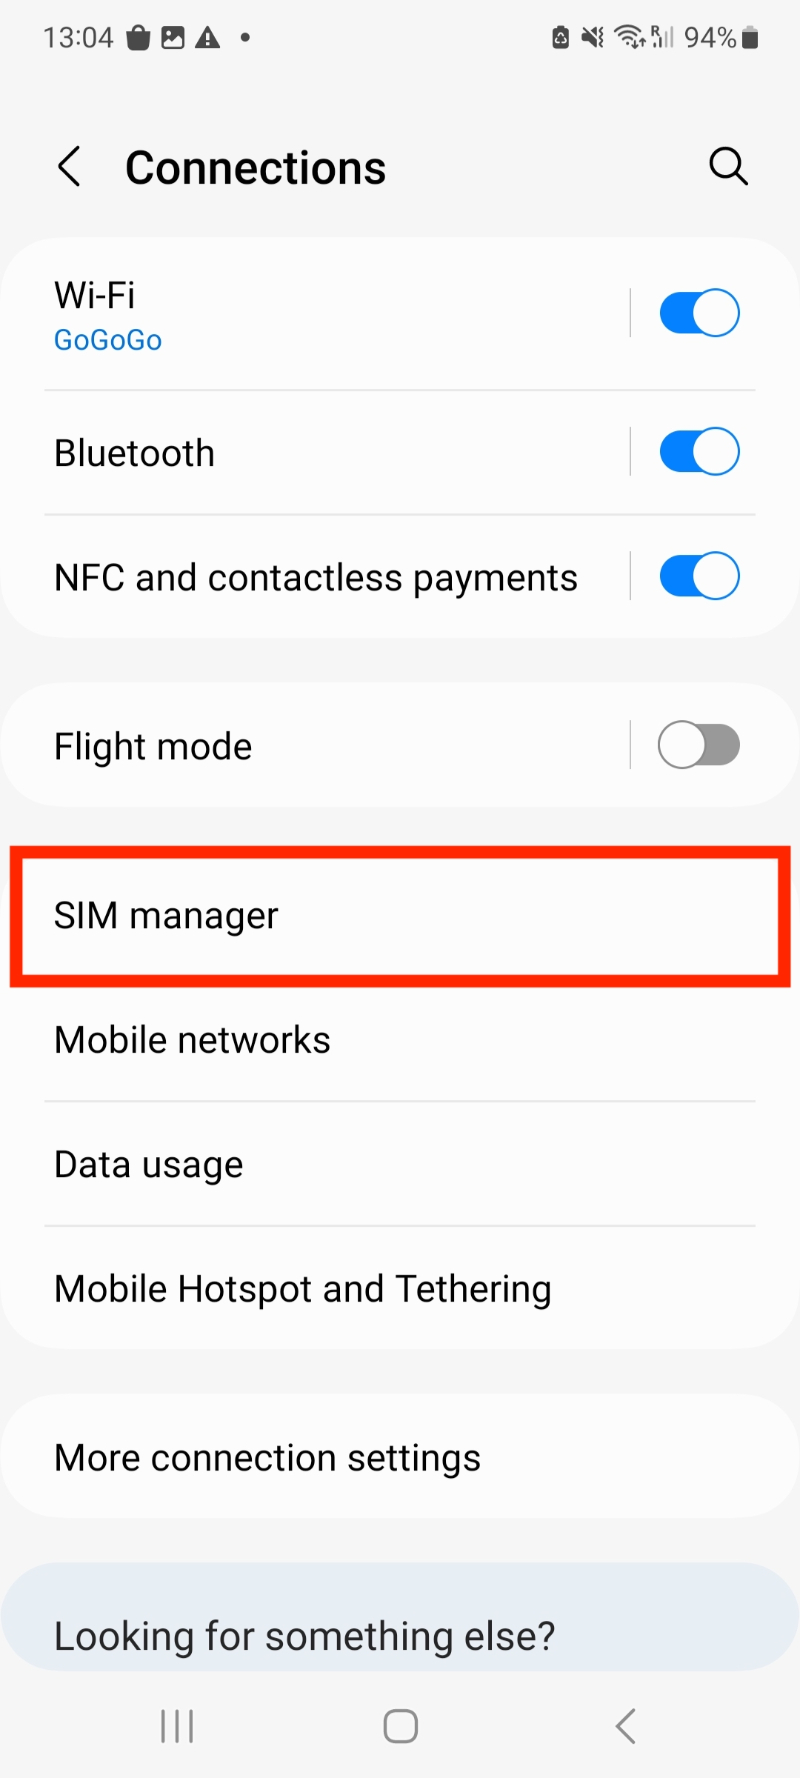
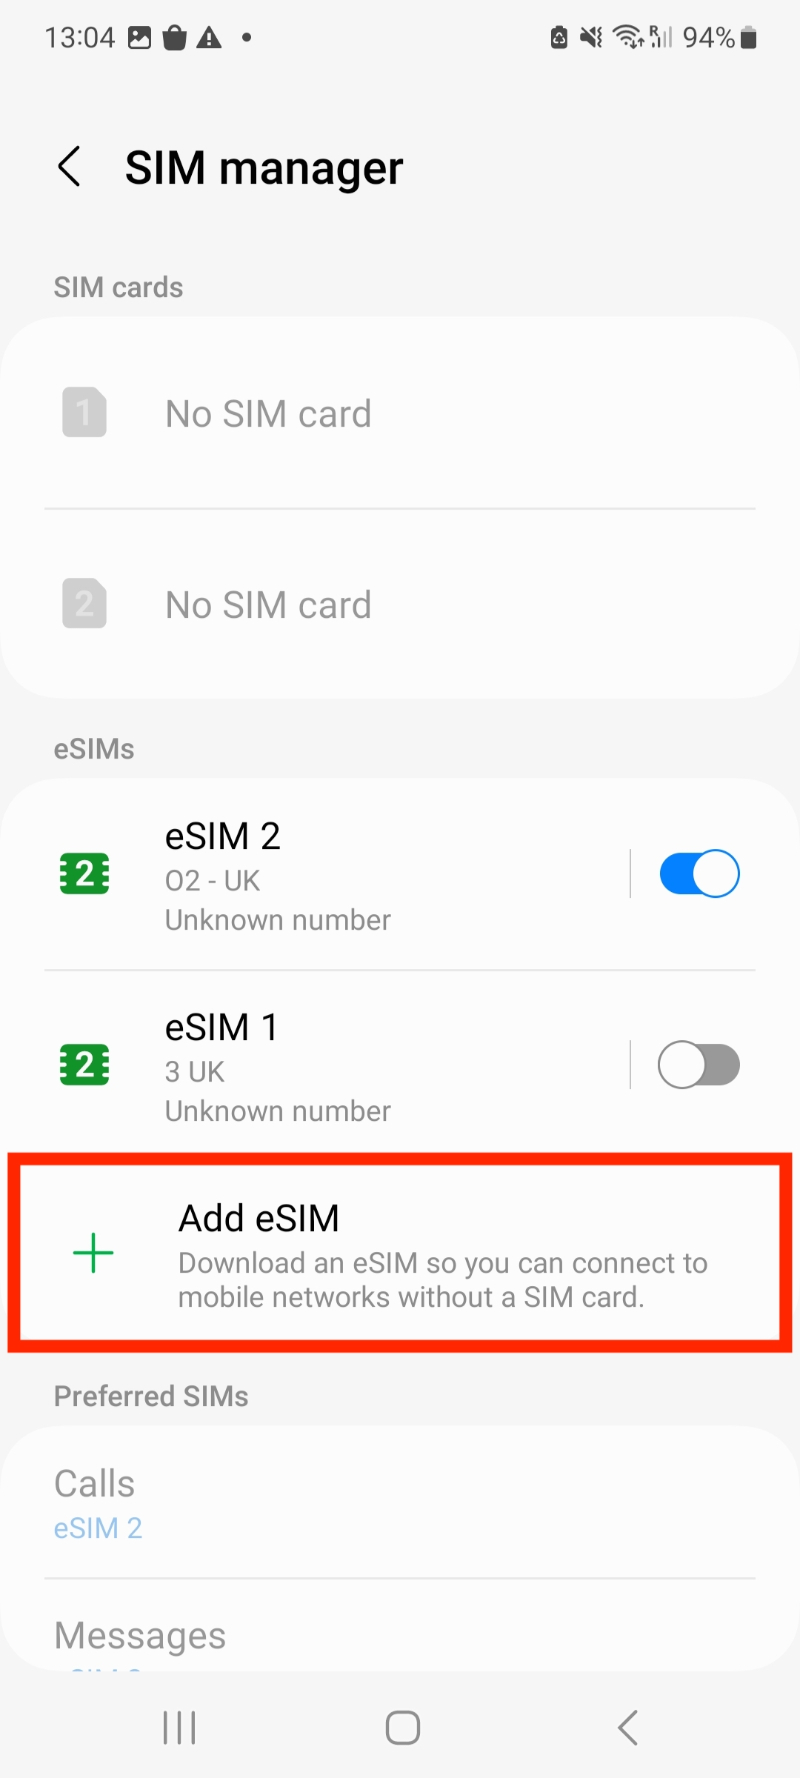
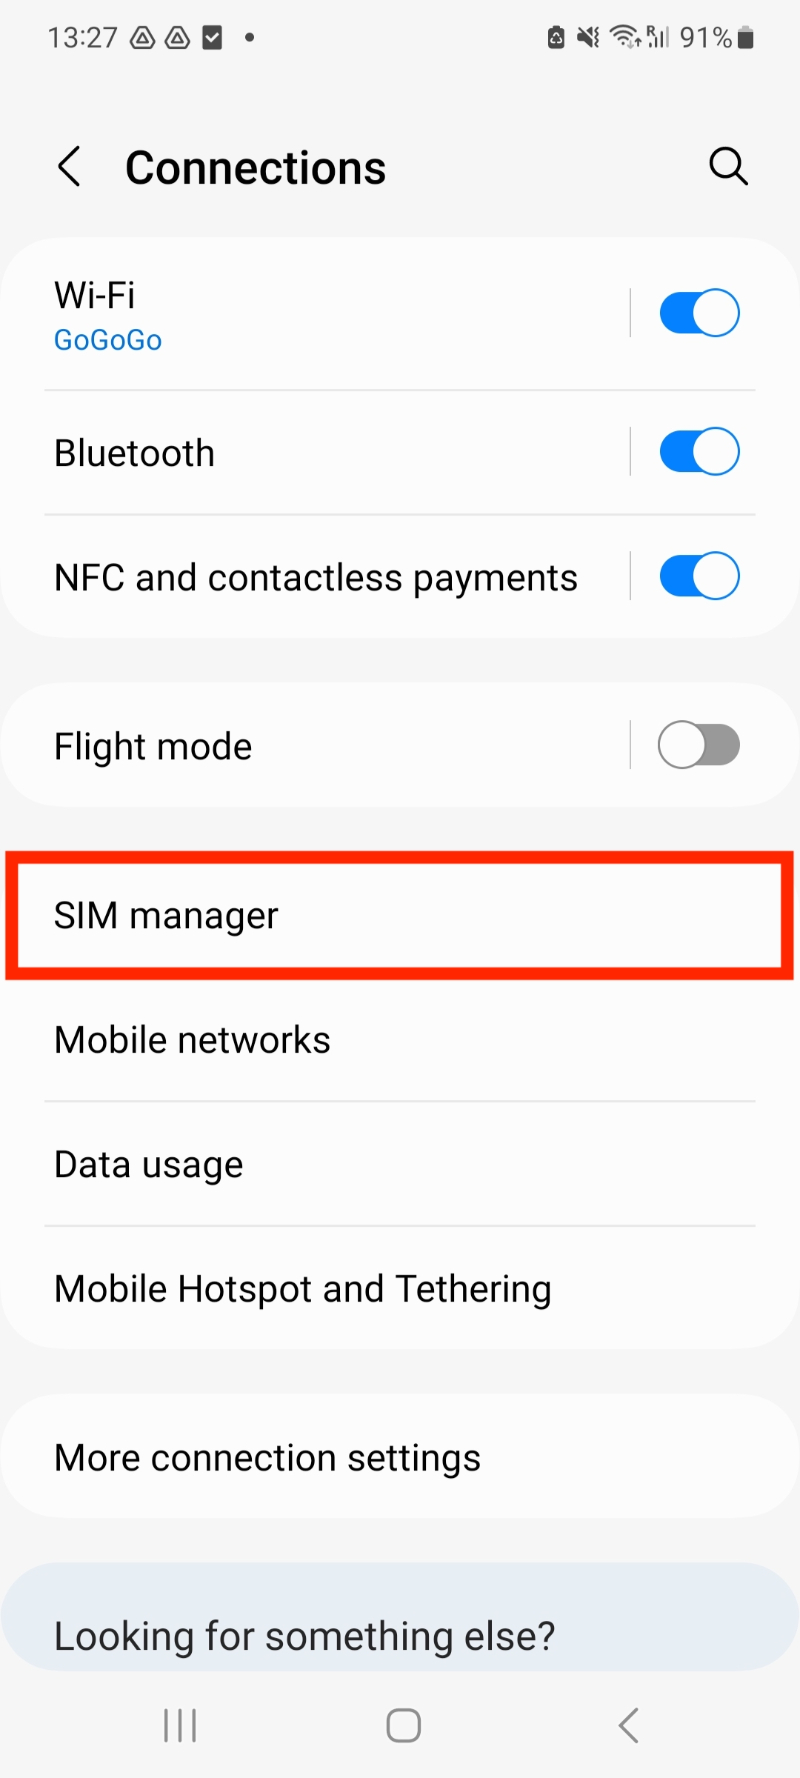
1. Go to Settings > Connections > SIM manager > Add eSIM
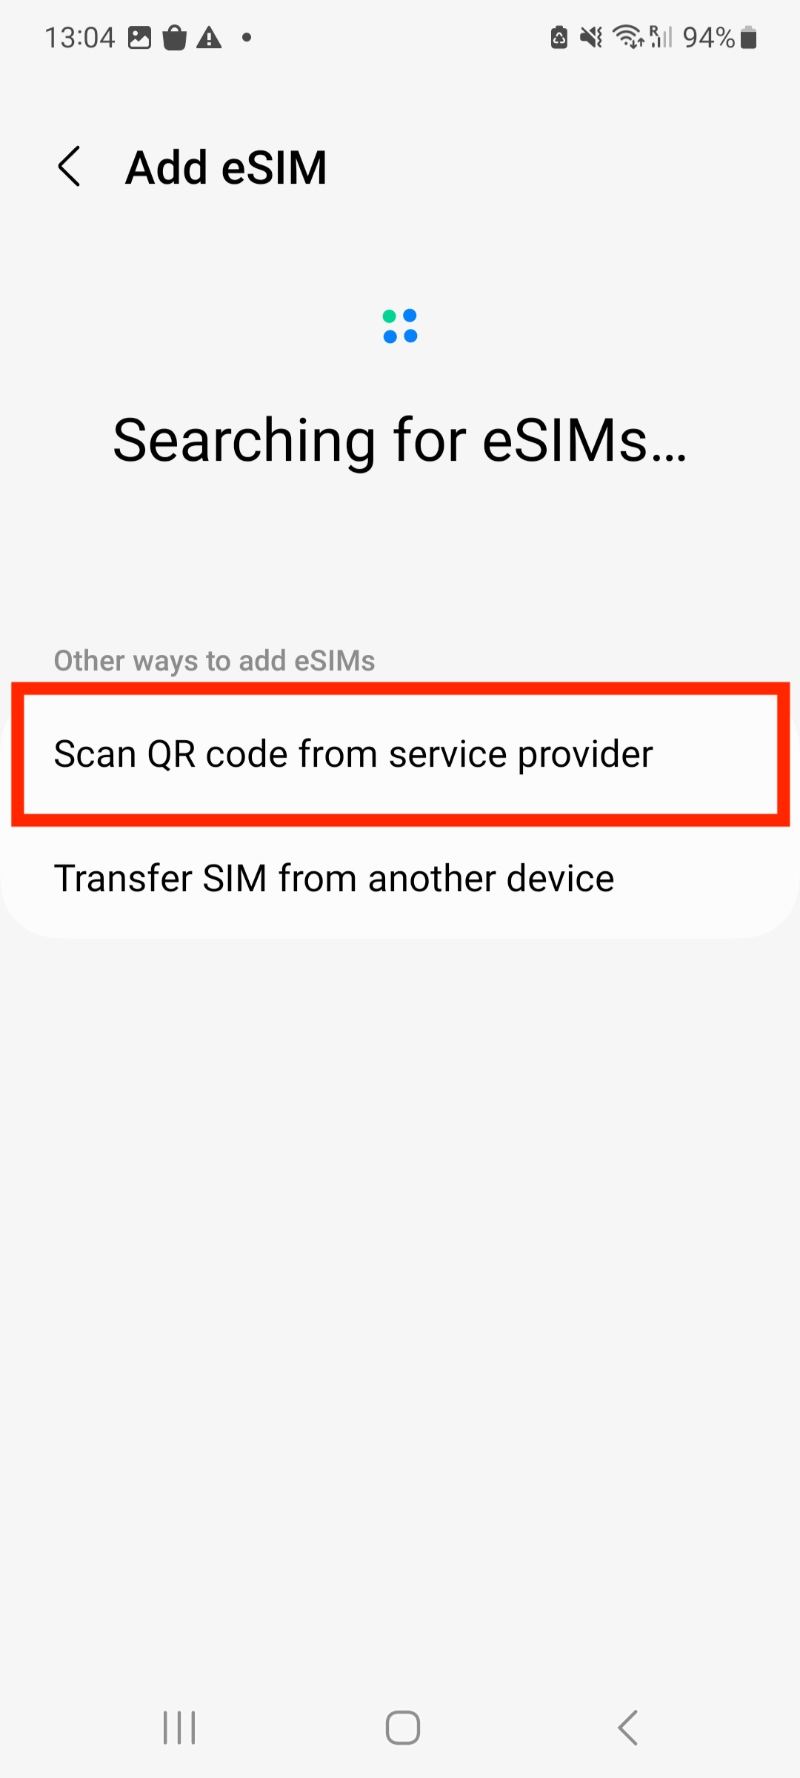
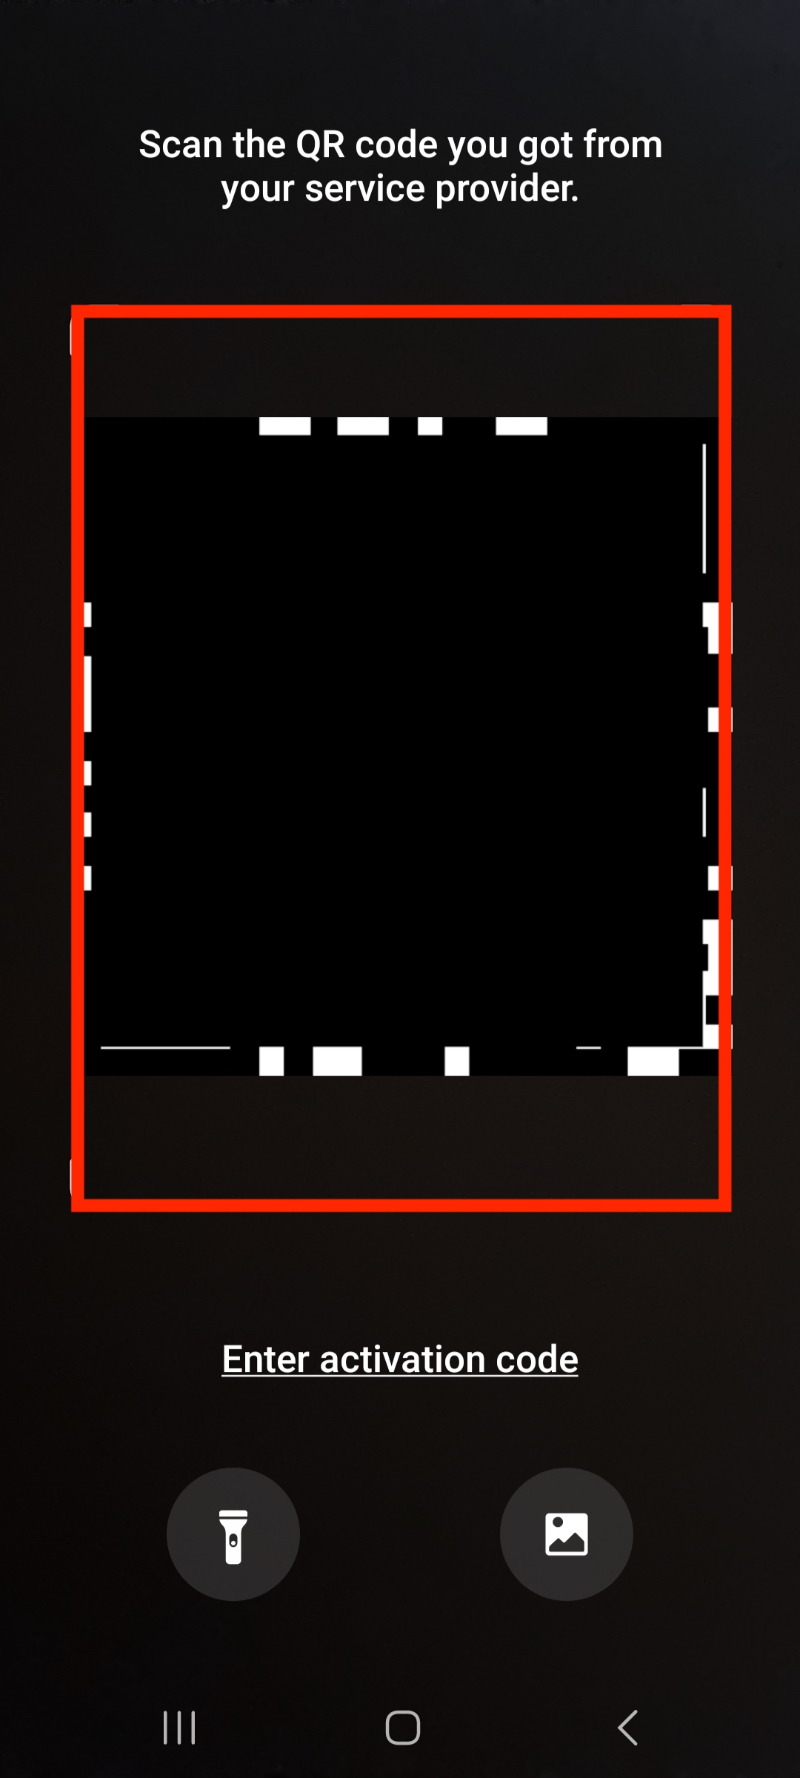
2. Scan the "QR Code" given through your eSIMs bundles account.
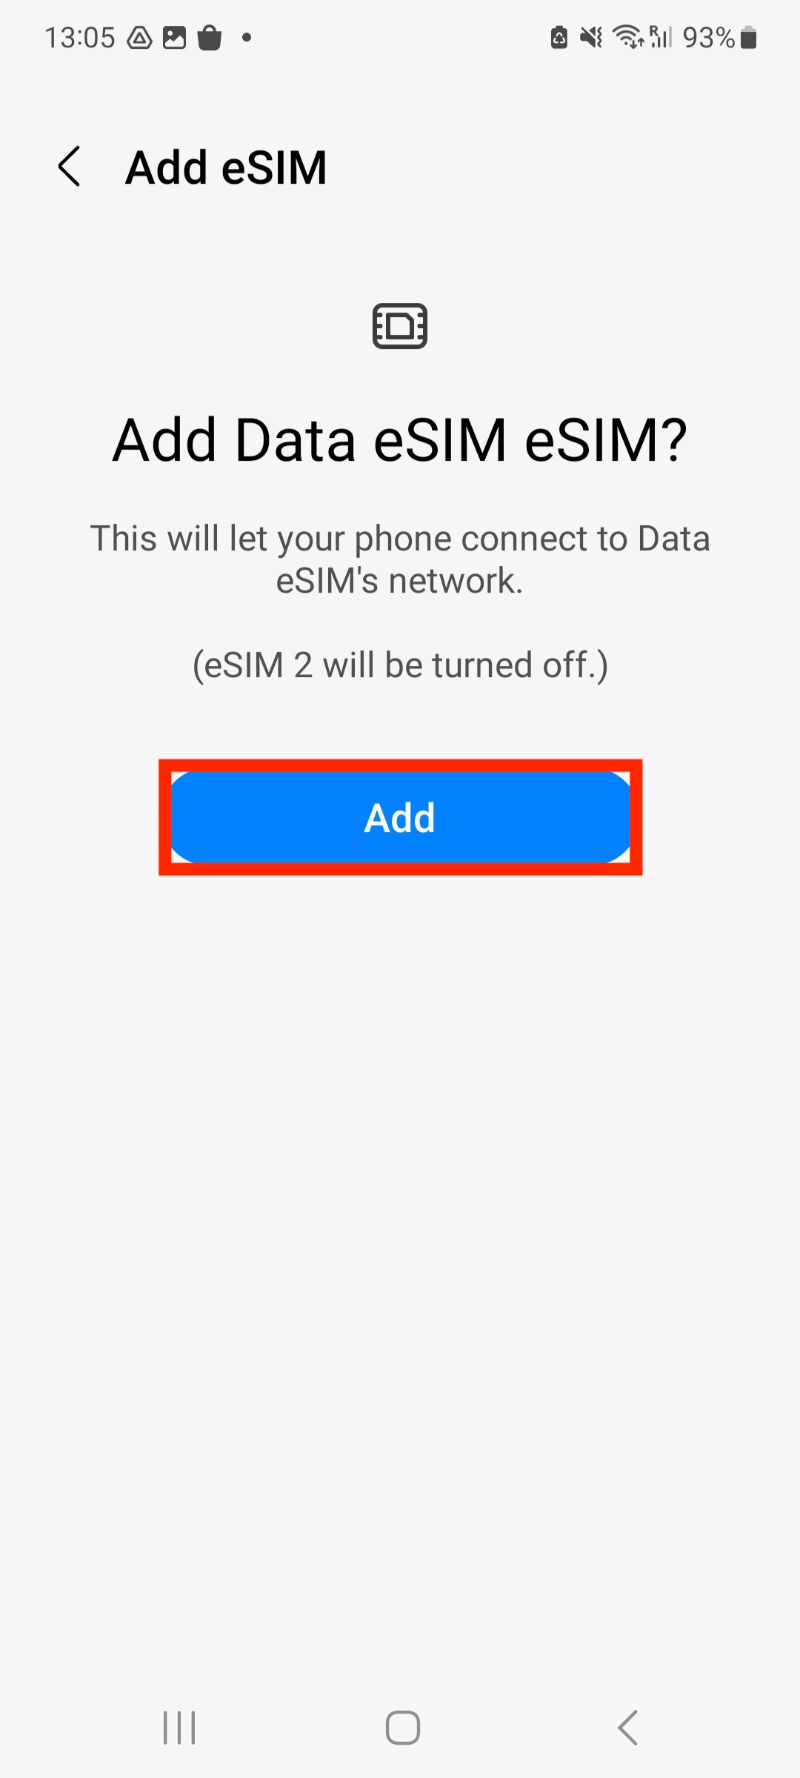
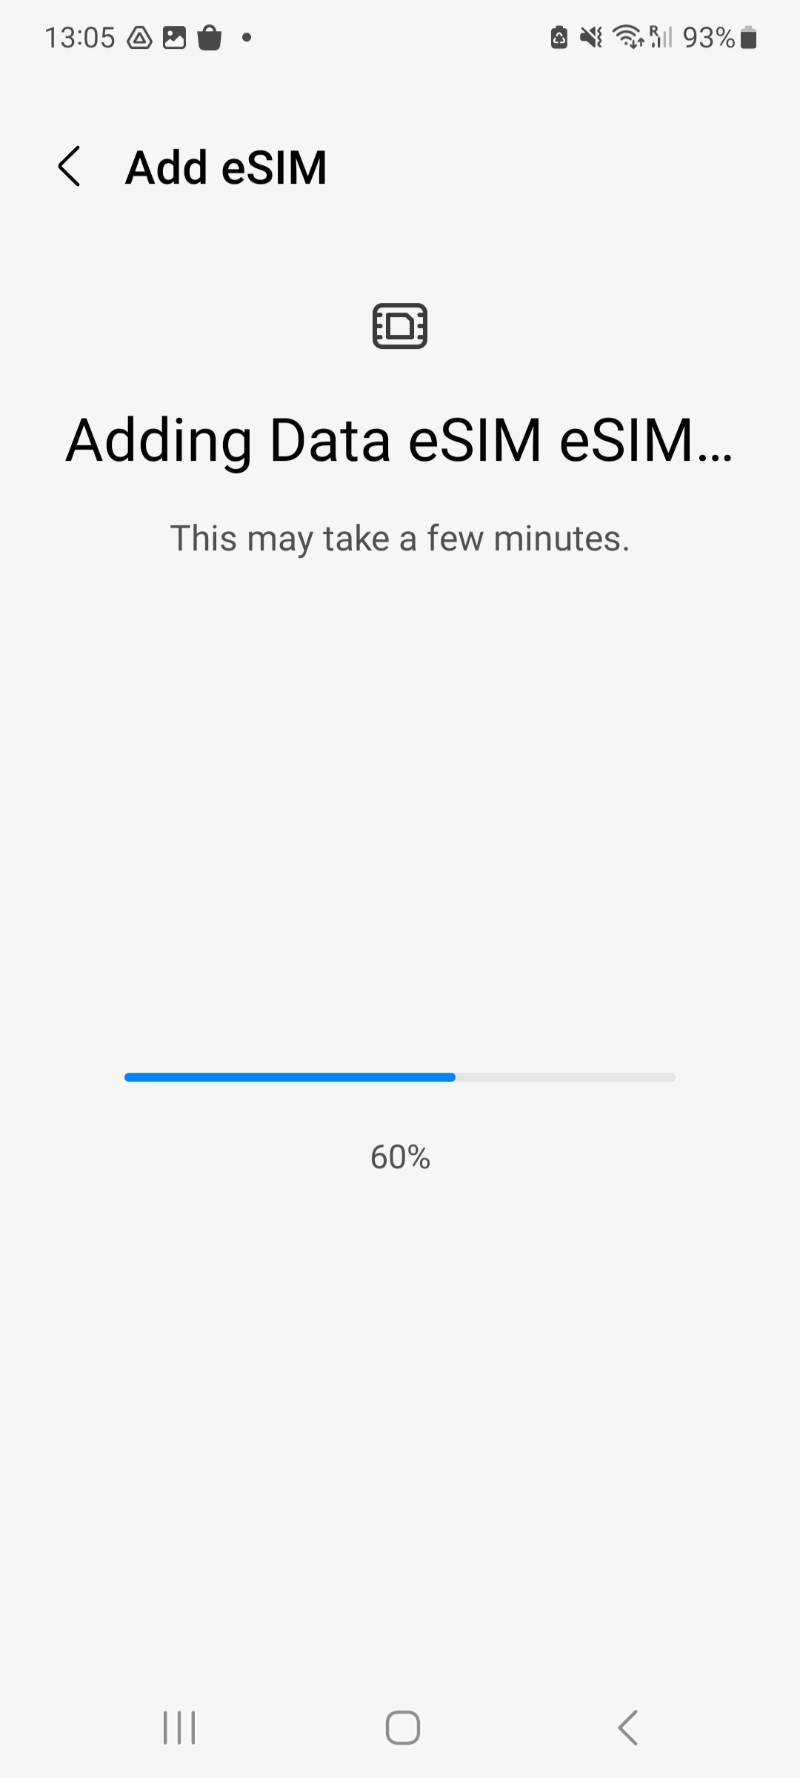
3. When prompted, tap "Add" > Allow up to 10 minutes for the eSIM to activate.
Note: This may take up to 10 minutes, please do NOT close this, or the installation will stop.
3. Leave "Calls" and "Messages" set to your original primary SIM
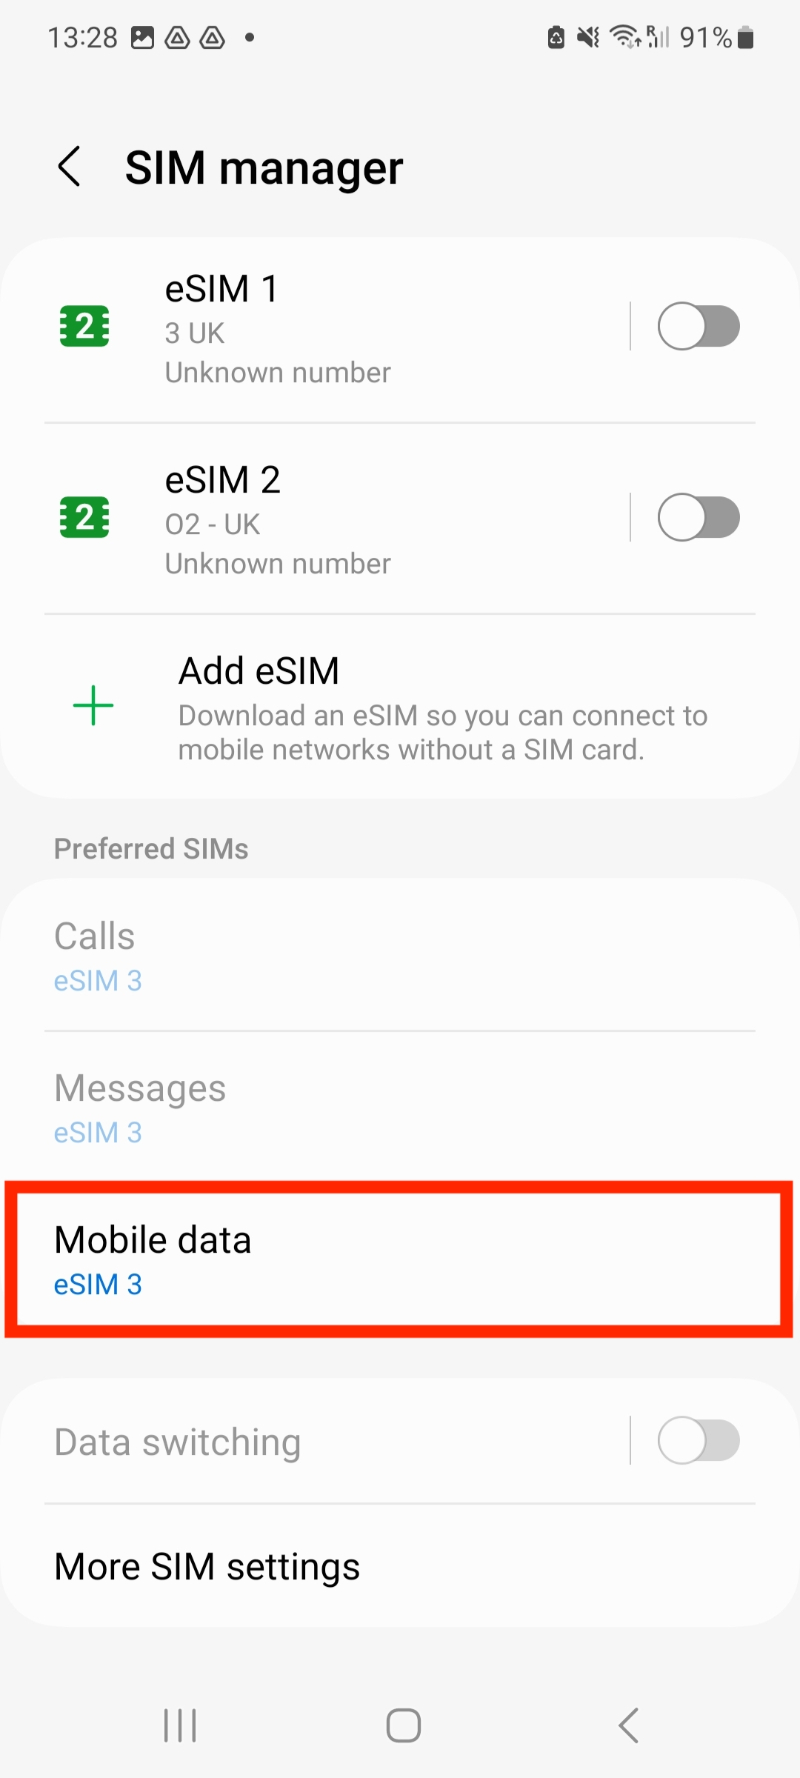
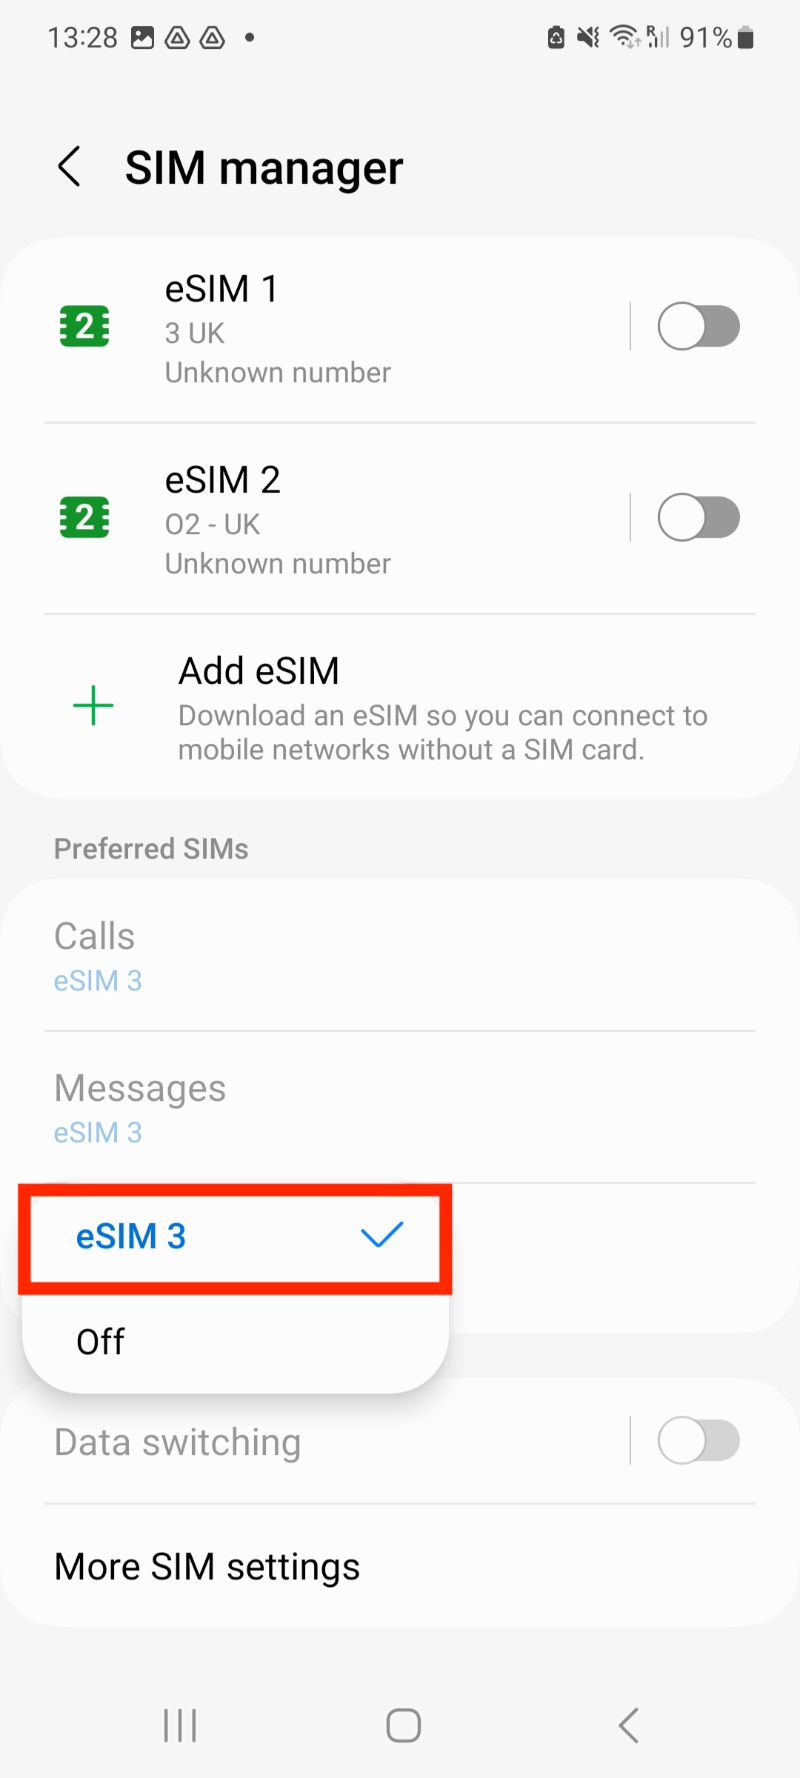
4. Go back into Settings > "Connections" > Select "SIM manager" > Tap which SIM you want to use for Data.
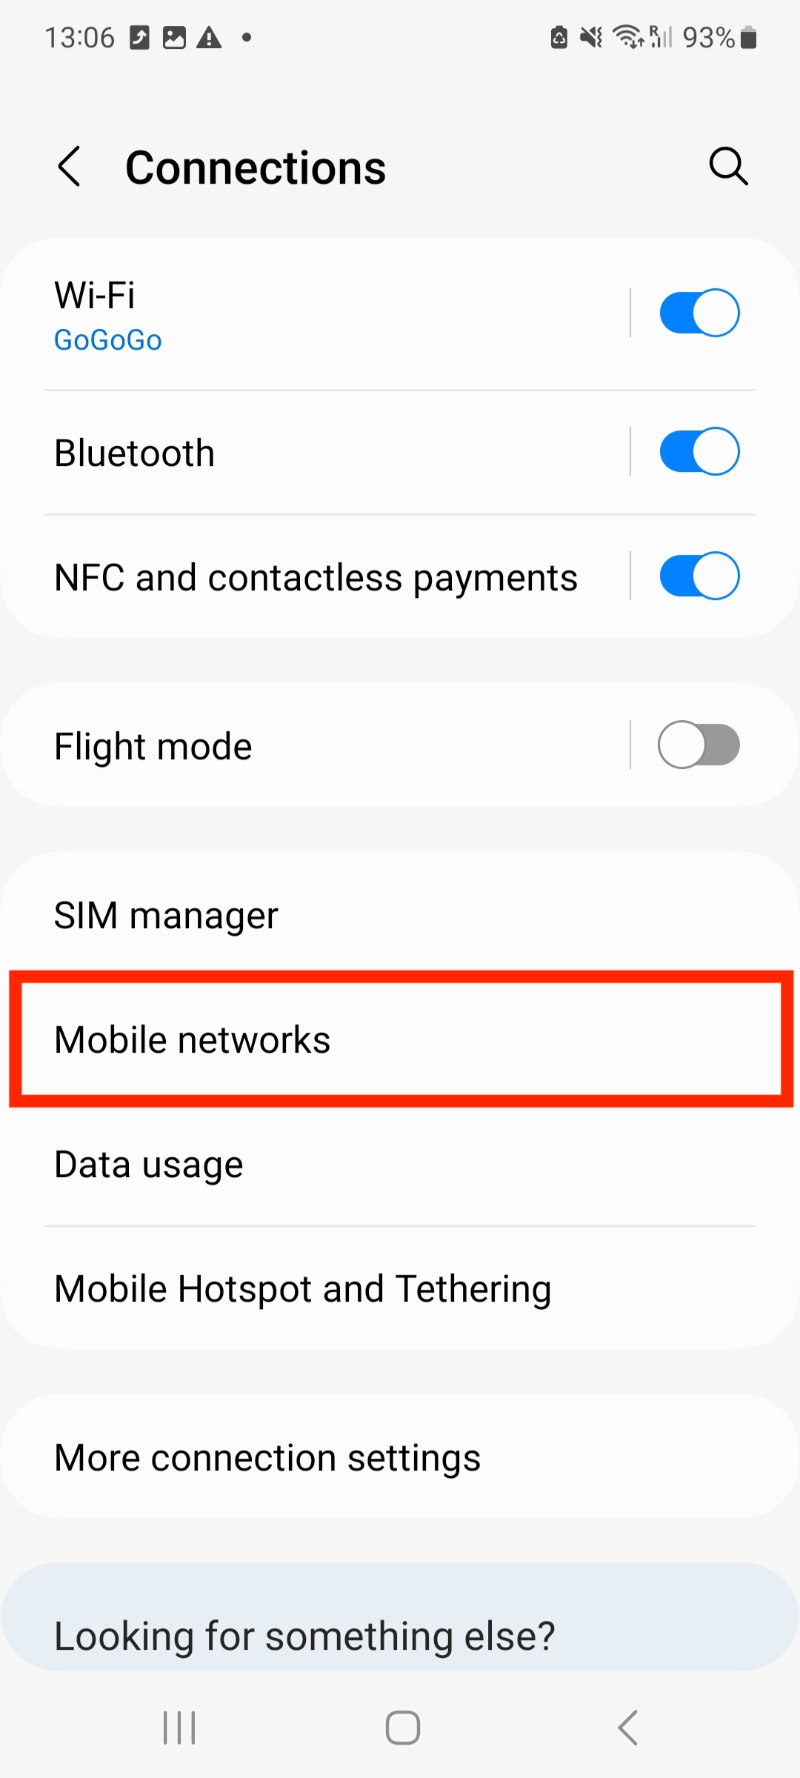
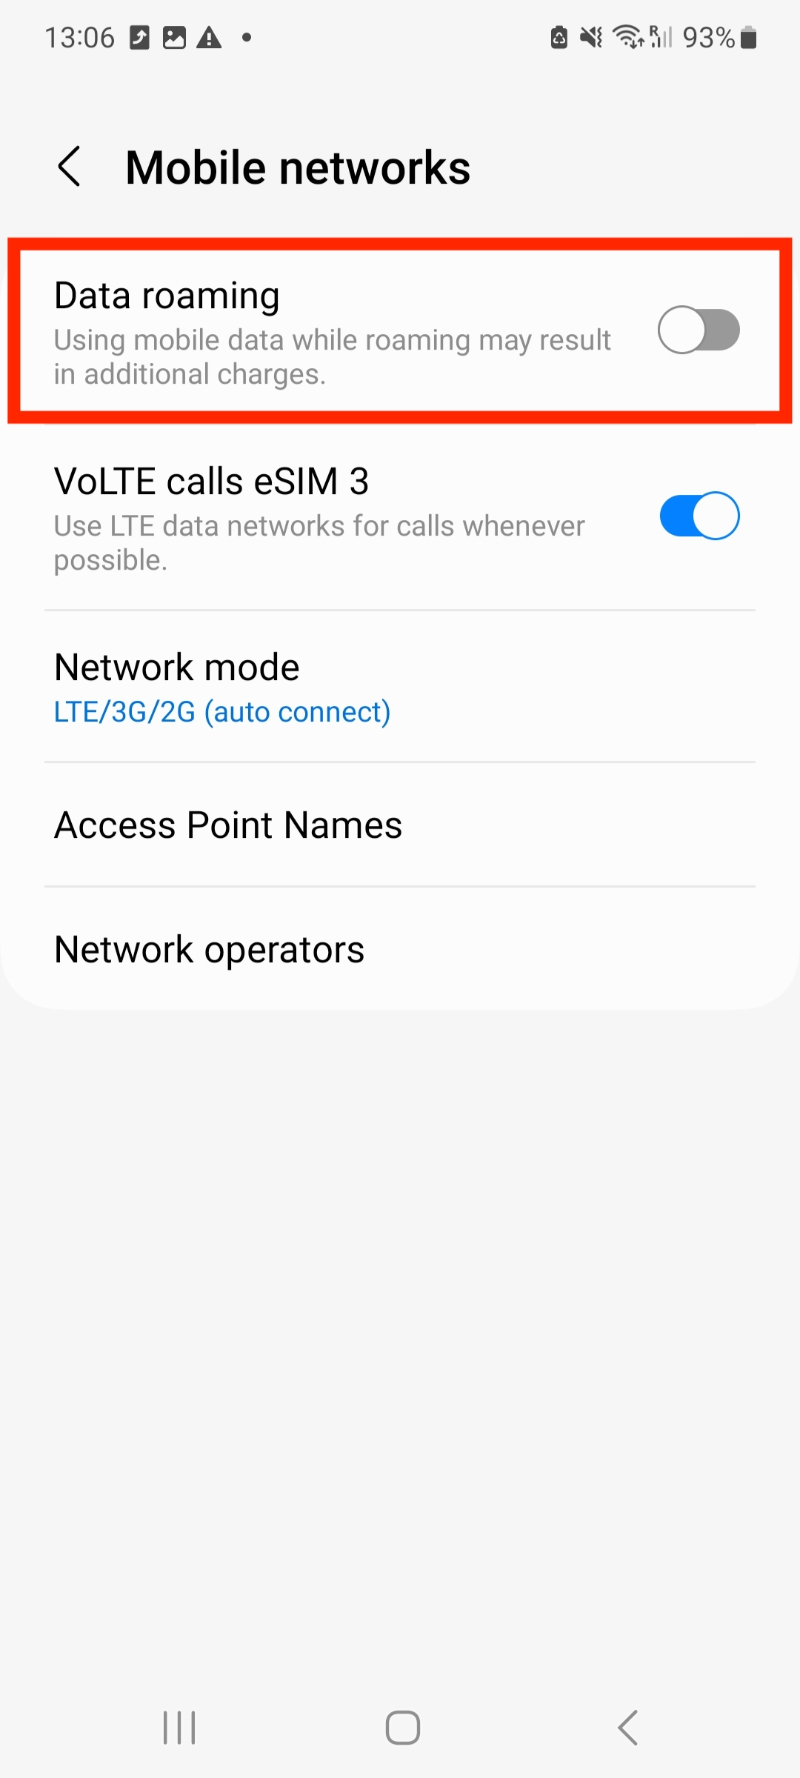
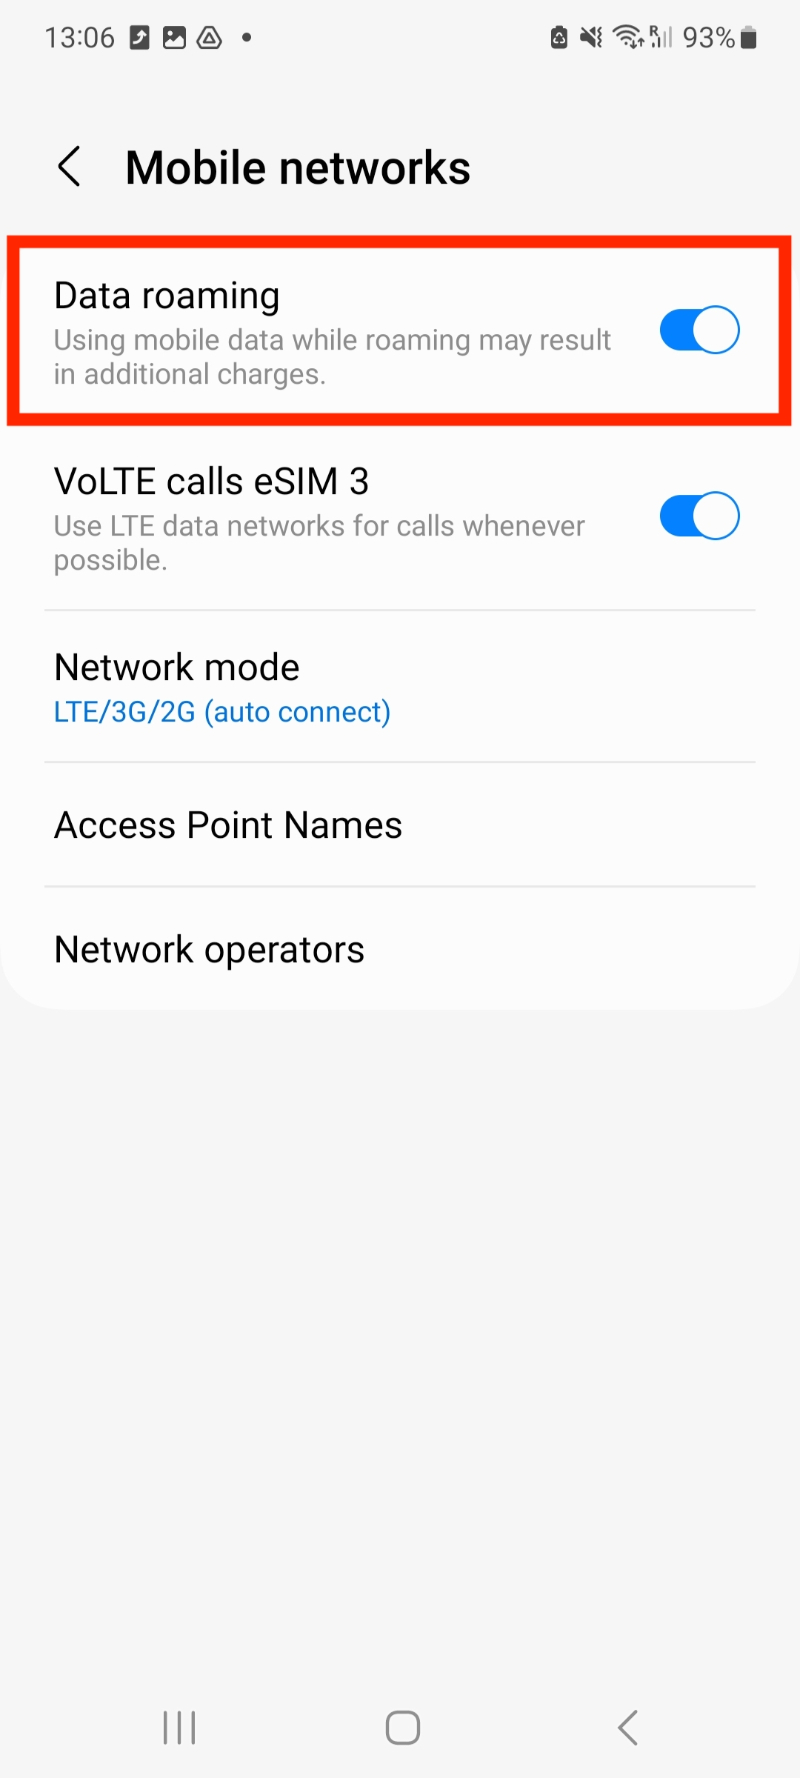
5. Go to "Settings" > Connections > Mobile networks > Ensure "Data roaming" is turned on.
If you experience any issues when trying to install your eSIM, have a look at our article here:
Freedom Roaming support.
In this guide, you have a step-by-step walkthrough you can take when installing an eSIM on your Samsung Device.
Installing an eSIM using a QR Code.
Before attempting to install the eSIM, there are three main things you will need:
- A strong internet connection - Ideally, you will need to be connected to Wi-fi or have a good 4G signal.
- An eSIM compatible device - If you are unsure, here's a list of compatible devices: List of compatible devices
- The device isn't locked to one Mobile Network - If you are unsure whether or not your device is locked to a certain network, have a look at our article on how to check if your device is "locked/unlocked" Locked/unlocked devices
Do not forget to turn on "Data Roaming" once the installation is complete.
1. Go into your Settings.
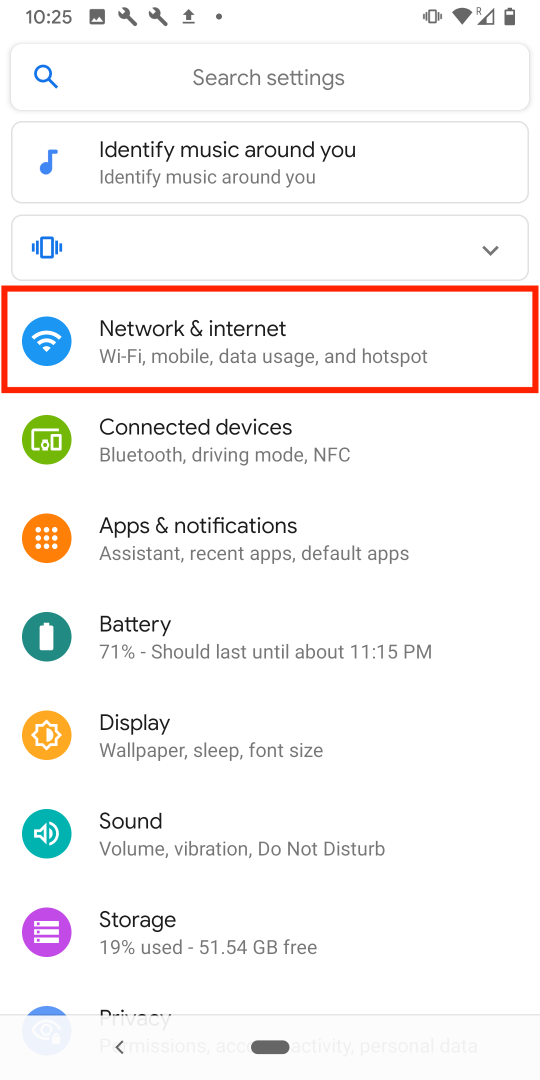
2. Click on "Network and Internet".
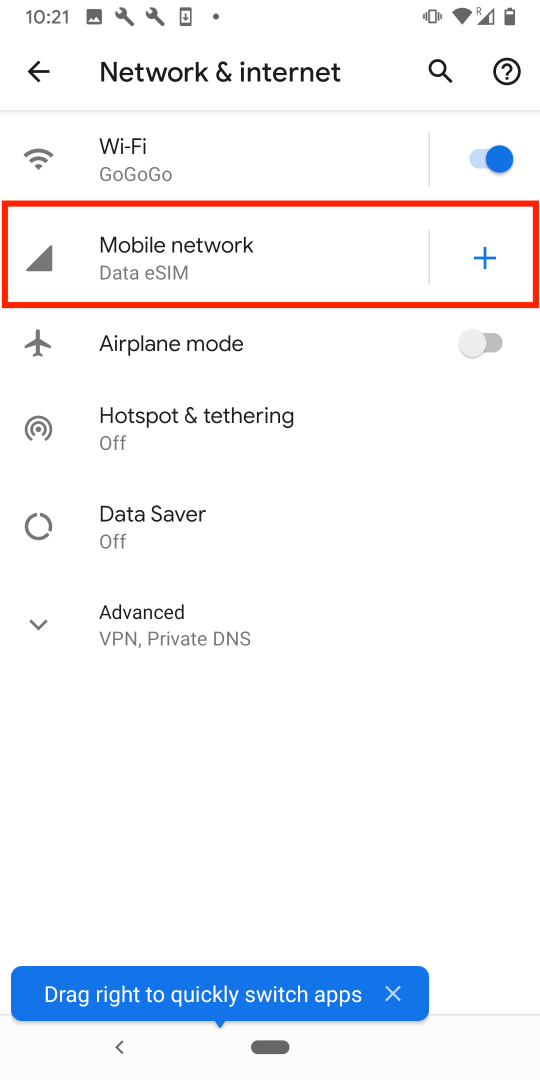
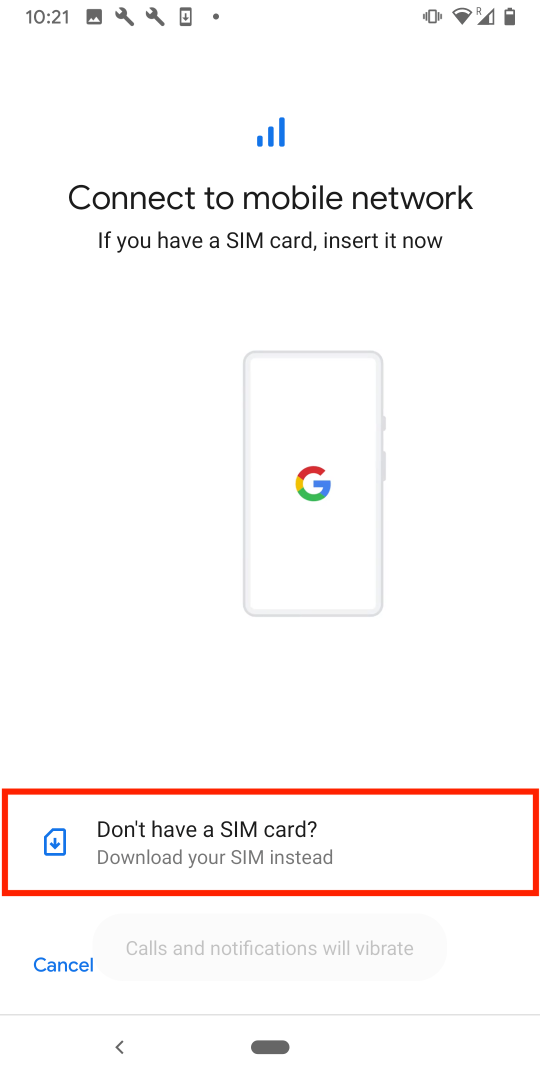
3. Click the "+" next to "Mobile network".
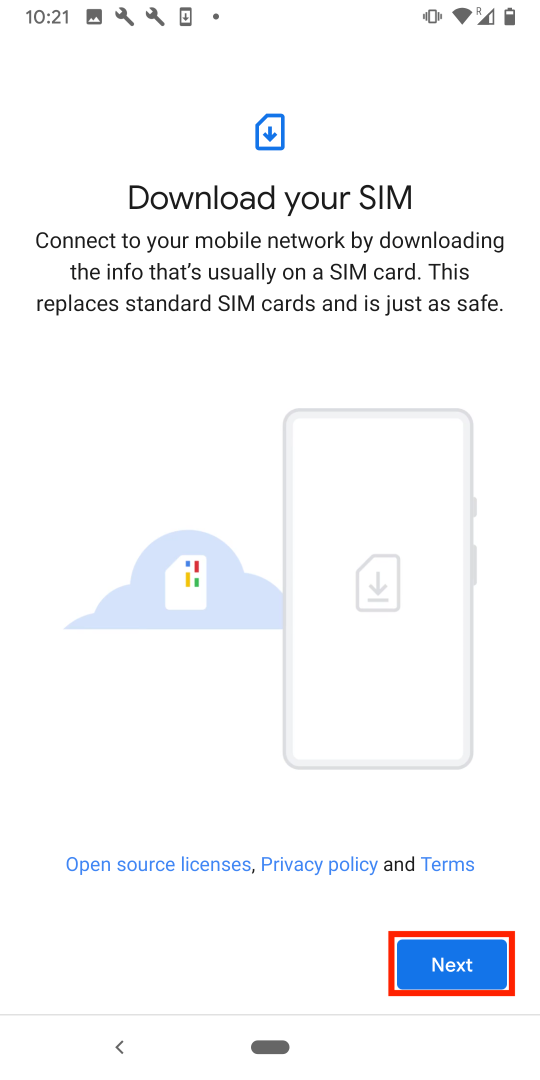
4. On this screen, tap "Don't have a SIM card?" > Click "Next".
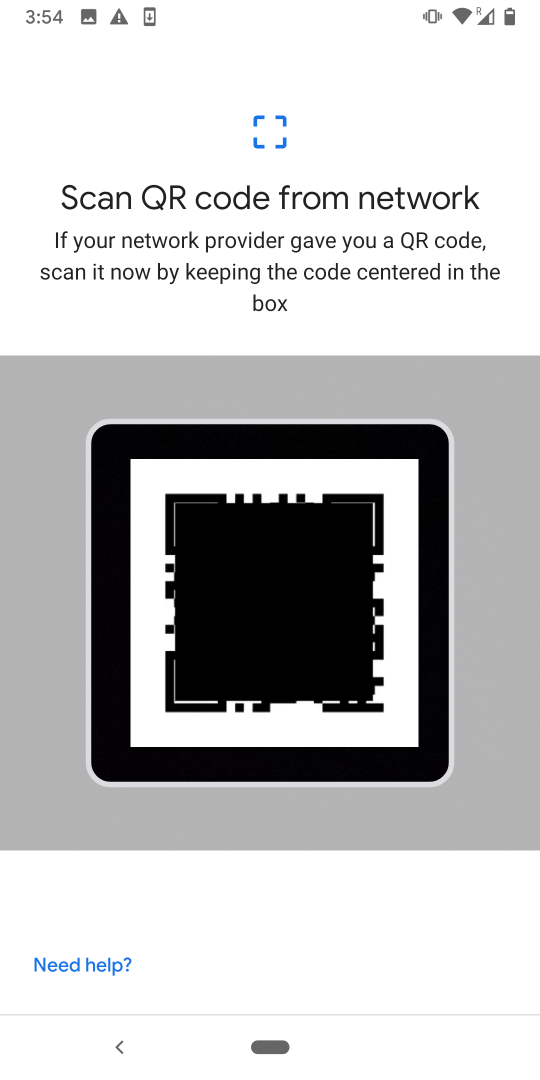
5. Scan the "QR Code" you can view in your eSIM Bundles account.
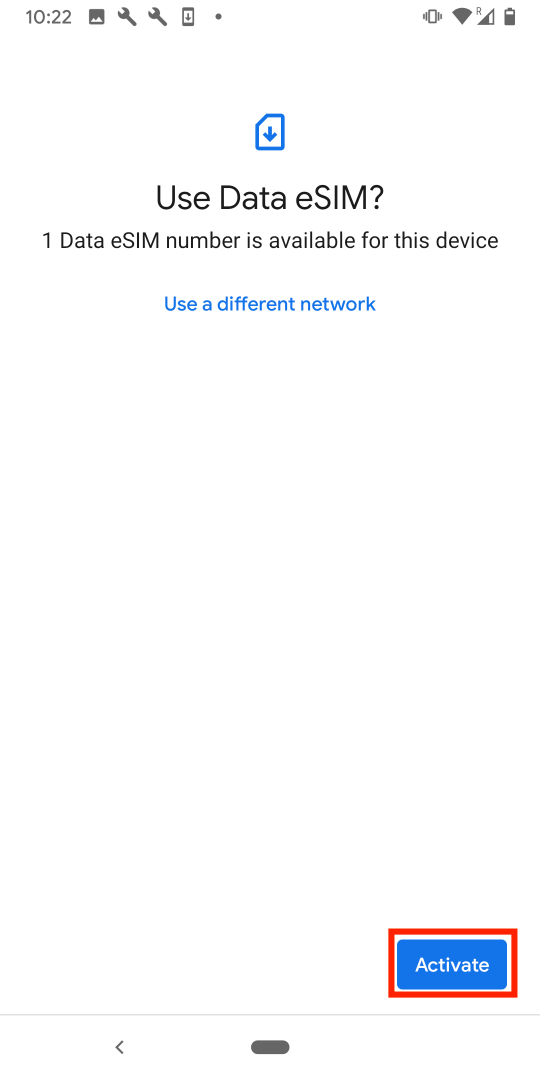
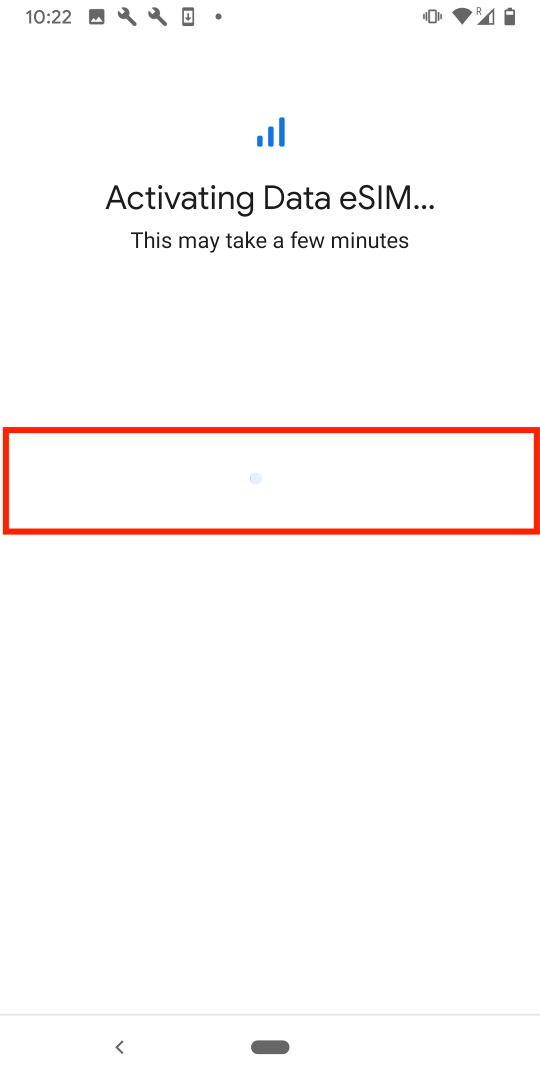
6. On the "Data eSIM" screen, click "Activate" > Wait for it to finish.
Note: Allow up to 10 minutes for this to complete, please do NOT close this, or the installation will stop.
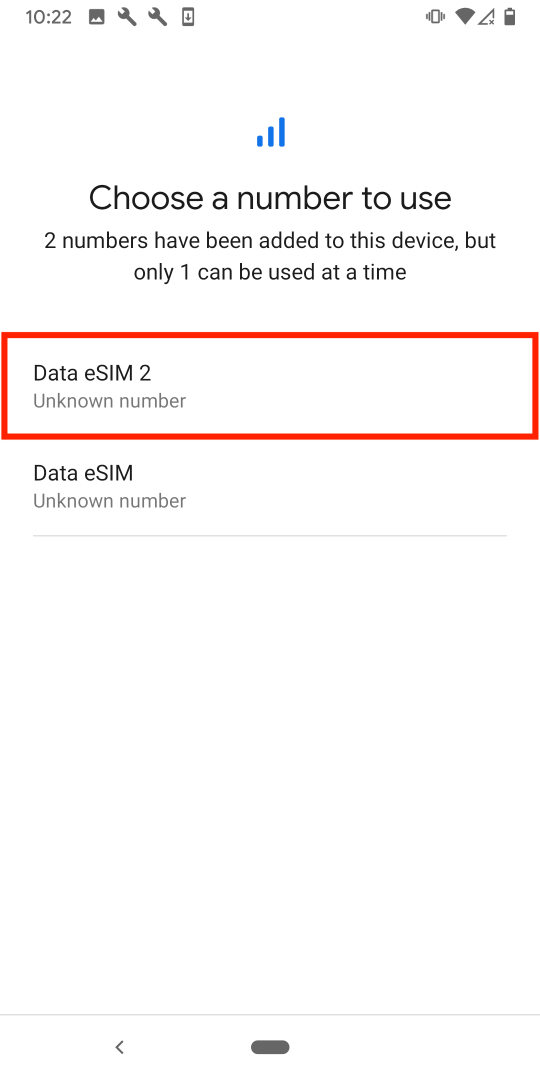
7. Once the eSIM has been successfully activated, you will be bought to a screen where you can choose which sim you would like to use for your number.
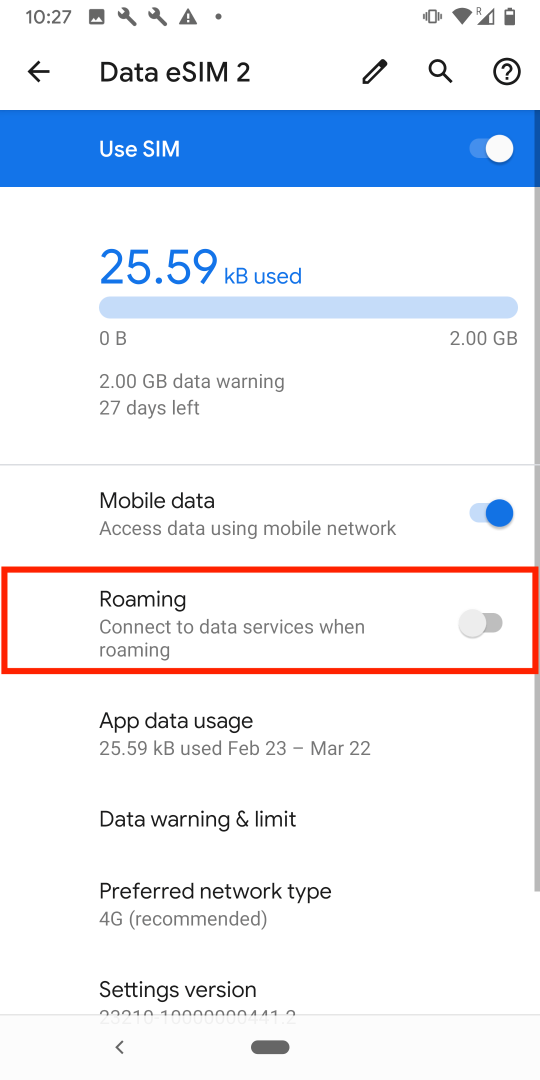
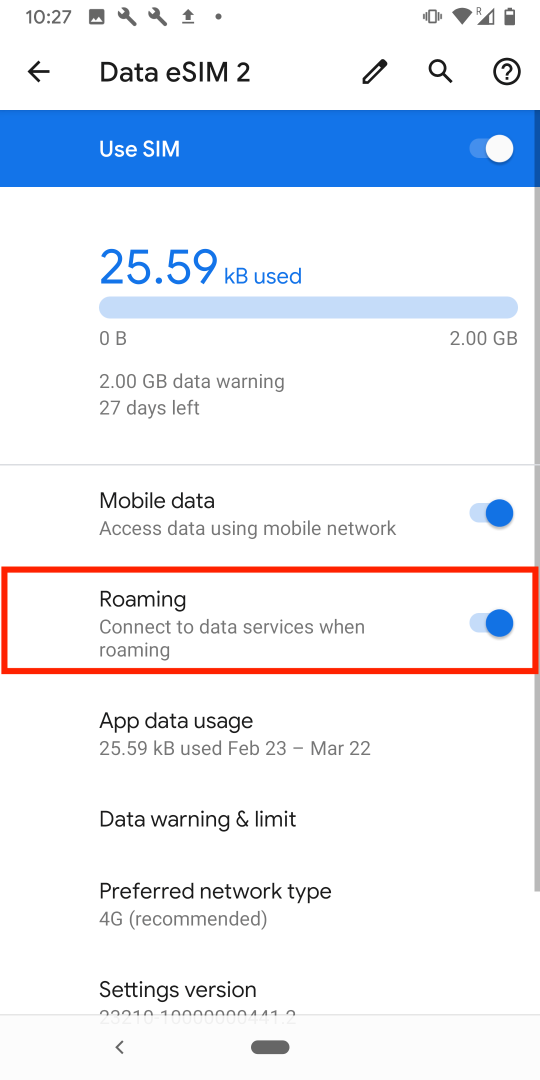
Note: Once you have completed these steps, make sure your Data Roaming is "ON" as seen in the photos below, otherwise you will not be able to use the eSIM.
If you experience any issues when trying to install your eSIM, have a look at our article here:
Freedom Roaming support.
In this guide, you have a step-by-step walkthrough you can take when installing an eSIM on your Huawei Device.
Installing an eSIM using a QR Code.
Before attempting to install the eSIM, there are three main things you will need:
- A strong internet connection - Ideally, you will need to be connected to Wi-fi or have a good 4G signal.
- An eSIM compatible device - If you are unsure, here's a list of compatible devices: List of compatible devices
- The device isn't locked to one Mobile Network - If you are unsure whether or not your device is locked to a certain network, have a look at our article on how to check if your device is "locked/unlocked" Locked/unlocked devices
Do not forget to turn on "Data Roaming" once the installation is complete.
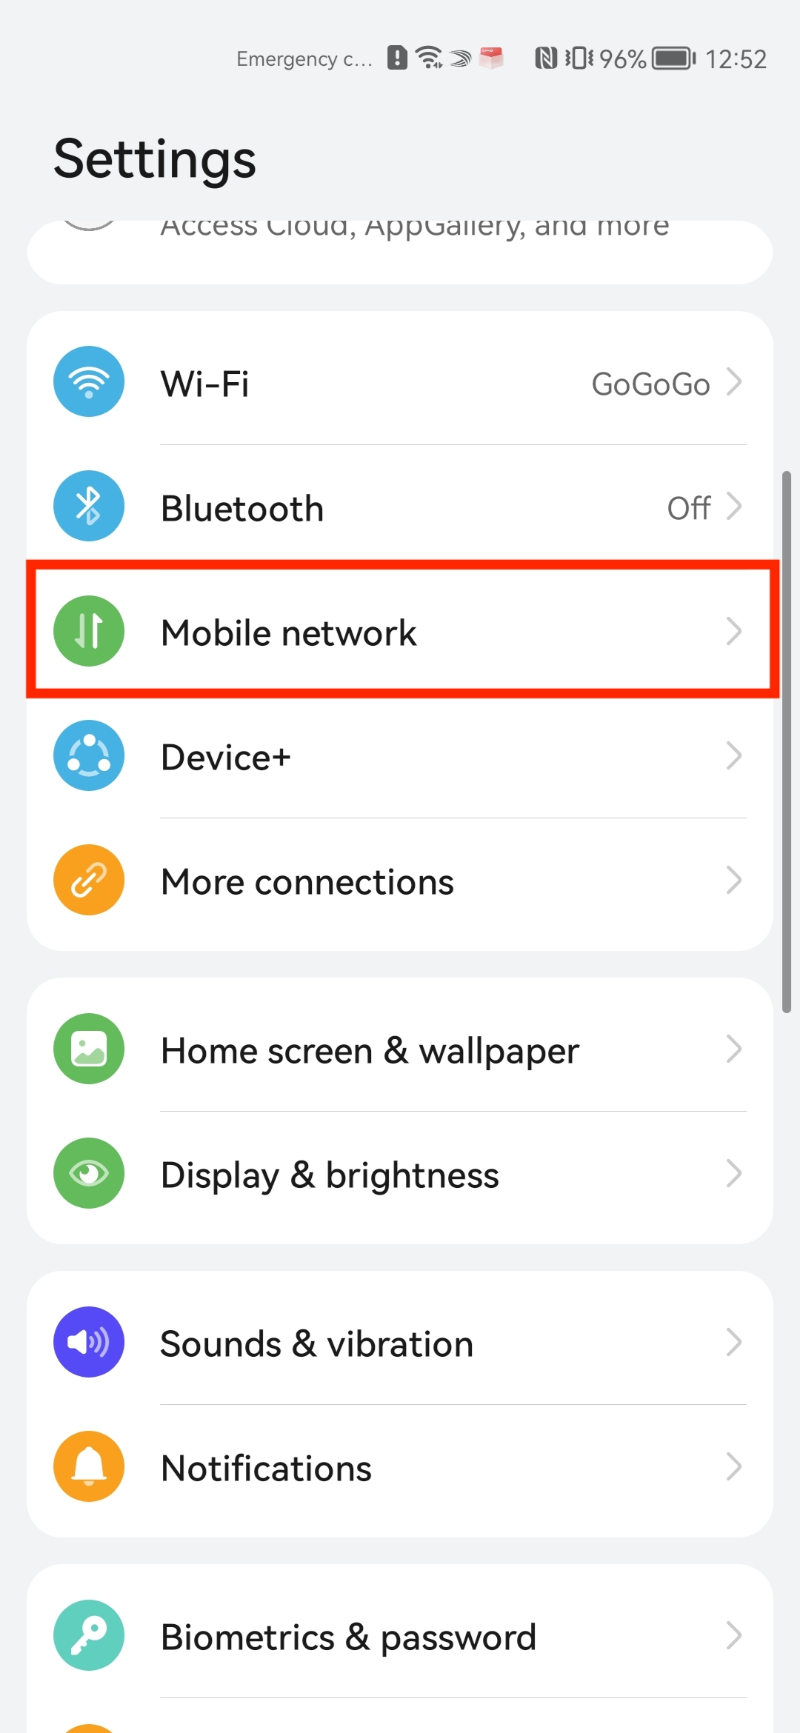
1. Go into your Settings.
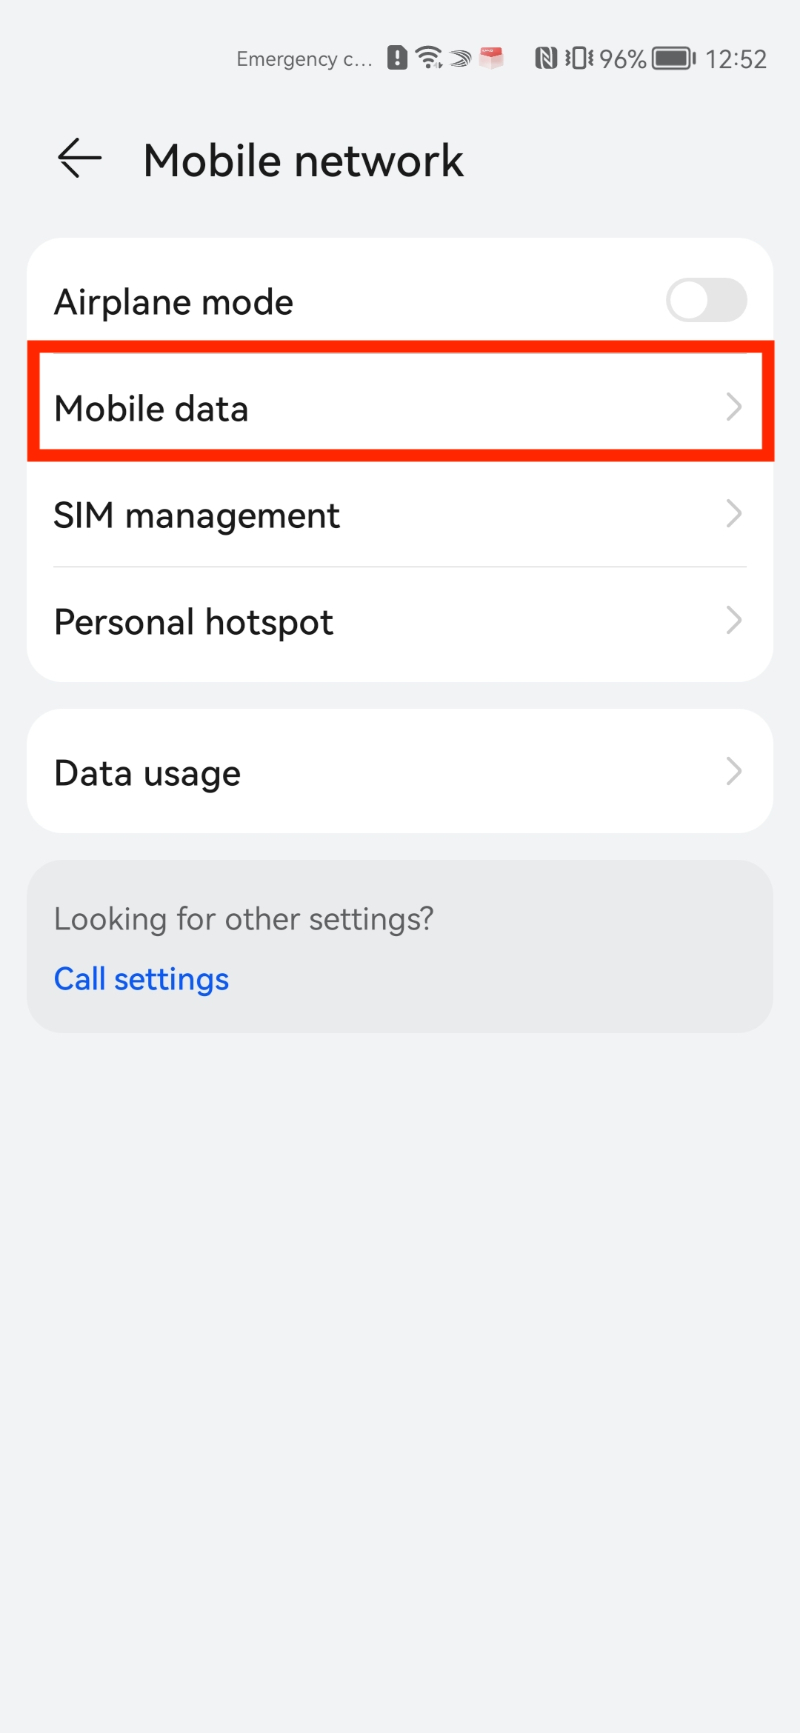
2. Click on "Mobile Network".
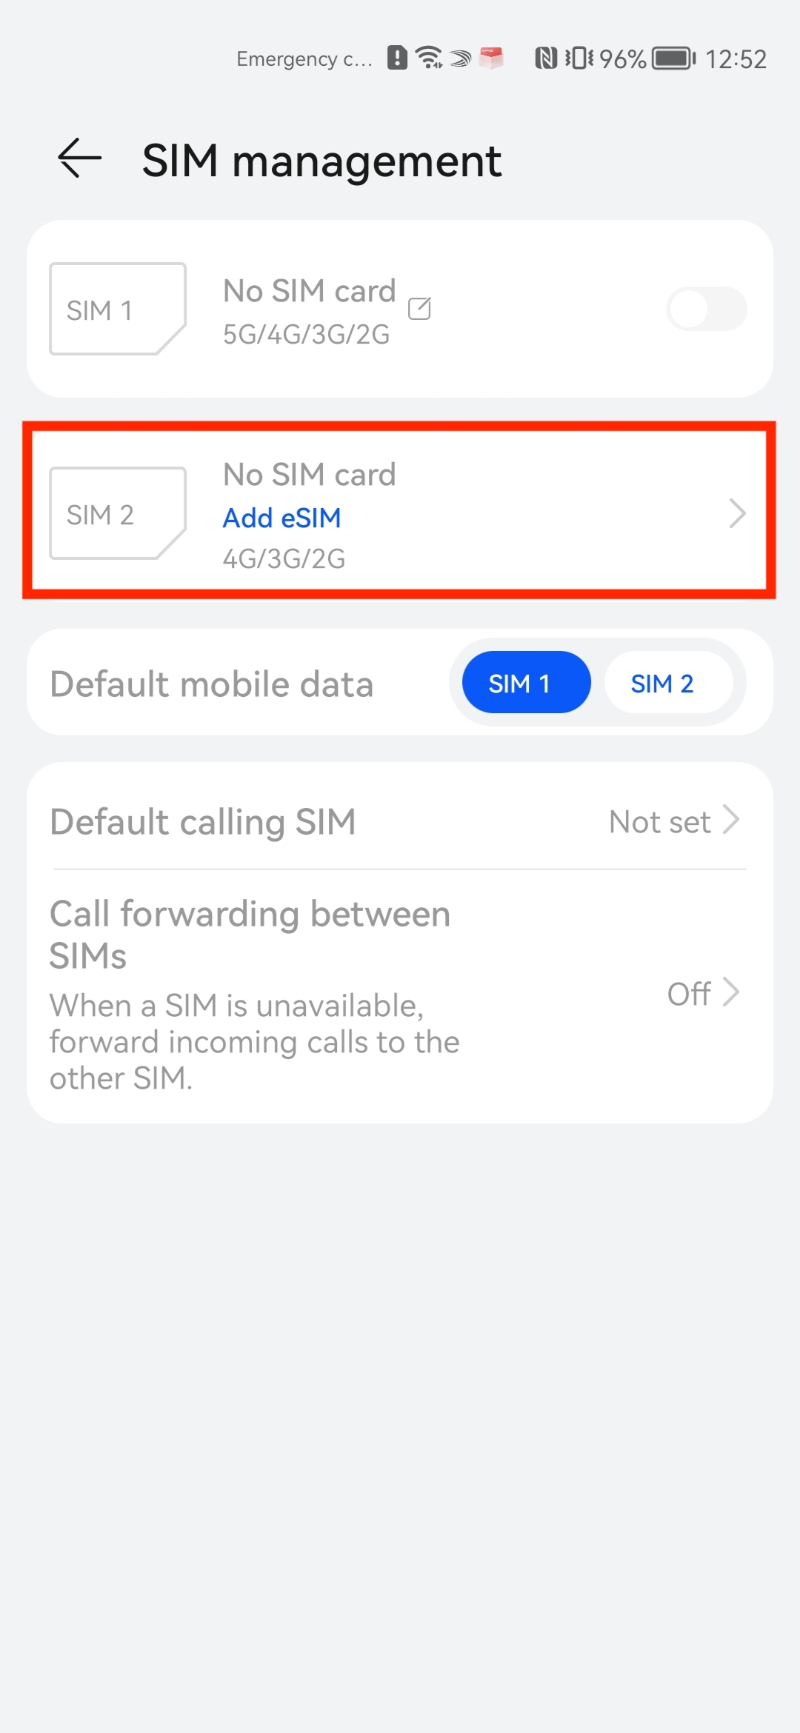
3. Click on "Sim Management" > Click "Add eSIM".
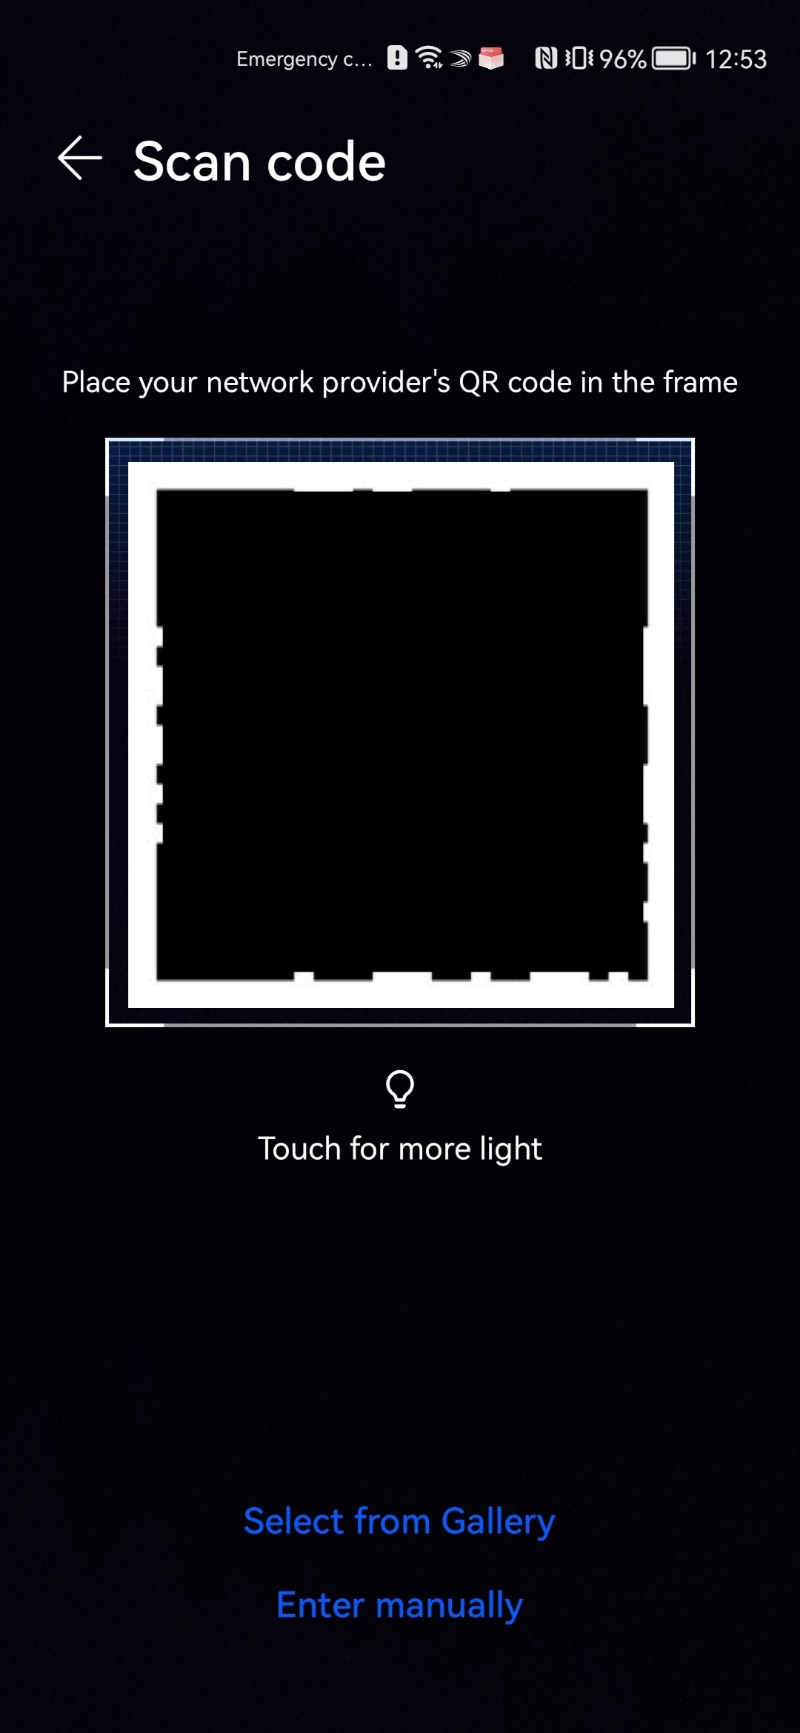
4. Click on the cross in the bottom left of the screen (Add eSIM) > Scan the "QR Code" given through your eSIMs bundles account.
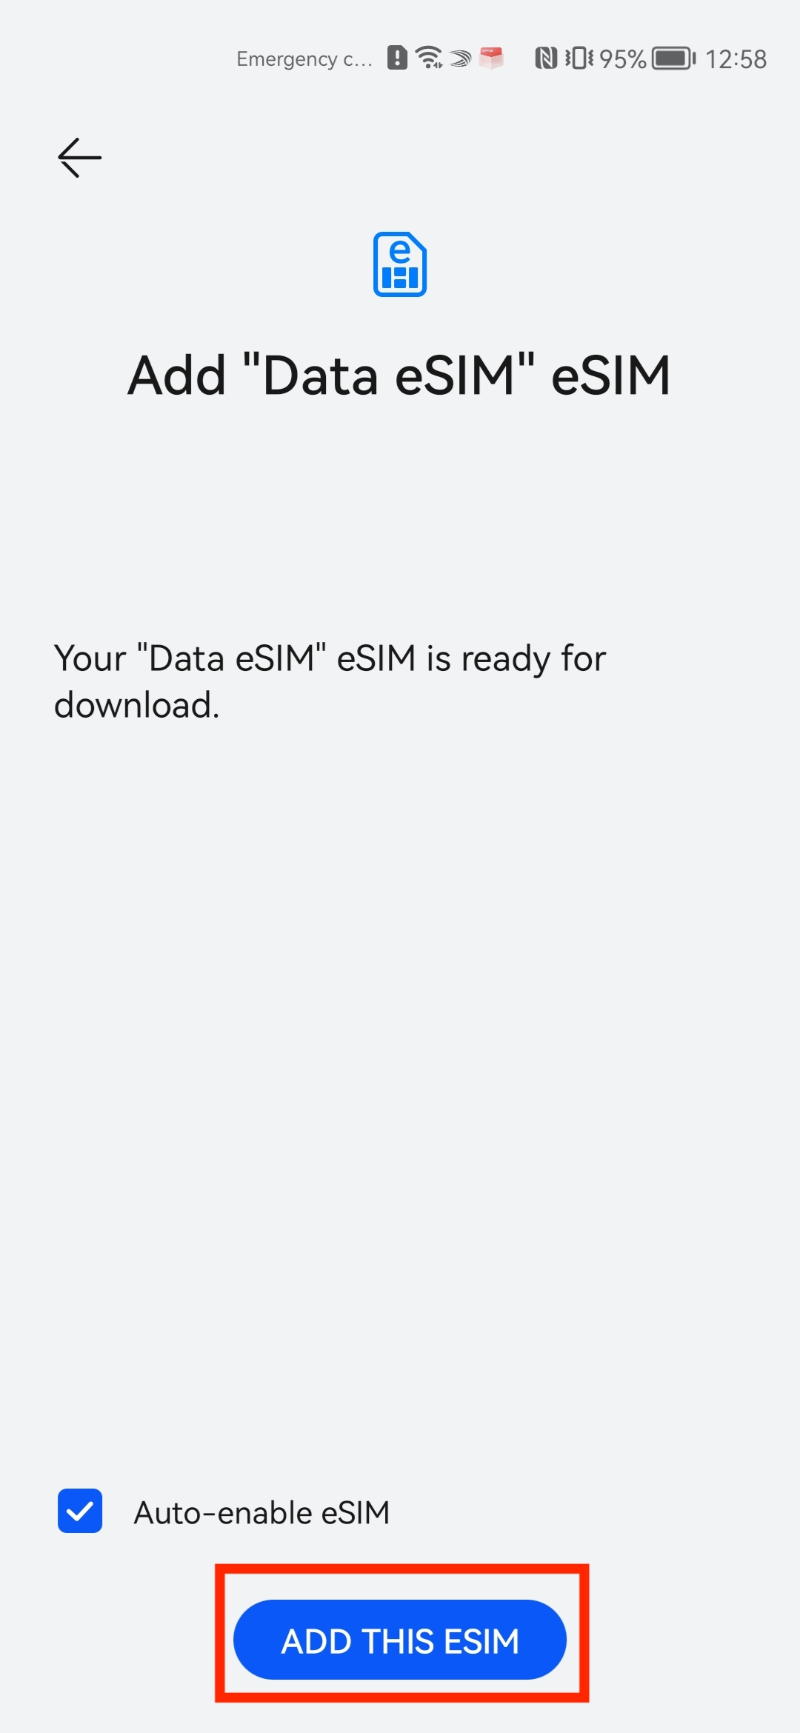
5. Click "Add this eSIM" > Wait for the eSIM to download.
Note: This may take up to 10 minutes, please do NOT close this, or the installation will stop.
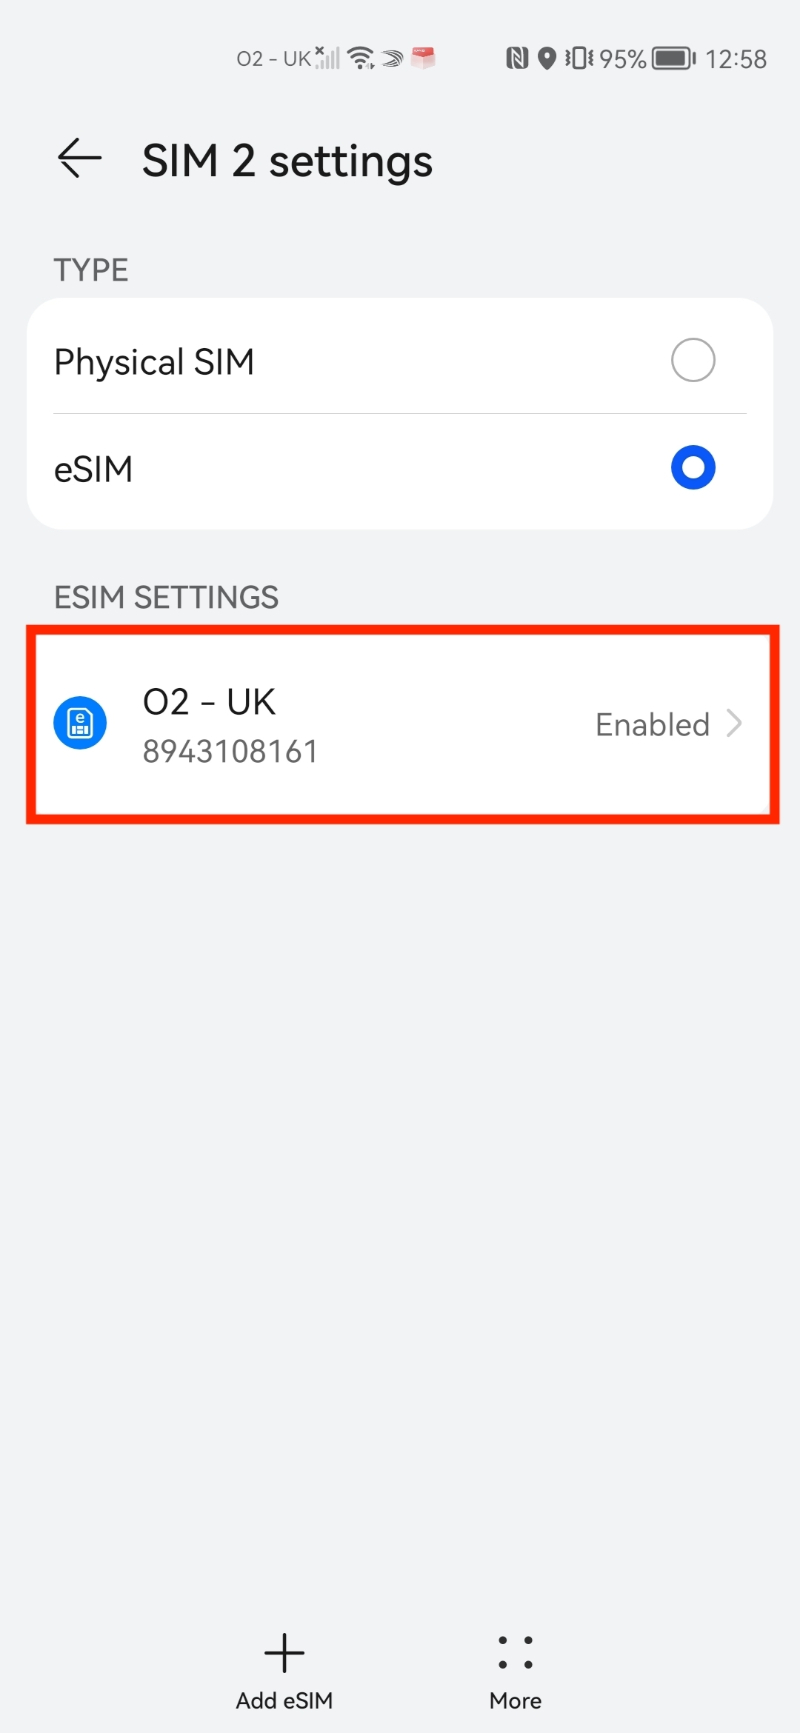
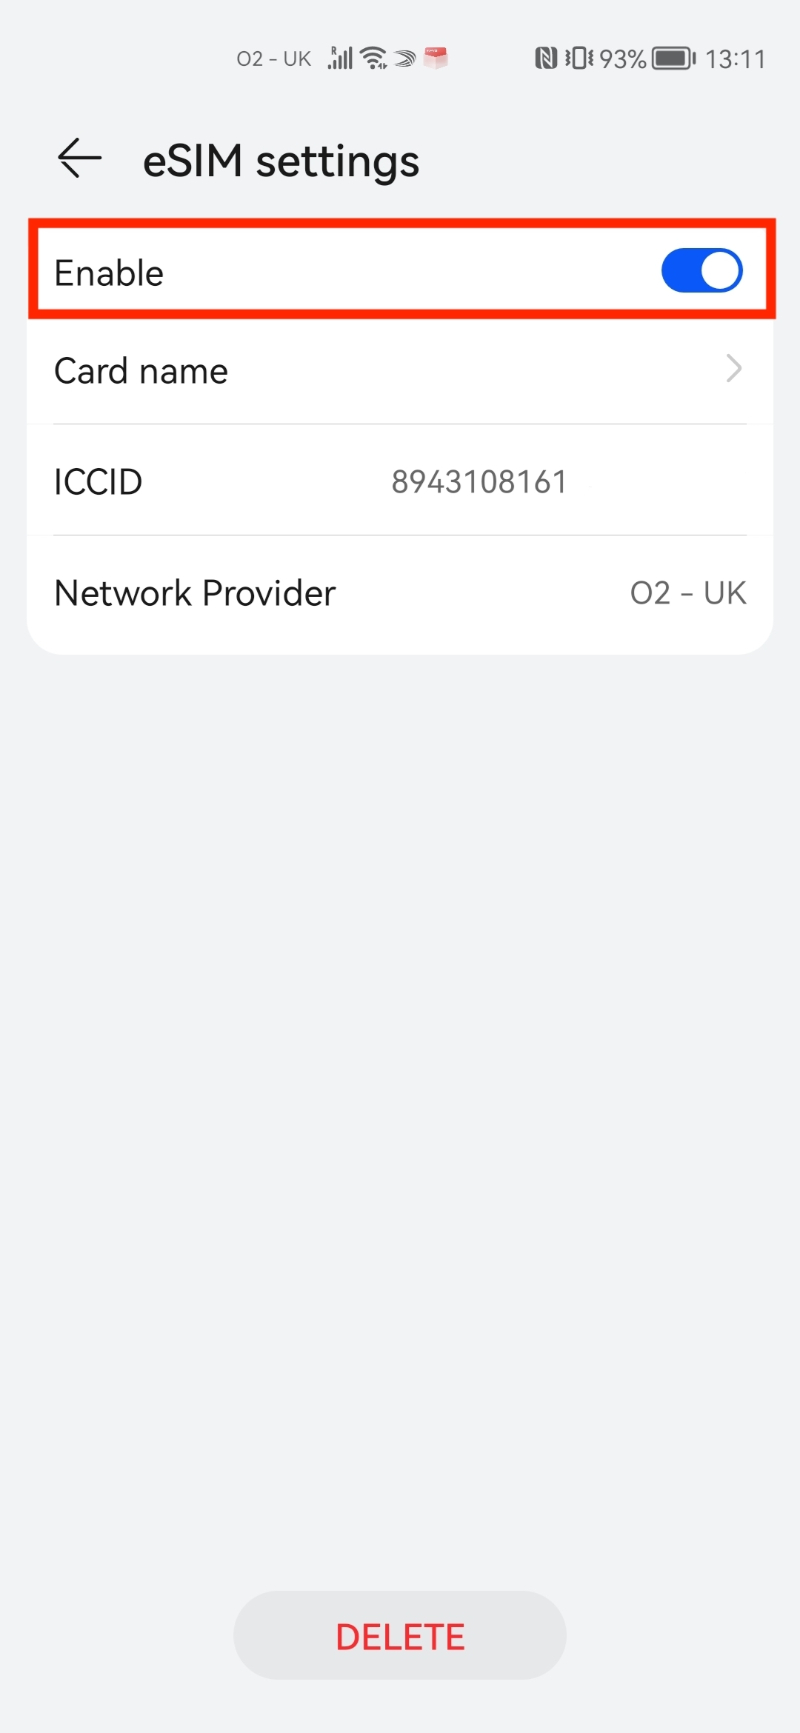
6. Once completed, your eSIM should appear in the list. > Make sure the eSIM is enabled, otherwise the eSIM won't work.
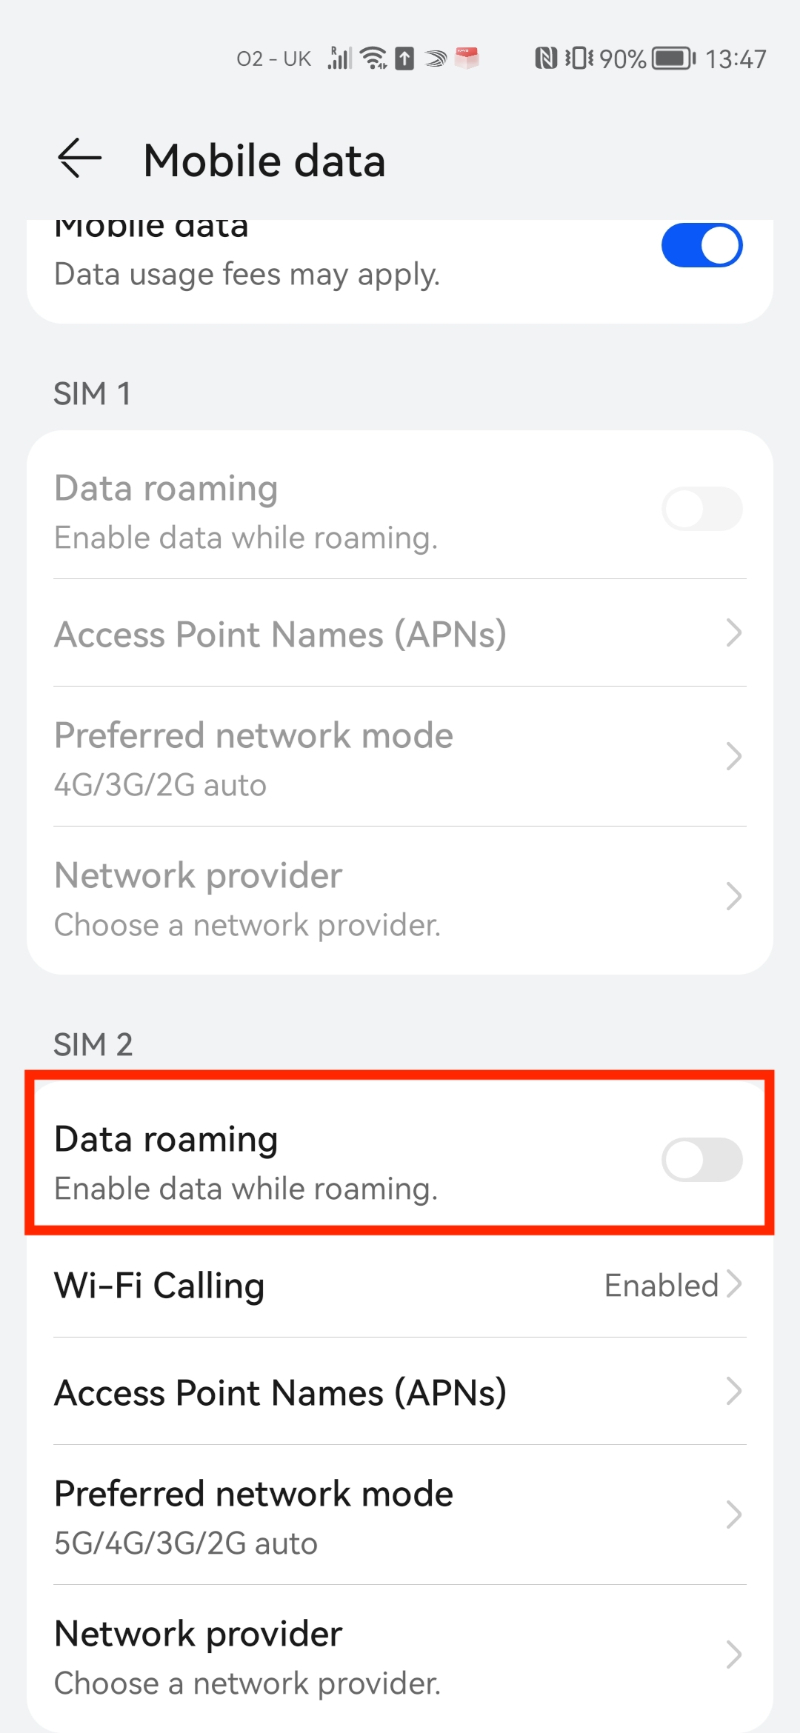
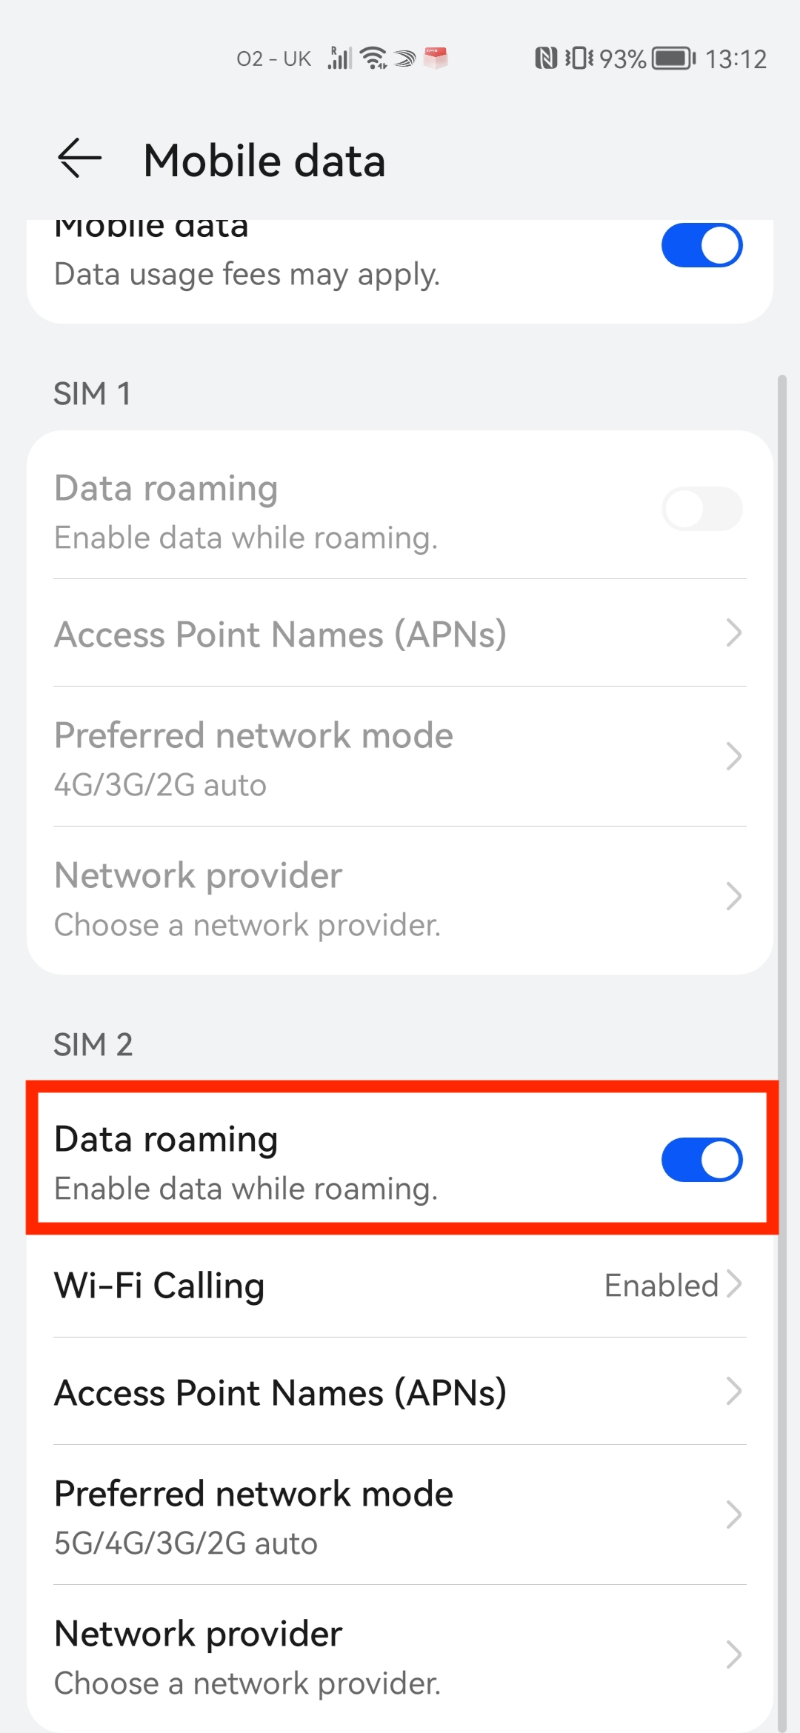
Note: Once you have completed these steps, make sure your Data Roaming is "ON" as seen in the photos below, otherwise you will not be able to use the eSIM.
If you experience any issues when trying to install your eSIM, have a look at our article here:
Freedom Roaming support.
In this guide, you have a step-by-step walkthrough you can take when installing an eSIM on your Oppo Device.
Installing an eSIM using a QR Code.
Before attempting to install the eSIM, there are three main things you will need:
- A strong internet connection - Ideally, you will need to be connected to Wi-fi or have a good 4G signal.
- An eSIM compatible device - If you are unsure, here's a list of compatible devices: List of compatible devices
- The device isn't locked to one Mobile Network - If you are unsure whether or not your device is locked to a certain network, have a look at our article on how to check if your device is "locked/unlocked" Locked/unlocked devices
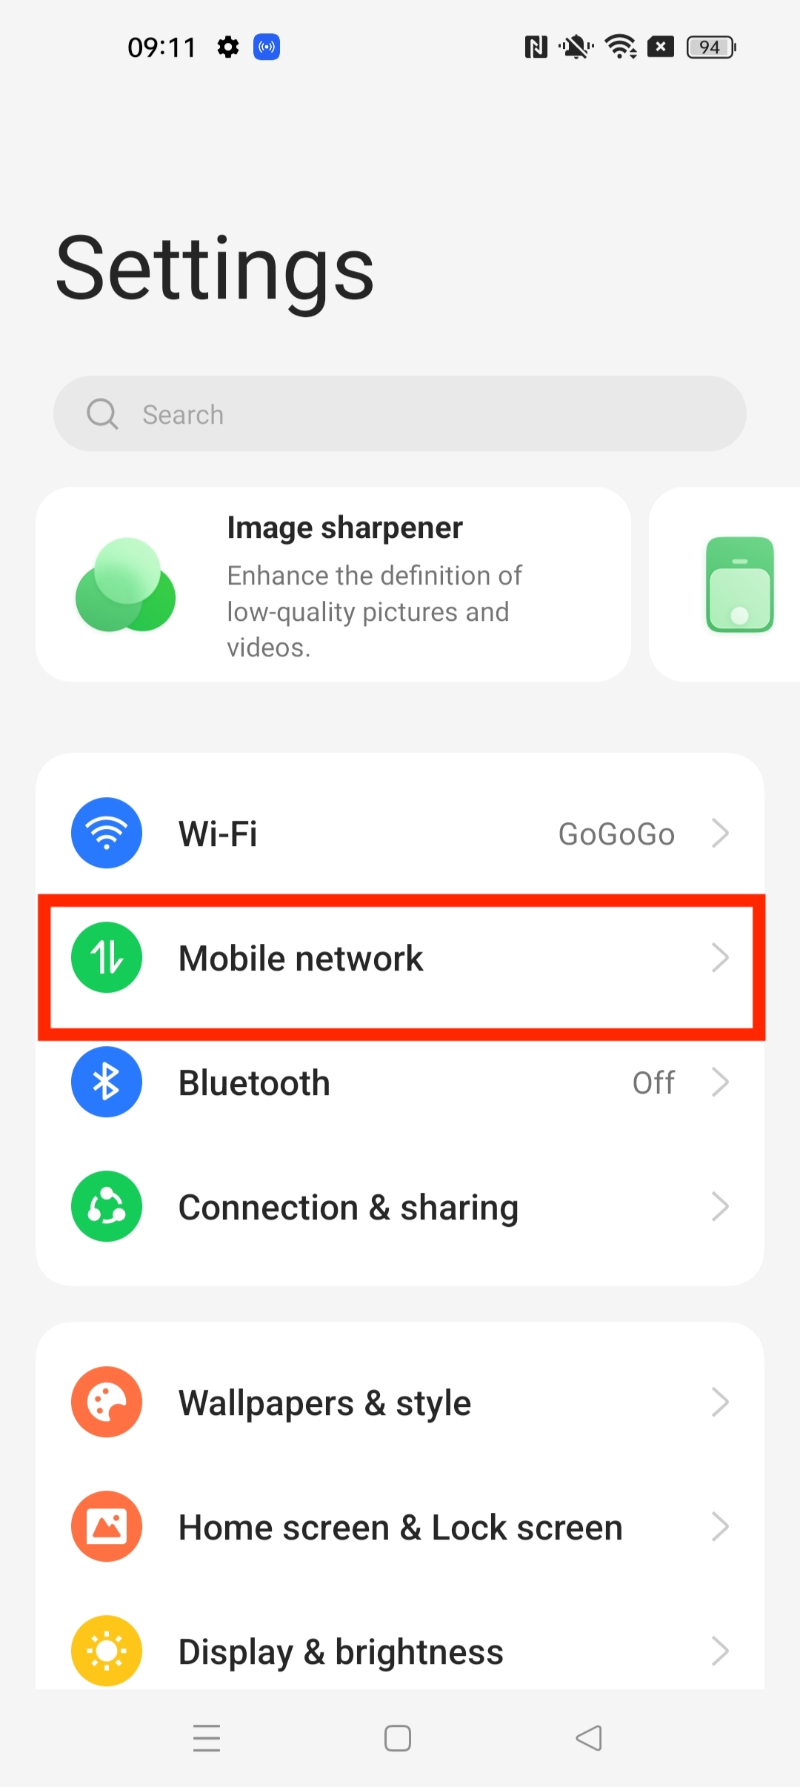
1. Go into your Settings.
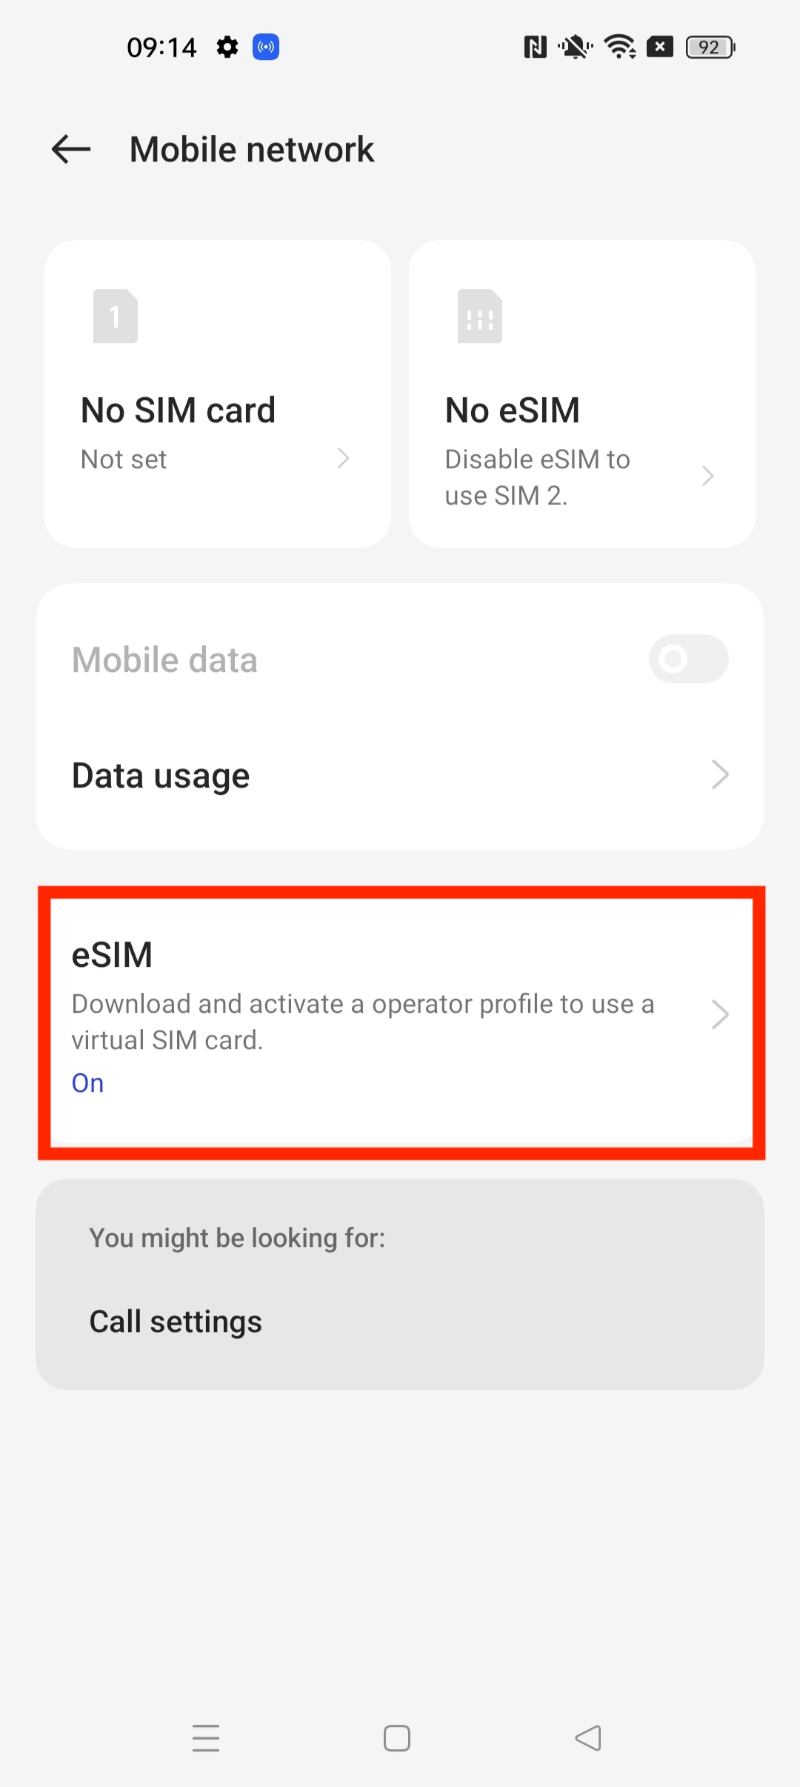
2. Go into "Mobile network"
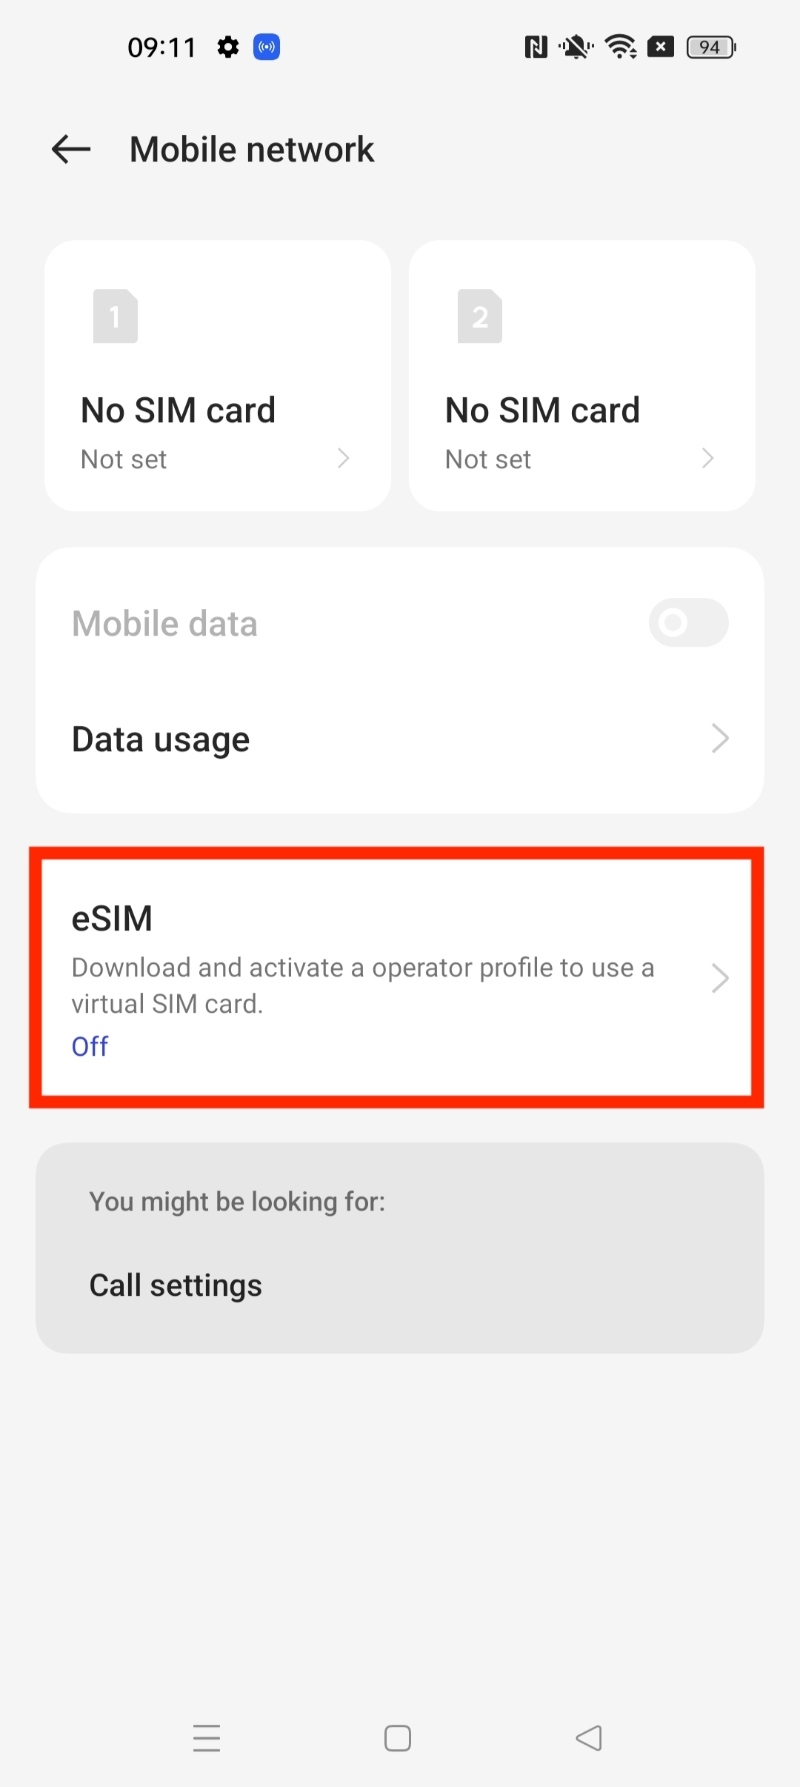
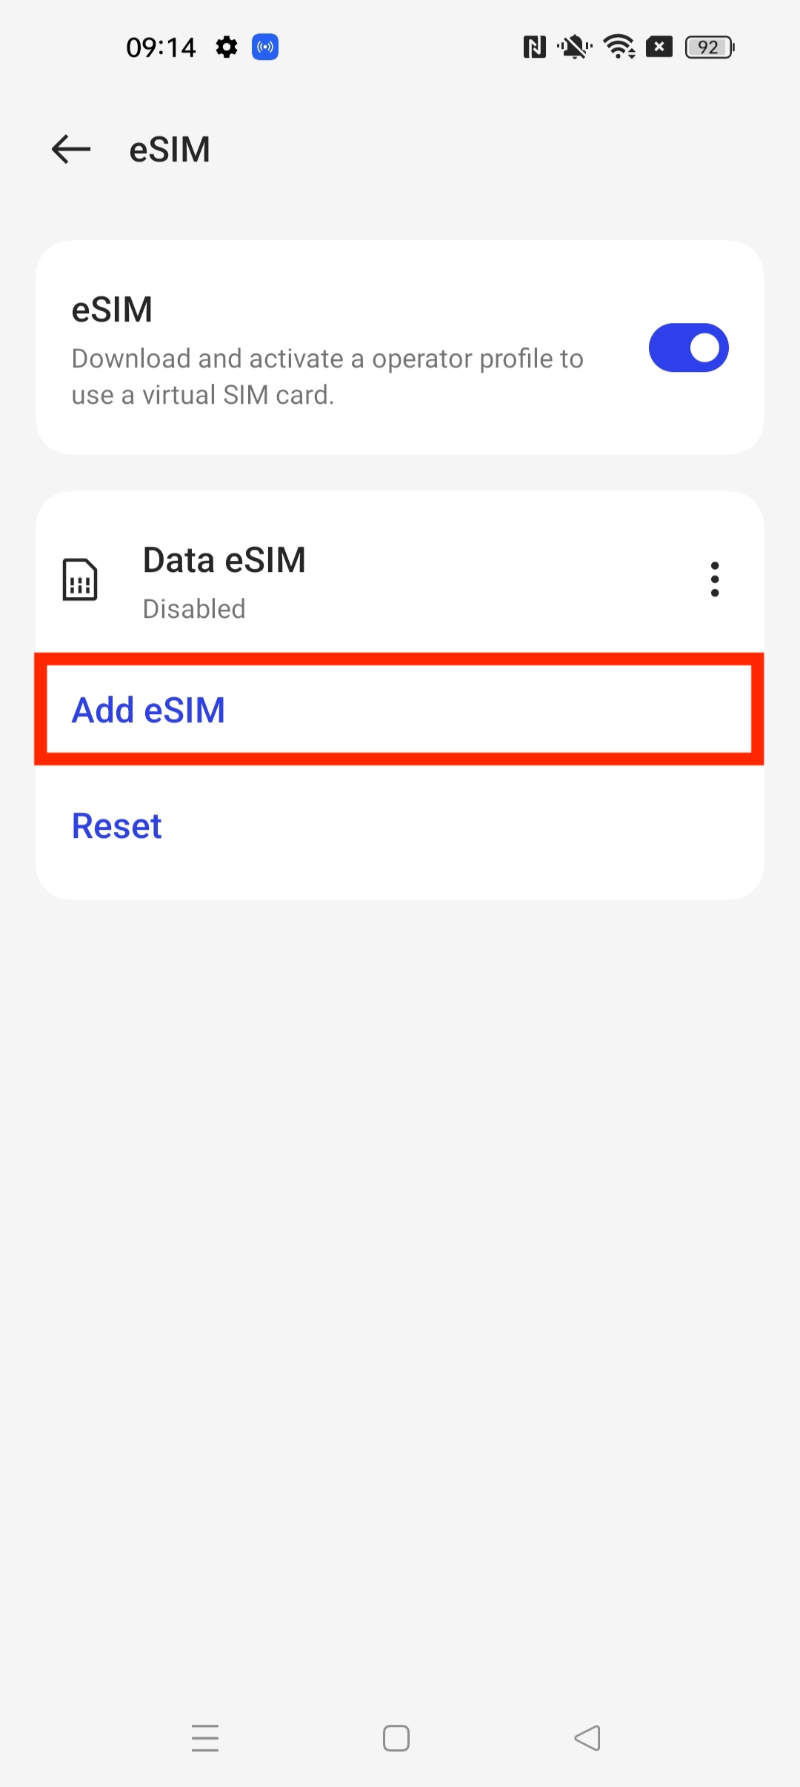
3. Click "eSIM"
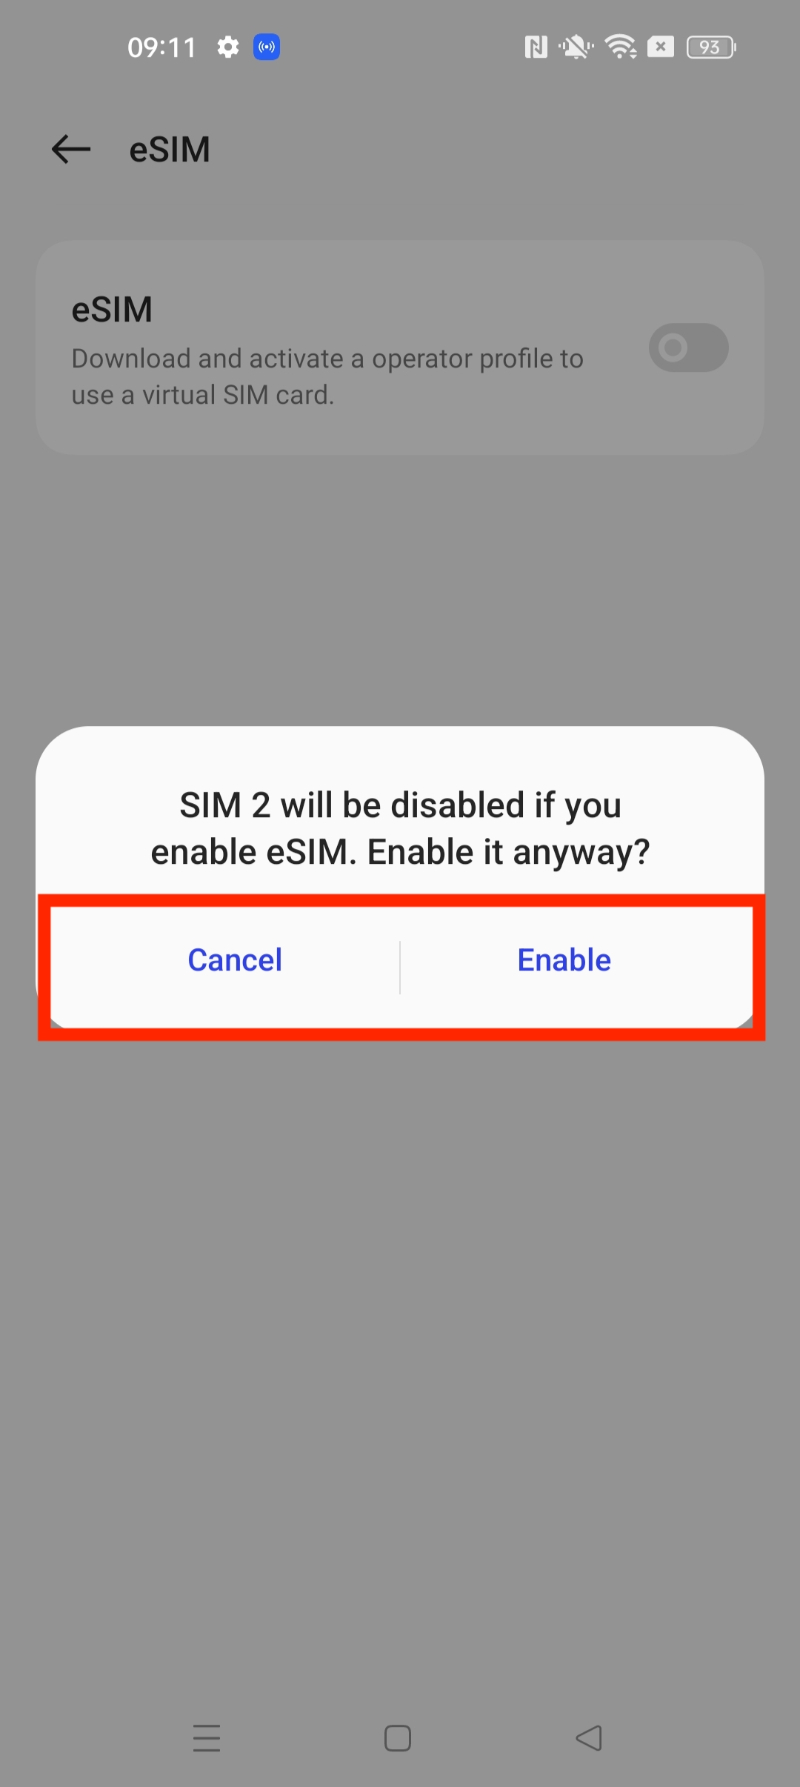
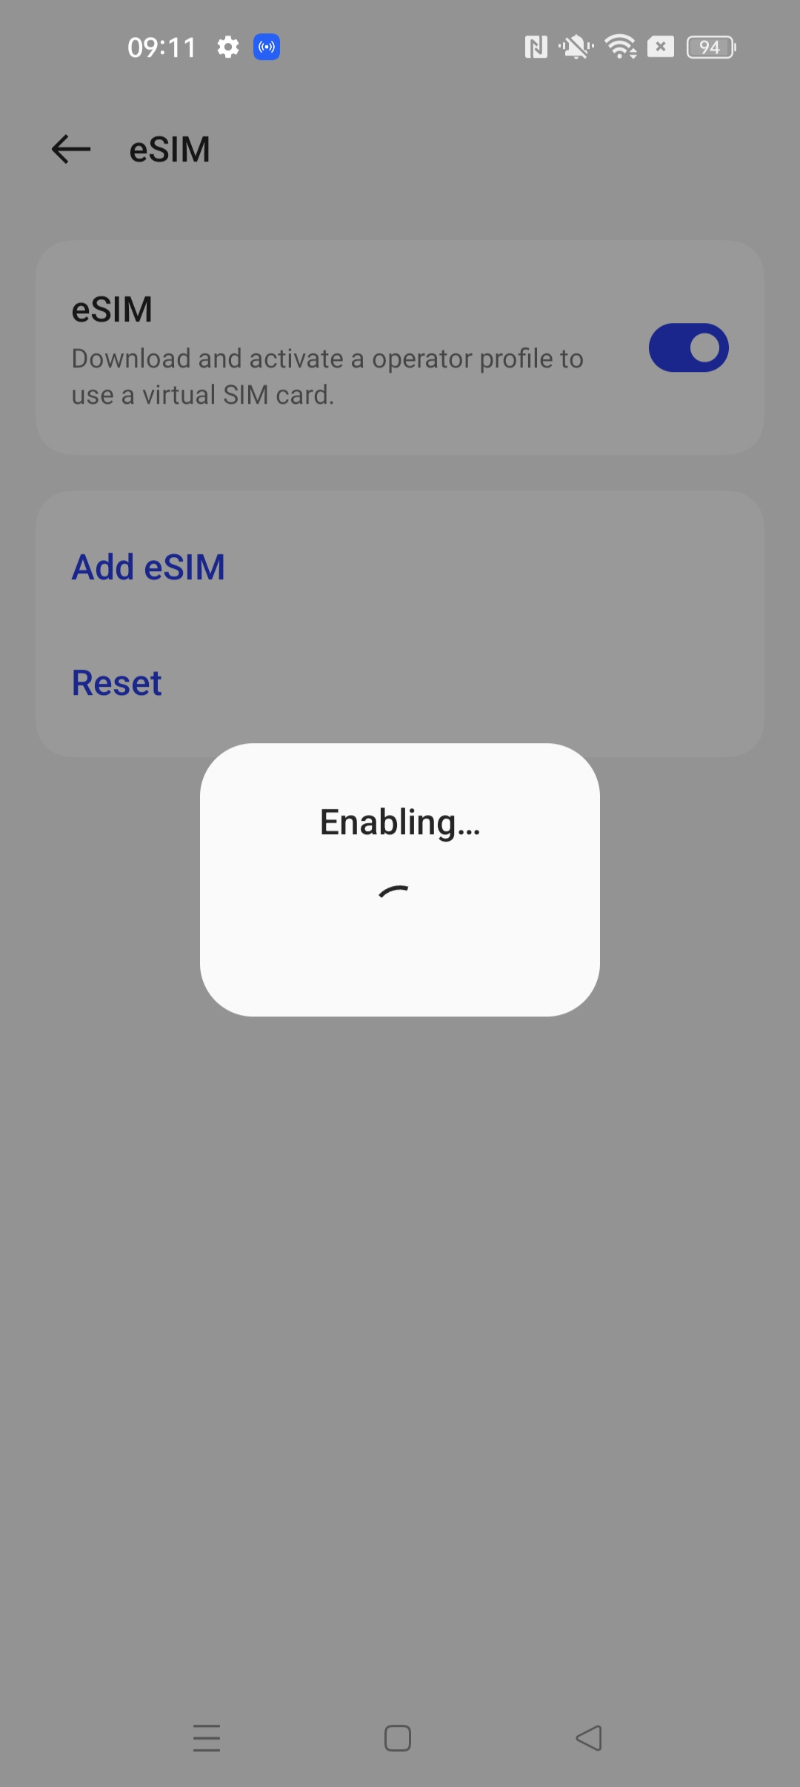
4. Turn on eSIM.
5. Click "Add eSIM"
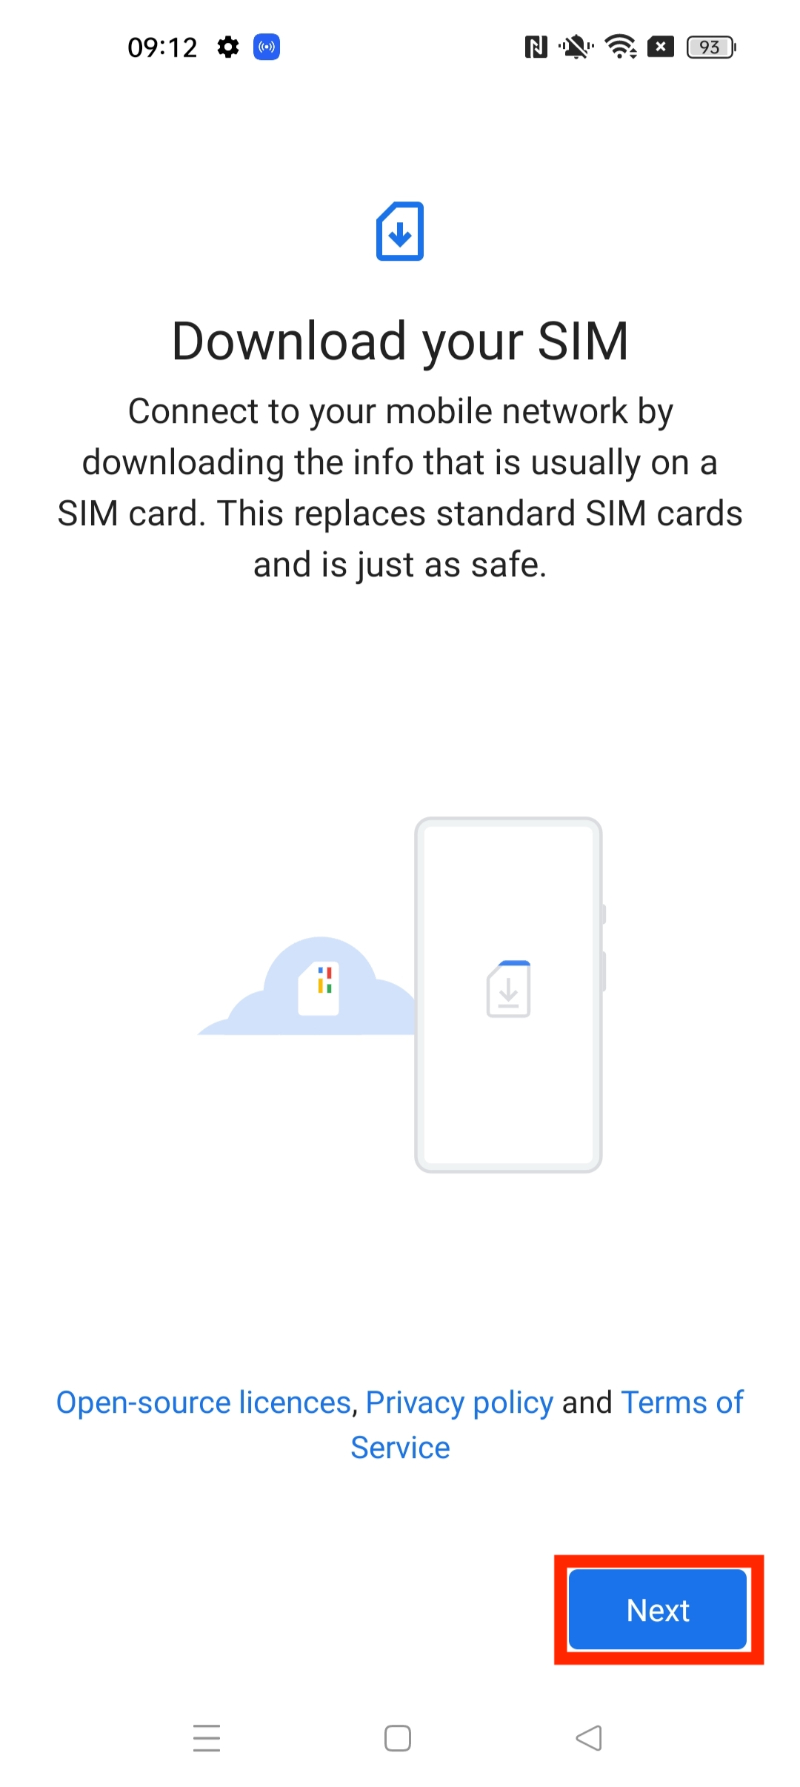
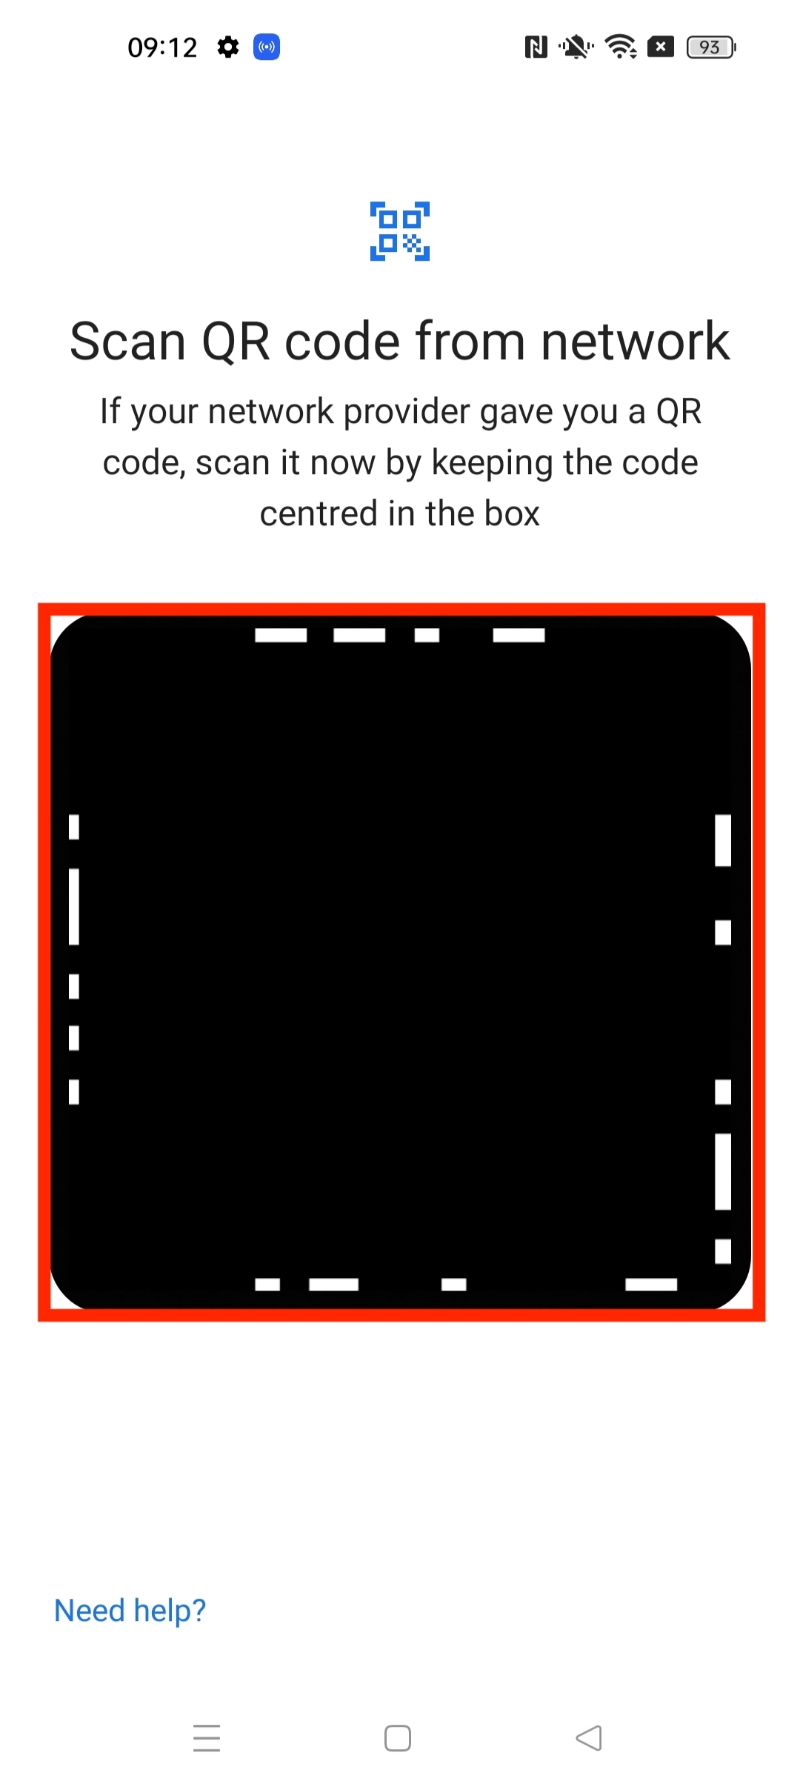
6. Press "Next" > Scan the "QR Code" given through your eSIM Bundles account.
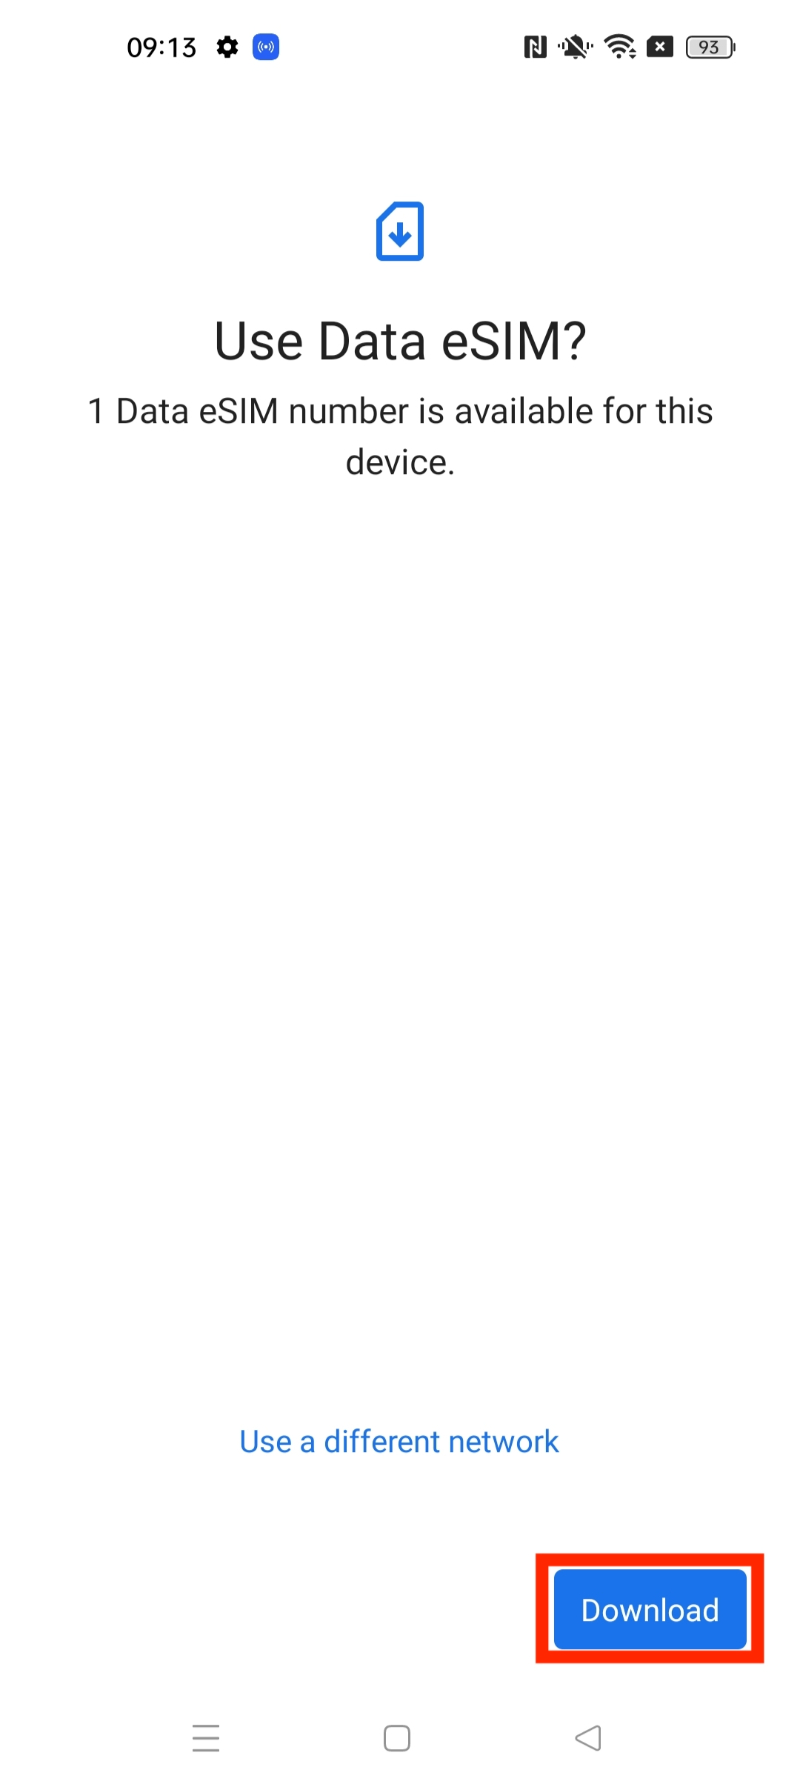
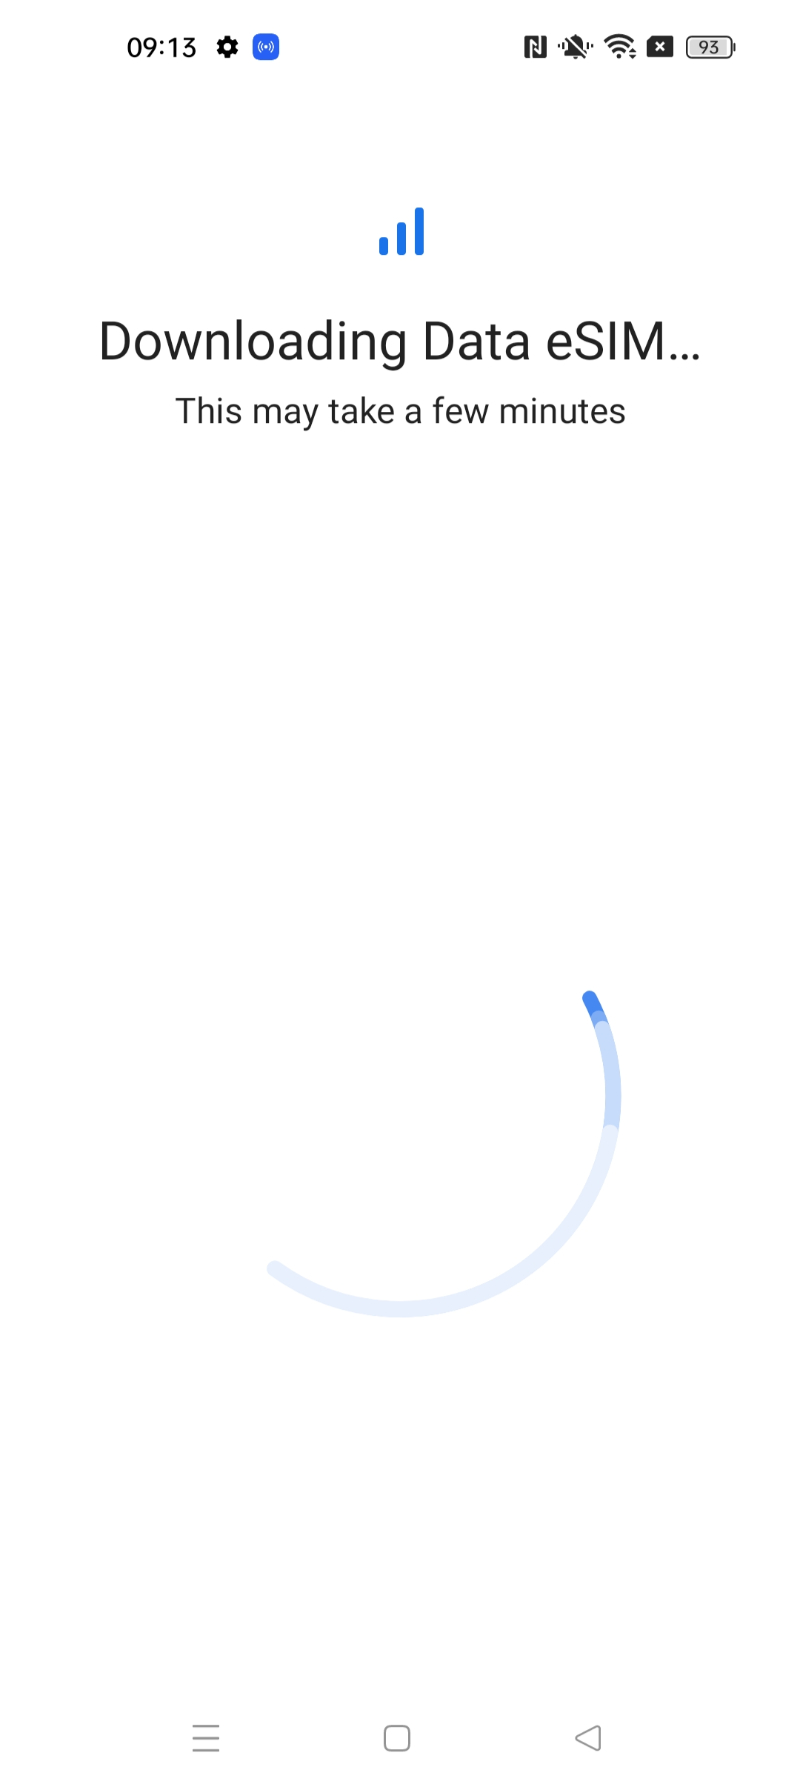
7. Once you have scanned your QR code, it will come up with the prompt given. > Click "Download".
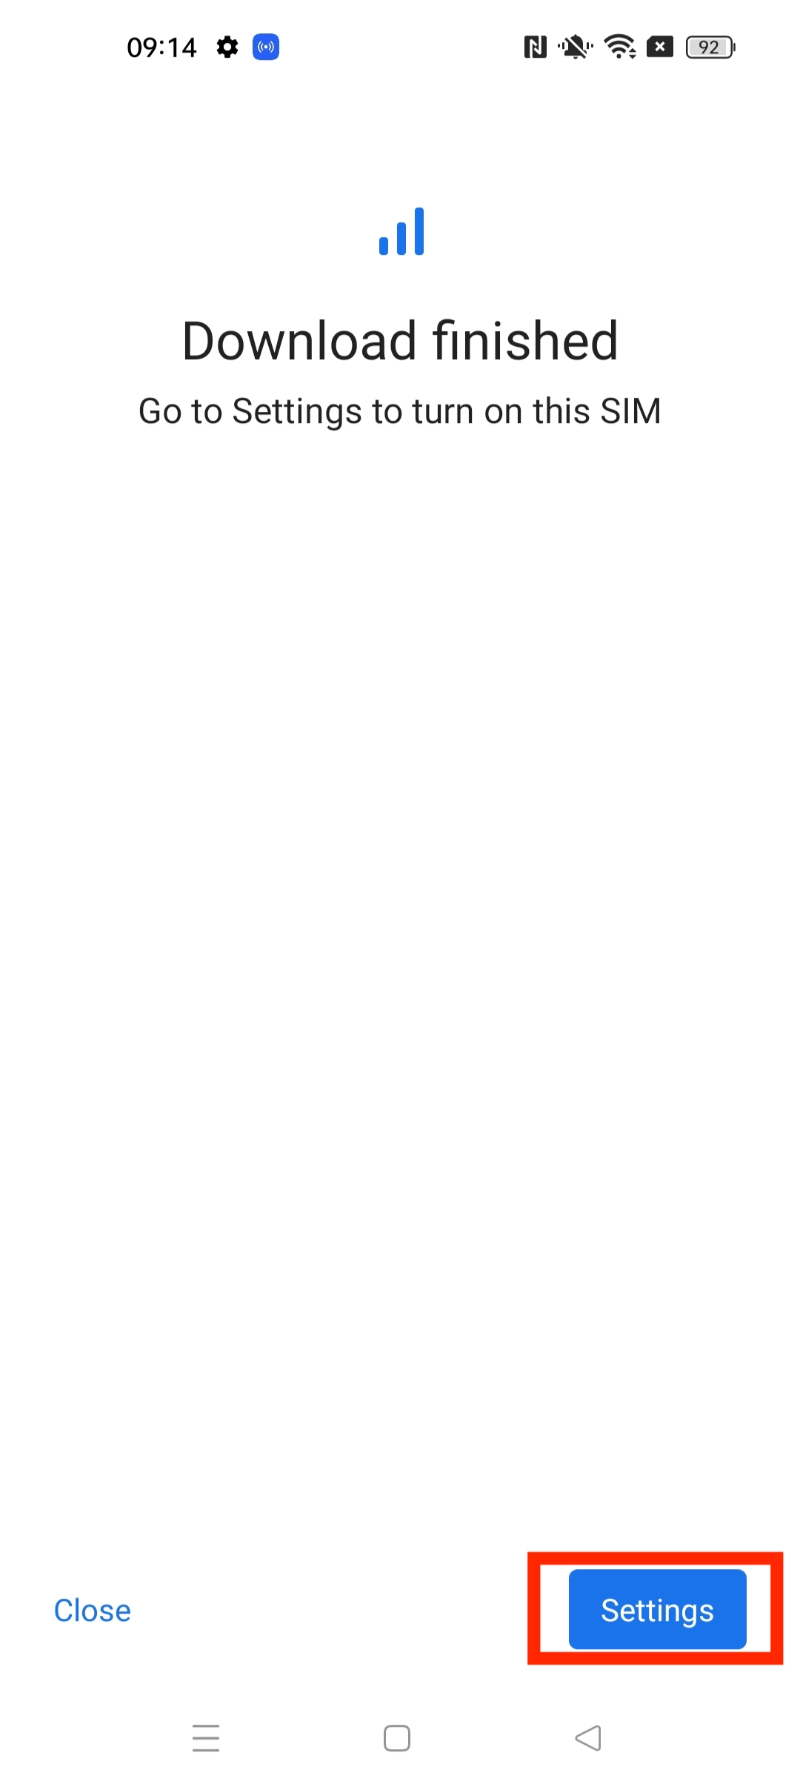
8. Wait for the eSIM to be installed. > Press "Settings".
Note: This may take up to 10 minutes, please do NOT close this, or the installation will stop.
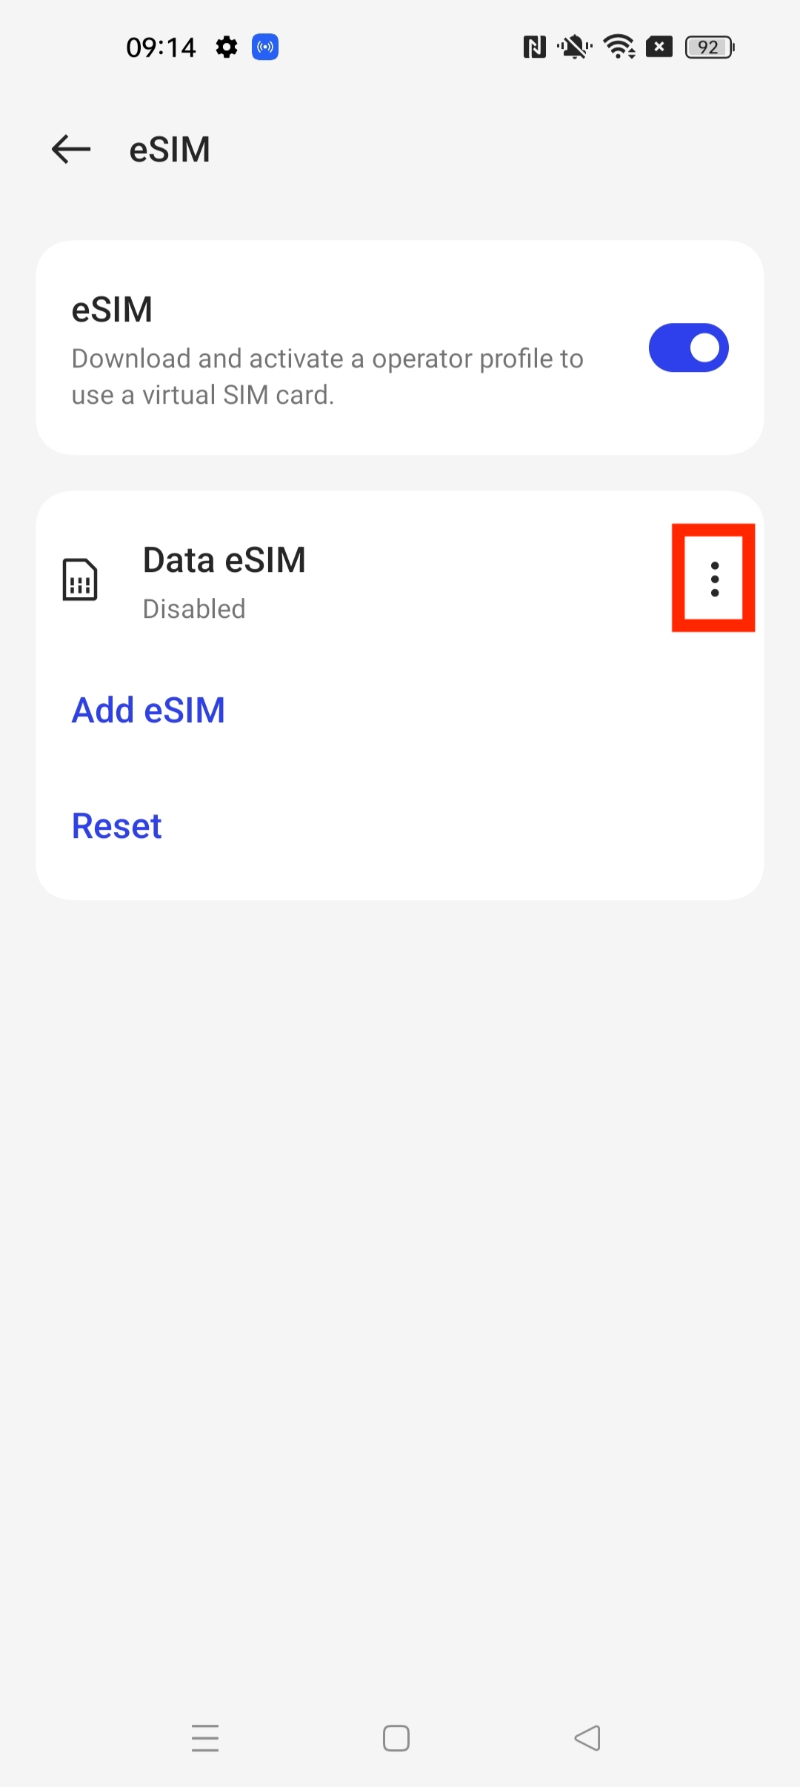
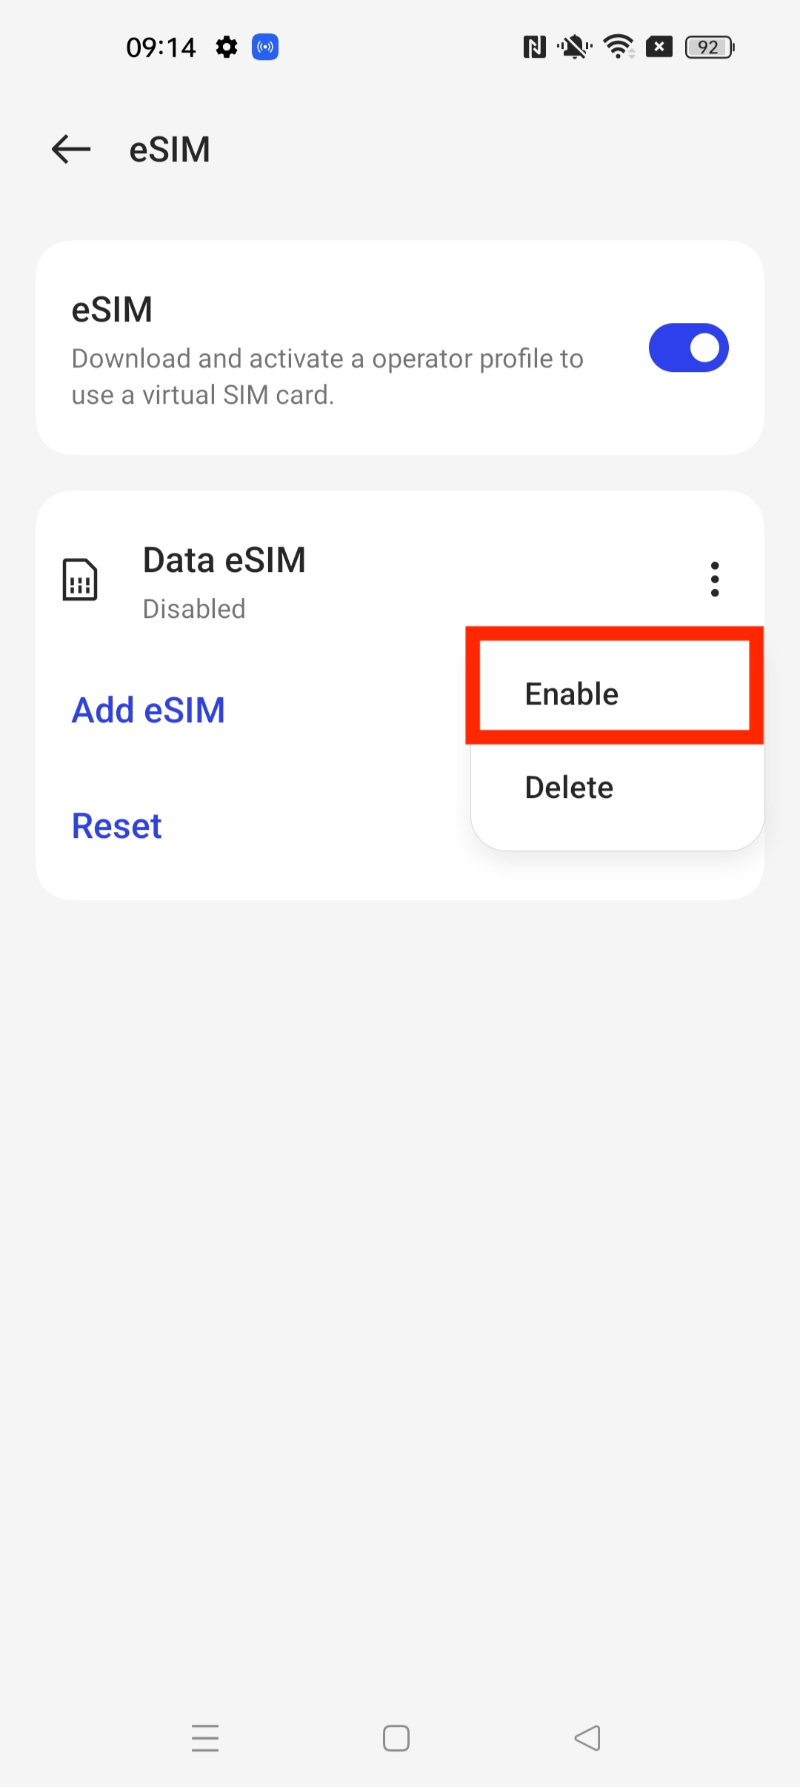
9. Once back in settings, click on "eSIM".
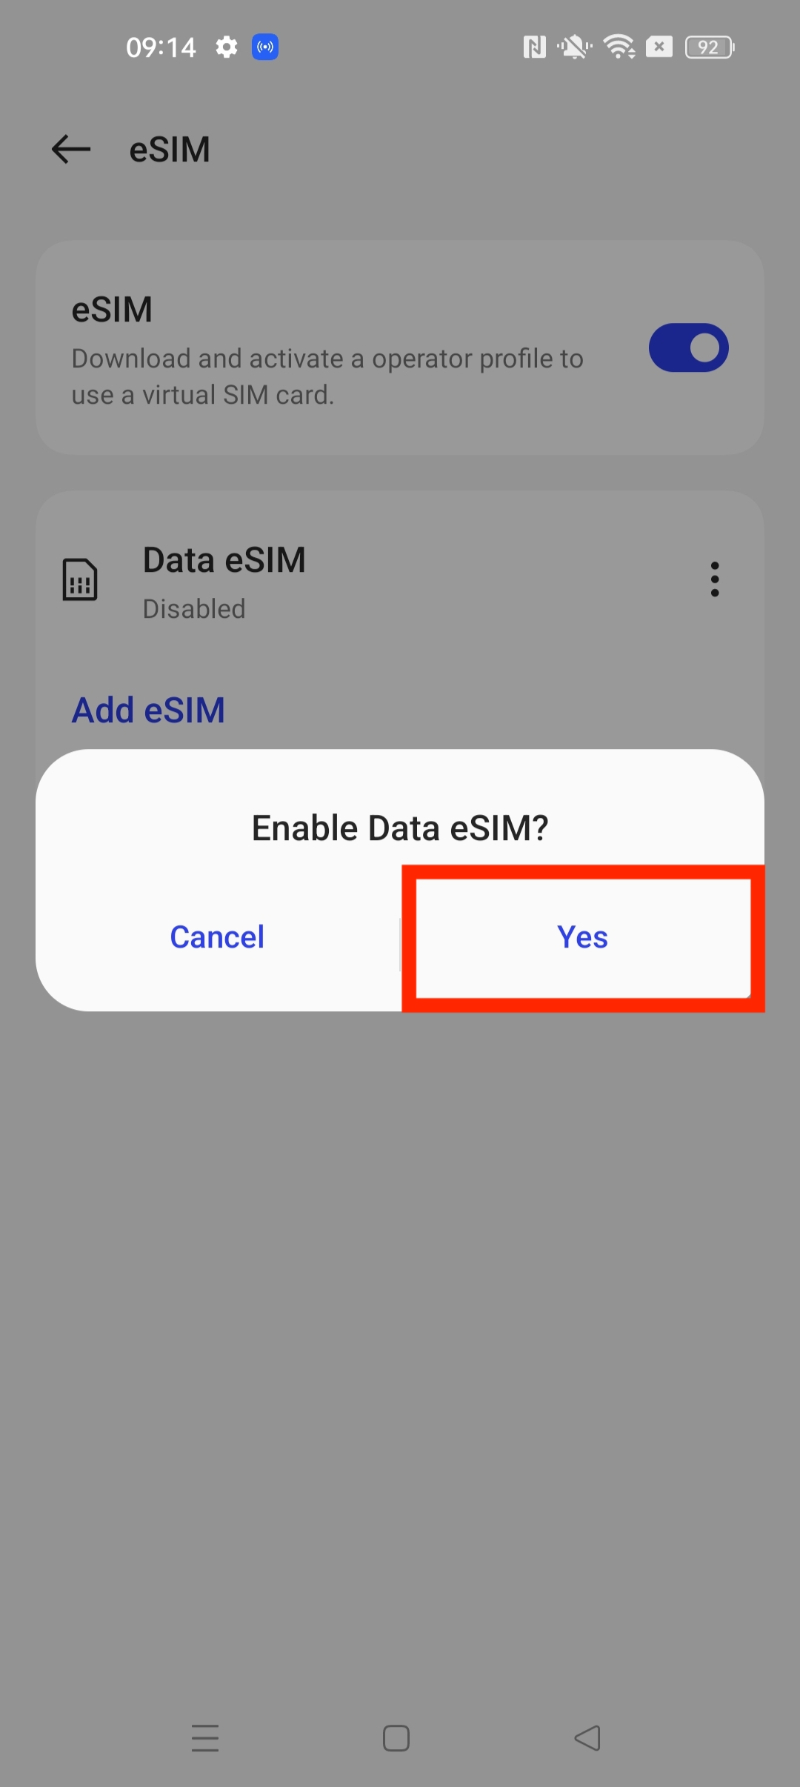
10. Ensure your eSIM is enabled by clicking the three dots on the right-hand side > "Enable" > "Yes".
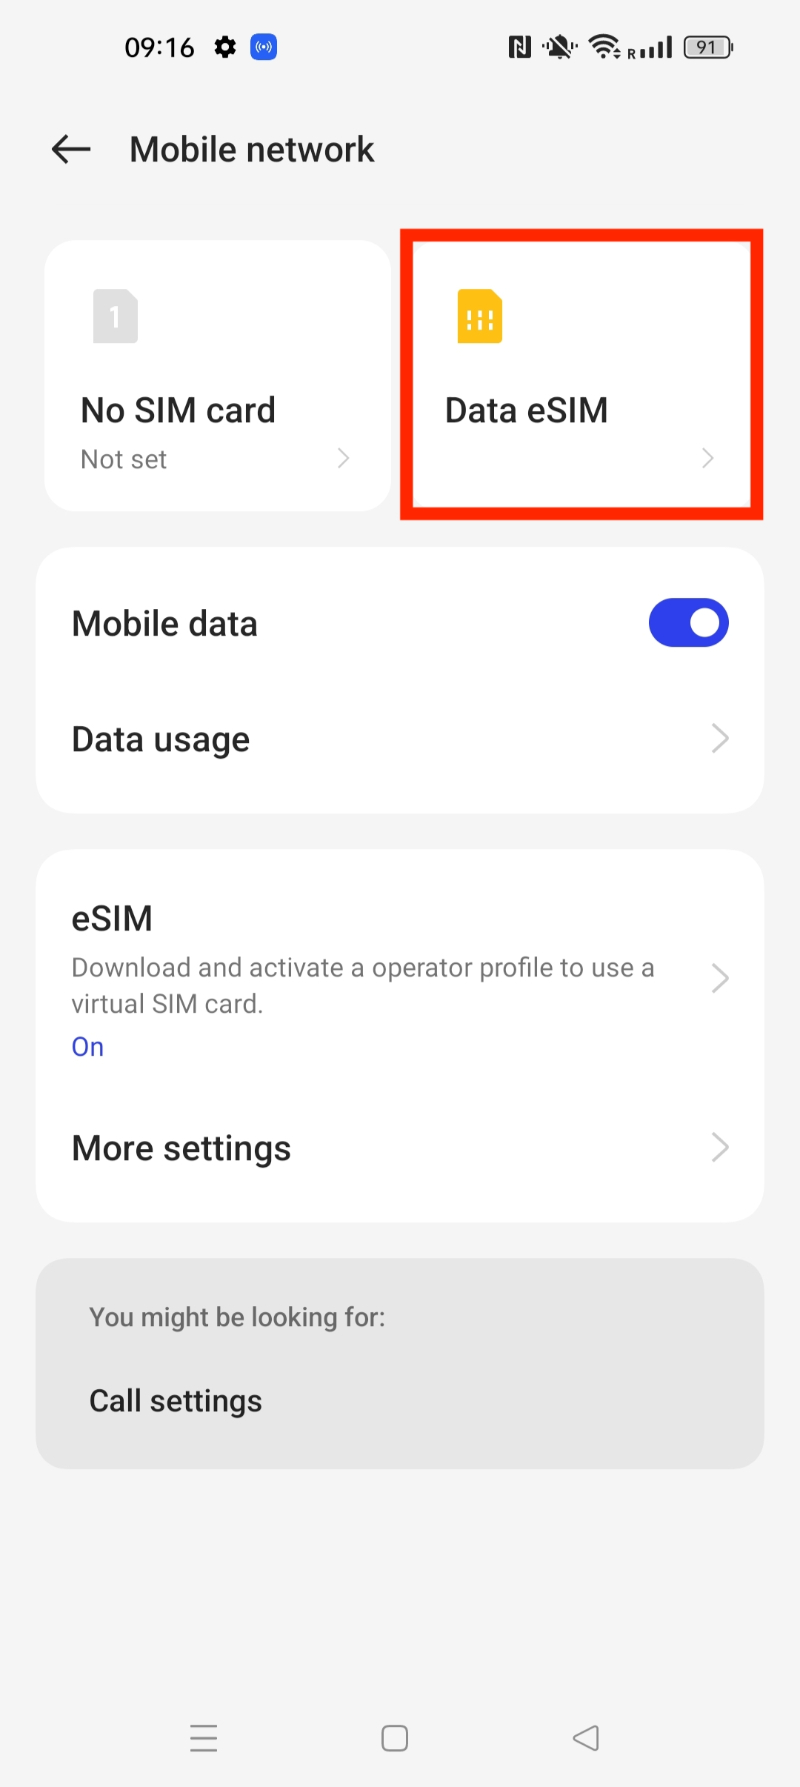
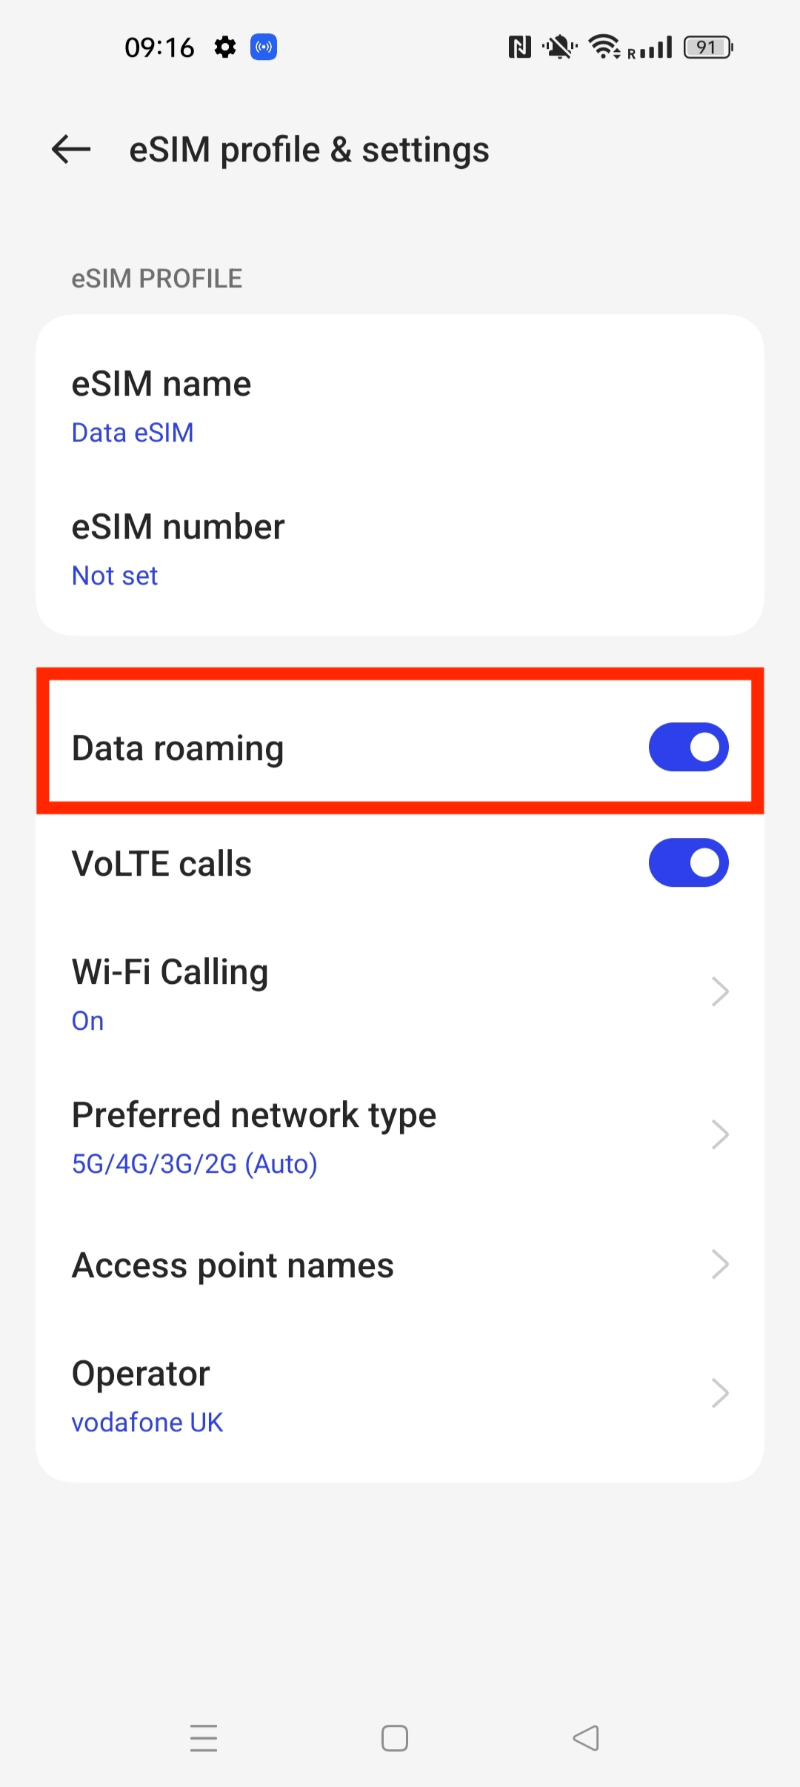
10. Make sure your Data roaming is on, or the eSIM will not work. You can do this by Going back into Mobile Network > Data eSIM.
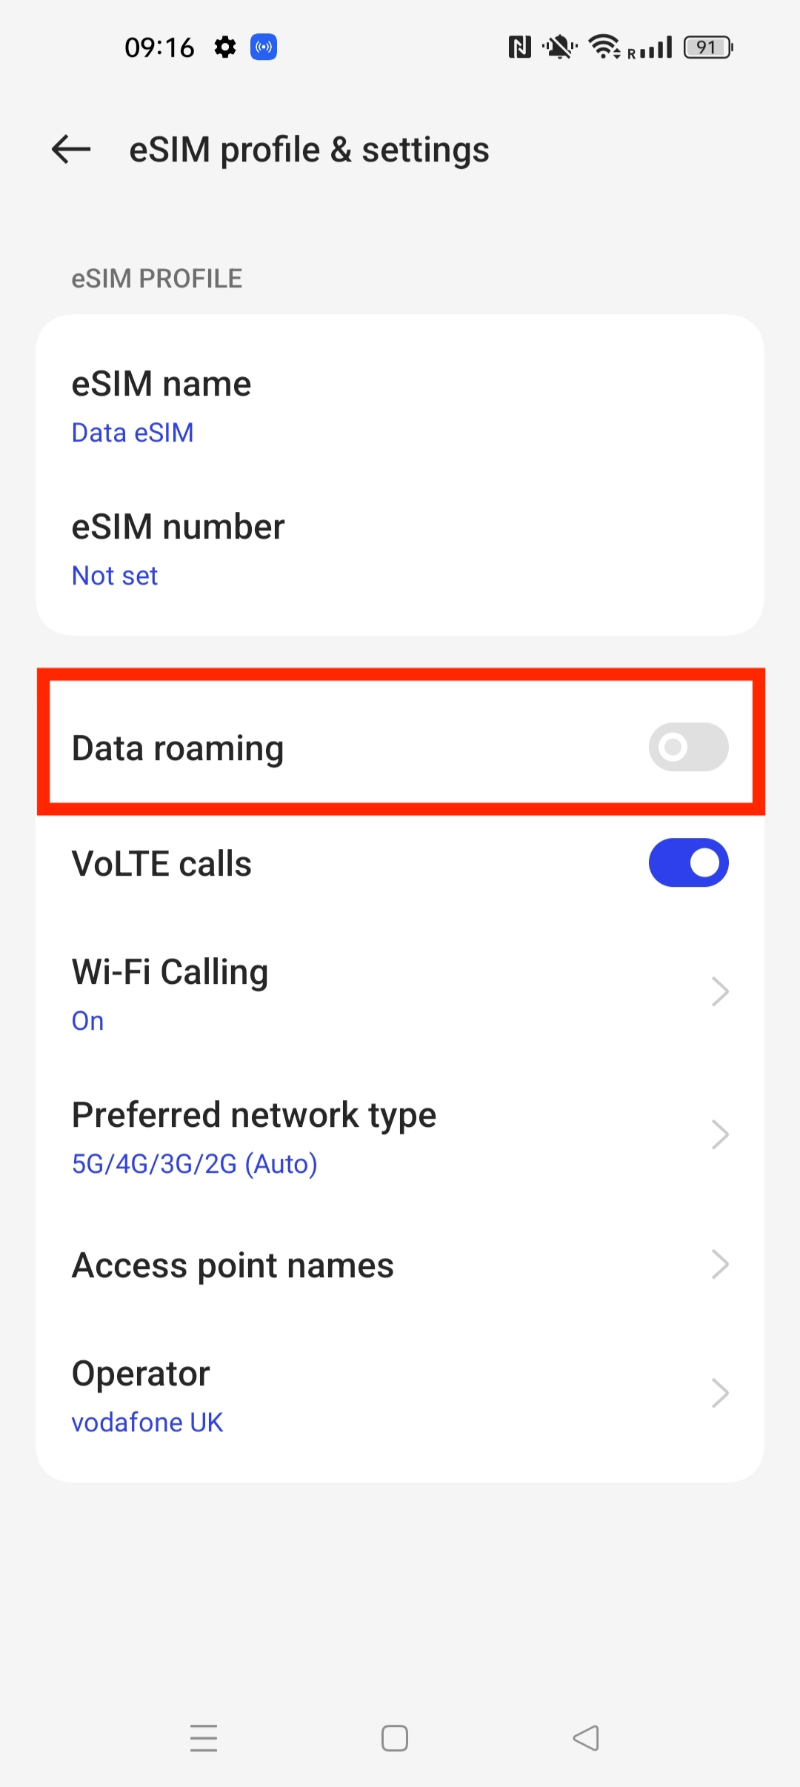
11. Once in this section > Click the slider next to Data roaming and make sure that it turns blue (enabled)
If you experience any issues when trying to install your eSIM, have a look at our article here:
Freedom Roaming support.
oppo
In this guide, you have a step-by-step walkthrough you can take when installing an eSIM on your Windows Device.
Installing an eSIM using a QR Code.
Before attempting to install the eSIM, there are three main things you will need:
- A strong internet connection - Ideally, you will need to be connected to Wi-fi or have a good 4G signal.
- An eSIM compatible device - If you are unsure, here's a list of compatible devices: List of compatible devices
- The device isn't locked to one Mobile Network - If you are unsure whether or not your device is locked to a certain network, have a look at our article on how to check if your device is "locked/unlocked" Locked/unlocked devices
1.Open the "Settings" app on your Windows device.
2.Click on "Network & Internet".
3.Click on "Cellular" in the left-hand menu.
4.Click on "Add a new eSIM profile".
5.Select "Install an eSIM from a QR code".
6.Scan the QR code provided by your mobile network operator using your device's camera.
7.Once the QR code is scanned, the eSIM profile will be automatically downloaded and installed on your device.
8.If prompted, enter any additional details required by your mobile network operator, such as your account information or verification code.
9.Once the installation is complete, your Windows device will be connected to the mobile network using the eSIM.
If you experience any issues when trying to install your eSIM, have a look at our article here:
Freedom Roaming support.